Pages

Wednesday, 30 November 2016

Peace on Earth - clean and simple Christmas card


Hi everyone, it's Esther here with a clean and simple Christmas card to show you. 

When I saw the Mama Elephant Home Collection Creative Cuts set, I couldn't resist it. There's just something about those little houses and trees, and I know I'll be able to use them for Christmas cards, and also birthday and new home cards throughout the year.


I used My Favorite Things Inside & Out Stitched Circle STAX Dienamics to cut a circle in a panel of card stock. I use these circle dies on so many cards. They're one of my all time top buys!

Next to the circle I stamped a sentiment from My Favorite Things Hand Lettered Christmas

Taking a new, smaller piece of card stock I inked a night sky in dark to light shades of blue, then splattered it with water and white paint. You can use any ink of your choice, and I particularly like the frosty, cool look of Altenew's Glacier Caves Ink Cubes. This smaller panel was stuck behind the main one to show through the die cut circle.

Using Lawn Fawn's Stitched Hillside Borders, I cut a hill and then re-cut it into a circle at the base using My Favorite Things Inside & Out Stitched Circle STAX Dienamics before sticking it into the circle.

I cut the houses and trees using Mama Elephant Home Collection Creative Cuts, and coloured the trees and windows with Zig Clean Color Real Brush Pens in 040 Green, 041 Light Green and 050 Yellow, then splattered the trees with white paint. I hand cut the base of the houses to fit the curve of the hill, then stuck them down and positioned the trees around them.

Finally I layered up the finished panel onto coordinating coloured card and then added it to a card base.


That's it for this week - thanks for stopping by!


Tuesday, 29 November 2016

Spinning Ninja

I was so excited to finally get the Mama Elephant Tiny Ninjas stamp set and the matching dies, which I've had my eye on since it was announced in September. I think it's such a fun and unique set, and great for lots of occasions.


There are two stamps in the set that mirror each other, perfect for a spinner card. I stamped both of these ninjas, coloured them with copic markers, then die cut them with the matching dies. I don't always get the matching dies for stamp sets but I think they are worth having with this set, especially when creating a spinner card as they cut the mirror images to line up perfectly.

I die cut a rectangle frame, attaching it to an A2 card base. I placed the inner rectangle piece in place on the card (but not stuck down) and ran them through my die cutting machine together with a circle die. This will cut the circle in both the card base and the rectangle so they match up exactly when you put the card together.  I'll link to the circle dies I used, but really any circle dies will work for this.

I blended distress inks on to the rectangle to create a night sky, then flicked it with a perfect pearls mix to create some starry patterns.  

To create the spinner element, I used a strand of metallic gold thread stuck between the two ninjas. I added lots of strong adhesive to the card base, before placing the ninjas on the card. I made sure to pull the thread taut and press it down into the adhesive so it stuck really well. I added more adhesive to the distress inked rectangle, then stuck this down over the top. 


Next, I die cut a larger circle than the aperture. I wanted it to be larger so there would be less white showing when viewing the card at different angles. I blended on some yellow distress ink to create a glowing moon, then stuck this onto the inside of the card to show through behind the ninja.

I chose a sentiment from the same set, and white heat embossed it onto black card. I cut it into a banner and attached to the card.

Finally, I added some ninja stars coloured with the Wink of Stella gold glitter pen, and a couple of glitter hearts.

I think this is one of my favourite cards I've made recently. I love the ninja and I'm so pleased with how he spins!

If you haven't tried making a spinner card before, I'd really recommend having a go. 
They are great fun and sure to be well received.

Have a lovely day,
Gemma


Mama Elephant Tiny Ninjas


MFT Single Stitched Rectangle Frames
Lawn Fawn Circle Frames
Yes Please Enamel Shapes
Lawn Fawn Everyday Sentiment Banners

Monday, 28 November 2016

A Simple Flower Bouquet


Hi there :)

My card today uses the new(ish) stamp set from Altenew called Simple Flowers... it's just fabulous, and 'simple' is exactly what they are. I love the bold solid shapes that can be used for lots of pattern making too. I do like flowers but have to say that I tend to go for this kind of stamp set over the detailed line images...


I decided to make a simple cluster of flowers on stems to pop through the Rectangle Peek-a-boo window which is currently out of stock but any aperture die would work here.

These stamps don't have a matching die set but the shapes are really quite easy to trim around.
The hardest part is deciding on a pretty colour palette and arranging them 😉


The sentiment is made using the letters cut from Reverse Confetti's Happy Pretty Panel die 
and part of a sentiment from Avery Elle's So Happy. 


Thanks for stopping by, catch you next week :)
Jenny x


Sunday, 27 November 2016

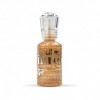
Nuvo Drops

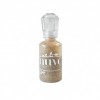
I wanted to highlight some of the new Tonic Studio products today as I've been itching to play with the Nuvo Crystal Drops for ages.  I have a couple of "non dot" applications to share with you using them.

Firstly I wanted to make some Christmas decorations with a modern twist.  If you've seen any interior shows recently you'll know that grey is the new magnolia so I thought I'd make some decorations to match.  I've made a couple but I may make more and turn it into a funky row of bunting.


I started with some Narwahl cardstock from Lawn Fawn covered with stick-it on the back for ease of glueing and the Lil' Inker Designs Baubled Wreath die.  I die cut it twice, once with the die facing the cardstock, once with the die facing the stick-it - that way you can flip it and sandwich two together with a sheet of acetate in the middle and create a decoration you can "fill" with the crystal drops.  I used a selection of colours in greys, and teals to keep on my theme.


This is the back view - if you were making baubles for the tree then I would fill the back once the front is dry, but as I think I will make something I can hang on the wall I will just keep them as is.

You could do them in any colours - the glitter drops would look really festive and the light would shine through them more.


Secondly, I thought I would have a go at using the drops to "paint".   I die cut the Outline Rose die from Wplus9 from more Narwahl cardstock and stuck it straight onto a thick base card.  I then used dandelion yellow, pumpkin and rhubarb drops, drawing lines with them on each petal and using a pokey tool to blend them together.   I used green and gold for the leaves and did the same blending.  I like the kind of cloisonné enamel effect you get when it dries.   Its a really quick and fun technique to play with too.


NEWS FROM THE STORE

  • It will be a quiet week from a new stock point of view - but there are more new releases pending, I just need a little time to get my orders in!   Watch this space next week for more news including new stock from Winnie and Walter and Lil' Inkers and the new crystal drops and fine glitters from the Nuvo range.
  • We will have our restock of Perfectly Penned from Concord and 9th though so grab them quick if you want them as they sold out in 6 hours last time!  We got as many as they could spare but we don't think it will be enough and will of course re-order as soon as they get more made!
  • We also  hope to finally have our gift vouchers working this week and will be doing a newsletter explaining how they work as soon as they are ready to go so make sure you are signed up to our newsletters if you aren't already.
That's all folks - see you on the flip side.
Tara


Saturday, 26 November 2016

Nuvo Mousse Review and a Fall Card

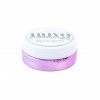
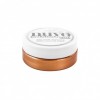
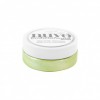
Hello crafters! Today I am reviewing a brand-new to the store Nuvo product for you – the Nuvo Mousse, something like an embossing paste, but oh so delicious you will want to use it on everything!


I am comparing the Mousse to embossing paste because that’s the only other similar product I have ever tried. The Mousse by Nuvo is a bit firmer than your regular embossing paste while it’s in the jar, but once you apply it to your card or paper, it becomes absolutely smooth and creamy.


Now, you know that I like to color my regular white embossing paste with Distress Ink or ink from my other ink pads, simply by pressing the ink pads on a craft mat and then mixing in the paste. That works still absolutely fine for me and of course that gives you a lot of versatility in terms of which color you want your paste to be in. But there are also downsides: I have no idea how to make it shimmery (not glittery, shimmery); you can easily misjudge the amount of paste you need and waste quite a bit; or you can accidentally add too much color and end up with a super strong colored paste instead of a subtle color.


The Nuvo Mousse is one solution to these challenges. Now, I’m not saying you need to buy all the colors. I’d suggest to try to figure out which colors you are most likely to use and maybe get one or two. You guys know that I love all things shiny and glittery, and this paste … well, I was doomed the moment I laid my eyes on it.

What else is it good for?

Glad you asked! I know that many of us need to stretch our budget, so to get more out of something is always a great justification to spend some money. Here’s what I found.

You can mix colors. Yes, it works just like watercolor would – for example, mix the Peony Pink with the blue, and you get a purple. Add more blue, obviously, to make it a darker pink. This way, you can get two colors and create a third one yourself.


You can try it for mixed media. Now, I’m not a mixed media person! But what I did try was to see if I could apply a super thin layer on my textured card stock. I picked up some of the Mousse with my finger and then used my finger pad to massage it (I know it sounds weird) into my paper. This allowed me to cover a relatively large area with the Mousse and make my paper look almost as if was using a sheet of shimmer card stock. If you use your fingers, you can make the layer incredibly thin and so no one will guess that you colored it with paste.

Oh, and little goes a LONG way. This stuff is really rich, so even a small dollop will last a while with the “mixed media” technique.


Use it for watercolor. Yep. Add a tiny amount to a piece of acetate or your craft sheet and then add a bit of water. You can paint with this stuff, it’s like a pearlescent watercolor. Add more water for subtle color, and less water for a more opaque effect.


Hope that gave you some ideas! If you want to see the Nuvo Mousse in action, I have a video over on my blog showcasing it.

Friday, 25 November 2016

Definitely not Christmas, dinosaurs!

Hi everybody,

Jill here, and this week I am definitely not doing Christmas (it's inescapable, no?), and instead, I'm re-visiting an old classic...


...Paper Smooches Cuteasaurus.


I made this card for a friend of mine who is dinosaur doolally, and what an absolute pleasure it was to ink this set up again.  This was one of my first ever Paper Smooches sets and the beginning of my journey in this awesome hobby we all share, so will always hold a special place in my heart.  I LOVE re-visiting older designs, there's so many cool releases all the time it's easy to get tied up in lusting after the newest sets, but, like many things in life...you just can't beat the old classics!


I decided I wanted to practise my pencil colouring, and opted for kraft card, because, well, I just love the look of it!
I started by stamping out the main element of my sentiment, this 'friend', from Mama Elephant's Friend Indeed, in black Versafine and clear heat embossing.  I then built up the line around and under it with some sprigs of grass, mostly drawn in by hand.  I then masked off accordingly and stamped out the rest of my scene using Paper Smooches Cuteasaurus and, again, masking as I went.
I then coloured my whole scene using colour pencils, adding white accents to the eyes and teeth using a white gel pen.


I finished off my sentiment with this phrase from Mama Elephant's Sunday Sentiments, again stamped in black Versafine and clear heat embossed.  I added a balloon from Mama Elephant's Woodland Gifts, and added it to my little cuteasaurus' hand with a piece of black thread.


I added a slick of Glossy Accents to my balloon, and a wee enamel heart embellishment to finish, and there you have it.

I really hopefully it encourages you to give some of the older sets a glimpse...you might just be missing out on a beautiful old classic :)

See you next week.

Jillx

CuteasaurusFriend Indeed Image 1

Sunday Sentiments Image 1  Woodland Gifts Image 1