Hello, Gemma here to share a card using distress oxides. Distress oxides are my favourite ink to use and it’s so exciting that they will be available in the store!
I’ve had my distress oxides for a while but I haven’t used them for watercolour before, so I thought I would try them out on my card today.
I chose two colours of distress oxide inks - peacock feathers and cracked pistachio, and pressed the ink pads directly onto an acrylic block. I spritzed the ink with water, then pressed a piece of white card down on the acrylic block. I moved the card around to make swirls of colour on the card, then dried it with my heat tool.
I repeated this process a few times, layering more colour onto the card. I wanted to add a little of a darker blue colour so I chose blueprint sketch, which is a lovely vibrant blue, repeating the same steps to add this colour to the background.
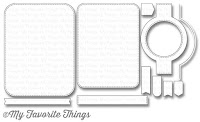
I cut another piece of white card with a rounded rectangle die, from the MFT Blueprints 31 set. I trimmed down my watercolour panel so I had three strips of card, then added them onto the white rectangle at a diagonal.
Next, I stamped a balloon from the Concord & 9th Happy Balloons stamp set with the blueprint sketch distress oxide ink. These inks stamp very well!
As these inks have pigment properties, its best to dry it with a heat tool first before heat embossing. I stamped one of the patterns from the set onto the balloon and used silver embossing powder to compliment the blues and greens on the card. I then die cut it with the coordinating die.
On the panel, I stamped a greeting from the stamp set with black ink, then masked it before stamping the balloon string too. I added the balloon with foam tape, then used liquid glue to attach the whole panel to a white card base.
I finished the card with some enamel dots.
Thanks for joining me today,
Gemma
 |
| C&9th Happy Balloons Dies |
 |
| C&9th Happy Balloons |
 |
| Hero Arts Silver Embossing Powder |
 |
| MFT Blueprints 31 |


No comments:
Post a Comment
Thanks for taking the time to leave a comment - we hope the blog inspires your creativity.
The Seven Hills Crafts Design Team