Thursday, 31 May 2018

Reveal Wheel under the Sea

Hey stampers, Anni here!

I am bit earlier this week because I swapped days with Taheerah this week.

I think a lot of people are in the Reveal Wheel feaver at the moment and so am I. When Lawn Fawn's Reveal Wheel arrived at my house I just had to make a card. And I HAD to combine it with Lawn Fawn's You are Sublime - the little diver is just to cute.


I started by die cutting the parts of the reveal wheel. The big piece you have to die cut twice - one for the front, one for the back. Then I added some colour to the front by ink blending various Distress Oxide onto the panel. I used Broken China, Wilted Violet and Faded Jeans. On the edges I also used some black ink.
I blended some ink onto the wheel, too.


While the background dried I stamped all the images I needed - most of the images come from the set You are Sublime but I added some fishes from Lawn Fawn's older Set called Fintastic Friends.
I coloured them with alcohol markers choosing colours matching the background and I mixed in some Pink to get a variation.

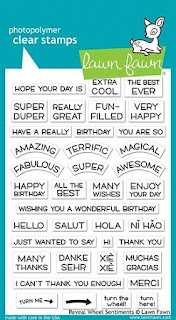
I stamped two sentiments from Lawn Fawn's Reveal Wheel Sentiments onto the wheel and heat embossed them in white. I also added some fishes from the images I coloured. So when you turn the wheel fishes and sentiments keep swimming by.


The other images I adhered on the front panel.

Then all there was left to do was to put together the whole mechanism - it is really easy. You can watch videos about it on the Lawn Fawn You Tube channel.

Thanks for stopping by and have a great weekend.
Anni


Wednesday, 30 May 2018

Ninja Thanks!

Hello, crafters!

I have a bright, bold, cute and quick ninja thank you card for you today. I have a friend who loves all things Japanese and I needed a last minute thank you card.


I used a Lawn Fawn Stitched Rectangle die to cut out a piece of Chilli Pepper card stock and mounted this to an A2 top folding white card base. I then used a Lawn Fawn Stitched Circle die to cut a peep hole from the centre of the card. I had to use my t-ruler to make sure I lined this one up correctly!


On another piece of white cardstock, I stamped out a couple of these cute little guys (or girls!) with some shuriken from the Mama Elephant Tiny Ninjas set and cut them out with the coordinating dies. I used a couple of alcohol markers to add some colour to their faces and their sashes. I arranged them on the inside of the peep hole in the classic 'I'm running at you!' pose so popular in manga and anime so it looked as though they were ready to burst out of the card.


I stamped both the thank you sentiments from the set, black for the English on the inside of the card and white heat embossing the Japanese kanji on the front of the card.

Perfect for a friend who loves all things Japanese!

Thanks for reading, catch you next week.

Tallie


Tuesday, 29 May 2018

Little Monkey Agenda Gallery


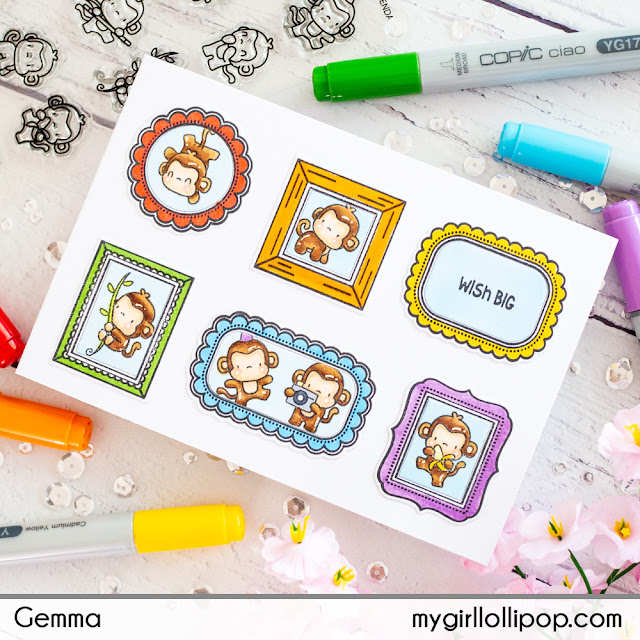
I love the look of gallery walls so I thought I’d recreate the look on a card. Of course, I had to get out some rainbow colours to team with these cute monkeys from Mama Elephant.


I began by stamping some Little Agenda Frames, and die cutting them with the coordinating dies. I arranged some of the frames on a white card base, to help figure out a layout that worked. Once I was happy, I added colour to the frames with alcohol markers and adhered them to the card base with liquid glue.


On the inner frame die cut pieces, I stamped some different monkeys from the Mama Elephant Little Monkey Agenda stamp set, colouring them with alcohol markers too, along with some white gel pen details. I saved one frame for a sentiment, from the Little Agenda Frames stamp set. I added these to the frames to finish the card.


Thanks for joining me today,
Gemma

ME Little Agenda Frames


ME Little Monkey Agenda


Monday, 28 May 2018

Out of the Box Ocean Scenes

Hello hello... yay it's Bank Holiday Monday... fingers crossed for a sunny one too!!

Today I have a couple of cards using the Ocean Add-Ons for the Lawn fawn shadow box but neither are a shadow box!!! Come and see....


The die set contains a great scalloped frame with a stitch detail to the outside which can be used on a card front to fame your scene. For the first card above, I used a spare piece of water-coloured card from another project to place behind the aperture and then coloured the underwater plants and clam with distress inks. I arranged them along the base of the scene and stamped a school of fish, from Avery Elle's Sea-prise, on the background. The shark is from Waffleflowers Tiger & Lily stamp set... I love how he's swooshing into the scene :)


I challenged myself to use other dies in the set for a second card... the waves and the whale.
I cut both waves in blue card and decided to leave the tabs on and curve them on the card base for some dimension.


As you can see from the photo below I had to cut one of the waves slightly shorter and make a new score line and tab so I could layer the waves.


Before adding them to the card base I sponged Limestone ink through the Carta Bella Shiplap stencil for a striped nautical feel. After layering the waves I added the whale which is coloured with distress inks and gave him a watery squirt from his blowhole by using the piece of coral from the die set.
You can see in the photo that the waves are lavishly covered with a glitter pen but it looks better in real life. The sentiment is from Avery Elle's Splash stamp set.

This card is either a 'deliver by hand' or will need a box to send it in but you could easily adjust the height of the dimension depending on where you adhere the waves on the card base.

I think this is a great standalone die set and I didn't even use the banner which is another useful shape and it's fun to use it alongside other stamp sets in your stash too :)


Sunday, 27 May 2018

Watercolour frustrations

I have a confession, for many, many years, I have been a frustrated watercolour artist.  Well artist is the wrong word, I long to be a watercolour artist, but I just can't master the skills particularly for drawing, hence why I stamp and colour instead!   So I was thrilled when we could finally get our hands on the watercolor range from Art Impressions, and even more excited when I saw the layered landscape set from Neat and Tangled as I immediately saw a way to bring my landscape painting frustrations to fruition!

Now this may not be a masterpiece ready to hang in the National Gallery, but for me, it's a pretty good start!


Apologies for the picture - I actually only created the picture this morning so it's still a little wet and needs pressing flat.

So to create it, I taped a piece of Daley Rowney Mixed Media paper to a board with painters tape and sprayed it lightly with water before doing a blue colour wash (I used my Winsor and Newton field sketch paints) from top to bottom.  Using a tissue I lifted the blue from where I wanted my barn, my van and then in a twisting motion to create some clouds.  A quick blast with the heat gun to dry it and then onto the stamping portion.

I stamped the Old Barn using a light grey ink and then made a mask for it.  Once covered with the mask I used distress inks to stamp the mountains behind it using the layered landscape from Neat and Tangled.  I started with a pale green and layered up a grey and darker green over the top being deliberately patchy with the inking (and using a tissue to dab it off areas I didn't want it before putting it on the paper)  For these additional layers I also used the stamp without a block so I could just add pressure where I wanted it.

For the reflexions in the water, I simply turned the hill over and inked up the side you would normally stick to your block so you get a mirror image (don't panic, this won't hurt your stamp - it still cleans up easily)  For the reflection of the barn I stamped the barn first onto a clean hill (you could use a mirror block stamp but I was being lazy and just using whatever was to hand) and then stamping that transferred image into the water to get the correct mirror image to match the original.  I then did a dry brush technique to get some reflection lines in the water but they aren't really showing up in the image too well.

I stamped the Truck from the truck mini set in the foreground, allowing the back to fall out of the frame. and again created a mask. 

I then did my water colouring of the barn, its reflection and the truck.  I need practice, but it was fun giving it a go so I will certainly be practicing when I get the chance.  The images on the front of the Art Impressions stamps give you a good guide if you remember to look at them before you start painting (which I clearly didn't!)

To complete the scene I added some fences (the small one in the background is in the Truck set and the larger on in the foreground is in the Old Barn set), and some fir trees from Tree Set 1 and some grasses using Foliage Set 3.

Not really sure what I'm going to do with it - might just keep it as a practice piece and see if I can improve on it after some more attempts as I like the composition but not the water colouring!


NEWS FROM THE STORE

  • The latest release from Flora and Fauna will be in store this week
  • The latest release from AlteNew should be in store this week - we've had a partial delivery but are missing a couple of boxes so fingers crossed they're just stuck in customs and will arrive after the bank holiday.
  • The latest release from Wplus9 shipped on Friday so there is a fair chance we'll have it by Friday.
For anyone worried we haven't dealt with GDPR, we're on it.  We don't use your data to contact you unless you specifically sign up to our newsletter and blog cookies are the same as any blog.  We'll be sending our dreaded "please resubscribe" newsletter in a couple of weeks once we have all the legal bits updated (grrrr - all this is really is a way for lawyers to make more money!) so if you want to stay in touch, please confirm your details when we ask you.

Right time to get out and enjoy the weekend (well get the skip we ordered filled if that counts as enjoying a bank holiday rest!)

Catch you next weekend

Tara


Saturday, 26 May 2018

Happy Birthday

Hey stampers, Anni here!

Today I have a card in violett to show you. Not so long ago I hated violett. But I changed my mind and now I like the colour. When I started making cards green was the main colour in nearly all of my cards - but now? I can't stand ist. I just bear with it when it comes in grass or leaves. It's strange, isn't it? My favourite colour doesn't change (it's turquoise in every shade) but the colours I don't like change with the time!
But back to my card:


I really really really love (I don't think that will change) Waffle Flowers' Bouquet Builder 1. The flowers in this set are so pretty! I took the prettiest one (in my opinion), stamped it in black in and coloured it with coloured pencils. When I finished the colouring, the black lines of the image were dull because of the pigments of the pencils. So I drew over the lines with a black pen.


Then I fussy cut out the flower (there are also coordinating dies available).

For the background I took a rectangle of a heavier white cardstock and ink blended some ink in violett and soft pink on it. To create the bleeched spots I dribbled some water on the paper.


What about your favourite colour or the colours you don't like at all? Do they stay the same or do they change over the time?

Thanks for stopping by and have a crafty weekend.
Anni

Friday, 25 May 2018

Enjoy the small moments


Hi everybody,

Jill here, and this week, I'm enjoying the simple things in life...


...using Avery Elle's Furry Friends.


My favourite thing in this universe is my gorgeous little doggy, Indiana (Indy to his pals).  Nothing brings me more joy than watching him frolic around, tail wagging having the time of his life on a beautiful summer's evening...and nothing brings Indy more joy than his ball!  He is obsessed!  So I decided to celebrate these small moments and the joy they bring with this week's card.


I started by stamping out and colouring, in the likeness of Indy, this cute little chap, from Avery Elle's Furry Friends, and his little ball (which is also coloured to match Indy's favourite ball).  I then cut a few strips of Lawn Fawn's Grassy Border for him to be sitting amongst.  I covered my front panel in some of the smaller stamps from the Furry Friends and cut a heart aperture from that.
My sentiment is from Mama Elephant's Everyday Greetings and is stamped and heat embossed onto vellum, adhered in place with a small amount of glue strategically placed!
I edged my card and my aperture with ink to help the scene 'pop'.

It's in these simple chilled out, laid back times I find myself to be my truest, happiest self; so never forget, 'Enjoy the small moments'.

Image may contain: 1 person, dog, grass, outdoor and nature

As always, everything I used is linked below.

Jillx

Furry Friends Image 1Everyday Greetings Image 1Grassy Border Die Image 1