Friday, 24 June 2016

A sparkly Hello with a resist watercolour wash.

Hi everybody,

Jill here, and this week I'm letting the sun lead the way by taking inspiration from some beautiful bright summer colours...


...ultimately aiming for a kind of sun-bleached, chilled out, laid-back vibe.


I started by stamping out this amazing Geometric grid Background Stamp from My Favourite Things on a piece of watercolour card and heat setting in clear embossing powder to act as a resist.  I love a great background stamp, even more than I love a cute critter stamp, and this is my newest favourite!  I'm really looking forward to doing a nice bright ombre wash across it.  It's one of those background stamps that works perfect with watercolour as it has all the little spaces for the colours to become trapped which makes for the coolest effect.  I used some beautiful bright yellows, greens and blues mixed with plenty of water, and washed them across my embossed background allowing my colurs to blend.


While that was drying, I cut this sweet little Duo Die 1 frame from  Paper Smooches, and white heat embossed the whole piece.  I then cut the 'Hello' form My Favourite Things Hello There Dienamics.  This is another new favourite for me, the font is just perfect, pretty but cool, and you get 'Hi', and 'there' in the set too so really great value for money.  I cut it from a scrap of sparkly silver paper I had in my stash, and a piece of white fun foam, before adhering them together.


I added a twirl of metallic thread and built up my elements on top of my panel, manipulating my 'Hello' die so that it fit nicely across my frame.
I kept things simple by embellishing with a scattering of gems and mounting onto a white card base, then left things there.


I really hope you like it, and as always, everything I used is linked below.

See you all next week.

Jillx

Geometric Grid BackgroundHello There DienamicsDuo Die 1

Thursday, 23 June 2016

Summer Floral Shaker


Hi there and a very happy Thursday!

Today I thought I bit of bright florals were in order ... with some added sparkle.

I grabbed MFT 'Pretty Posies' and set to work...


I started by drawing a circle onto a white card layer with a pencil so it could be rubbed out later, this circle will act as a guide for both stamping the images and partial die-cutting the circle. I then stamped my flowers and leaves into place using some lovely bright inks with a bold black outline. I stamped the outlines slightly off to give a more fresh and funky vibe.


Once the stamping was done I took the scallop circle from Mama Elephant 'All Prettied Up' die set and added this over the pencil guide I drew in before. I didn't want to cut through the flowers so I left these poking out from my plates when I die cut the circle- this way there is no pressure on them when they go through the machine so won't cut.

Once cut I added the piece on top on my card base without adhering it so I could stamp my sentiment, using Mama Elephant 'Everyday Greetings', through the die-cut circle into place.


I then added foam tape to the back of my card layer and added some clear sequins over my sentiment before adhering the card layer down.

Thank you so much for stopping by and I'll see you again next week!

Hugs Lydia x


Wednesday, 22 June 2016

Sweet smiles


Hello.
I have this fun gumball shaker card today using Lawn Fawns sweet smile stamps and dies.


I die cut the gumball machine first then coloured with copics. 
Next I die cut a circle from the centre.
Then with the banner die cut panel i used the same circle die to make another hole and placed the gumball machine there.
I added a shaker pocket behind the hole so that the sequins look like sweets or gifts.
I used the sentiment from baked with love along with bannerific to finish the card,


Sweet Smiles Image 1Baked with LoveStitched Party Banners Lawn Cuts

Thanks for looking.

Tuesday, 21 June 2016

Flying Off The Card

Hi! Hope your day is going well.
Some of you might know how much I love creating 'off the card' style projects.
Why stick to just the card base when you can use the space off it too?! (I'm greedy like that!)

I was flicking through some of my sets and saw I'd not used these in a very long while


It's using the pretty Painted Butterflies set
To create this, I sorted the acetate frame first- you can see it in the picture below.

Once there. lay out all your butterflies.
I stamped and white heat embossed and then coloured in using Zig Clean Color Markers plus the Kuretake water brush

You then arrange your butterflies onto the acetate frame using glue and foam pads. Once they're all in place, flip the card over and snip off any parts of acetate that are showing and don't have a butterfly stuck to it.
It creates great movement using this method. I've tried to balance the design by adding the singular butterfly underneath which draws your eye back towards the top right following the directional aqua strip and then your eye is led back down the card with the butterflies. The sentiment leads your eye back up the butterfly and there you have it; a cyclic design.

I rather wish I was flying off somewhere today too.

See you soon,


Keren xx


Monday, 20 June 2016

When Stamping becomes a Game!!

Hello there and Happy Monday morning to you, hope you had a good weekend :)

I'm excited to share my project with you today because it uses stamps to make a children's game!!


I found this DIY Memory card game in our local Tiger store and thought it was the perfect way to use some of those fun, cute images in the mountain of stamp sets I own ;) You get 44 sturdy blank cards which have a lovely papery finish one side and a glossy pattern the other. I decided to make mine a matching pairs game... it's one of my lads favourite games because he's pretty quick and good at it!!.


I used memento ink to stamp the images and then coloured with Copic markers. The blank paper side took both the ink and marker well but I was careful not to do too much blending and saturate the paper. For the solid stamps I used dye inks and they had a lovely coverage too.


When I'd finished colouring, I felt they needed a coat of mod-podge to seal them and make them more durable for playing with.... you can see the soft sheen on them in the photo above. I used the glossy type and it actually made the colours much more vibrant and eye-catching :)

I have used a lot of stamp sets for this project and I have listed them below with links but really it's about using what you have already. I also realise not everyone has a Tiger store local to them and they unfortunately don't do mail order but hopefully this will inspire you to get creative and use your stash to make fun games to play too :)

Lawn Fawn Stamps:

MFT Stamps:

Paper Smooches:


Thanks for stopping by :)
Jenny x

Sunday, 19 June 2016

A Non Father's Day Post

It occurs to me that this year, we haven't given you the masculine themed week we did for Father's Day last year.  I must admit I find the day hard since my own Dad has passed but it is more a case that the last few weeks have been super busy.  We are trying to find a new house so we can have more space to bring you more of the products you keep asking for ;-)


So my nod to Father's Day today is this masculine "thinking of you" card using the brand new Seaside stamp set from Reverse Confetti along with the Hero Arts Wave stencil and an older but new to us die set from My Favorite things called Let's Get Nautical which will work with all the sea themed stamp sets which have been a strong theme across all our brands this summer.  The large porthole die is perfect for framing sea-scenes!

We had so much new product recently though I had to get my hands on some florals so I have another couple of projects to share.


Firstly I have a soft floral wreath from Lil' Inker Designs paired with one of their new scalloped dies which add such a fun and funky border - I really love them!   Here I used the Fringed Scalloped Square Die on soft green card and paired it with the Warm Welcome stamp and matching die and the complementary Welcome Word Die.  I used two shades of purple ink blended together on cardstock to cut the word from to ensure it matched the florals exactly - doing this helps keep a CAS card really cohesive.


Finally I went out of my CAS comfort zone in favour of some in your face bright florals with the gorgeous new Brushed Florals set from Mama Elephant.  This is a really easy to stamp floral set and I fancied doing something I haven't done in ages so I pulled out all my coloured embossing powders and went to town to create a card where all the colour comes from powders.  I simply stamped the leaves and embossed in lime green and then added pink flowers and for the larger blooms used two shades of yellow and orange to create some funky effects.  Some bright blue berries scattered around give it extra zing and then then I toned it all down and tied it together with a black die cut sentiment.


 NEWS FROM THE STORE
  • We are still waiting for Concord and 9th's new release and restocks (including the scripts) to ship. They had hoped to have received the stock from the manufacturer on Friday but it didn't arrive so fingers crossed they get it this week.  We will get it here just as soon as we can.
  • We will have some new papers from Echo Park and Simple Stories this week along with co-ordinating accessories, embossing folders and a few dies.
  • We will have a small restock order from MFT this week which include the spacers to work with the surf and turf dies along with more of the hybrid ink and reinkers.
  • We have our order for the amazing new release from Stamping Bella ready to go so we will get those just as soon as they are available to retailers.
  • We placed a MASSIVE restock order to Lawn Fawn this week but it usually takes around 2-3 weeks for them to turn around orders these days.
  • We know lots of the Altenew sets flew out of stock as soon as we got them last weekend - we do still have some of the new release but its is selling fast.  The inks have pretty much all gone again and are still oos at their end, although we do still have the large oval packs in 3 colours.  We are wait listed for the rest so will grab more when we see they come back into stock.


Saturday, 18 June 2016

Cheerful Get Well Card

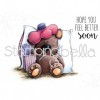
Howdy, crafters! Today I have two cards for you featuring the same super cute Stamping Bella stamp but different overall design. I am re-discovering my love for combining watercolor markers and my blender pens. Shall we have a look?


As much as I love my Blender Pens (I prefer the one from Stampin Up because of the durable nib, the one from the Dove pen just disintegrates all the time), they are a bit tricky to use. I have mentioned in my previous posts you can easily start damaging the paper and pill it up because rubbing it with the tip just does that. I have tried oodles of different watercolor papers (super cheap ones to super expensive ones) and still it happens and it's something you have to accept. I can only suggest to a) use a very light hand and b) let previous layers dry fully before going back in with the pen to reduce the strain on the paper.


 (I am showing you one card here, and on my blog - link in sidebar - you can see a video for the other version)

As you might have noticed, I've become obsessed with bright colors and sparkle. Can't tell you why, but I need to put sparkle on everything right now. The cheapest and easiest way is via a self-made spray. All you need is Perfect Pearls in the color Perfect Pearl and a mini mister. I used to add the Perfect Pearl via a brush in the past, but Jennifer McGuire's suggestion to instead put it into a mini mister with some water is simply brilliant. I usually spray my project from an arm length away, immediately heat set it if I don't want the colors to run, and the spray again and heat set (two layers of spray gives gorgeous sparkle!).


I hope you enjoyed the project and found the tips helpful. Thank you for stopping by today, I really appreciate it!