Thursday 31 March 2016

A 'Knight' Bus


Hi there and happy Thursday!

Today I have a really fun card to share ... especially if you like Harry Potter.

Yep, I made the Knight Bus!


To make the Knight Bus I used the bus image from 'Newton Dreams Of London', I didn't stamp the top/roof the first time around. So I could ink up just the top 'desker' of the bus and stamp this on top to make the double decker a triple decker.

For the ''London'' background I used Altenew 'Sketchy Cities America', I know it's not London but I thought with the 'London Eye' and not using the Space Needle it was good for the look I was going for. I then finished off with a sentiment from 'Be A Unicorn' but you could use any 'magical' sentiment.

Thanks so much for stopping by!

Hugs, Lydia x


Wednesday 30 March 2016

Donut worry ....Be happy!


 Hello.
I have two cards today both using the super cute and excellent value mini "Donut worry"stamp set from Lawn Fawn.


The first card I have used Kraft card and stamped the donut image all over in black ink. 
Each one was then coloured with prisma co,or pencils and the I have added clear wink of stella over the top so that they really sparkle.
Initially I was planning on keeping this a one layer card but then decided to use the A birdie told me stamps and dies to make some speech bubbles for the sentiment.
I then added another donut on foam tape.


The next card uses just the mini set. 
I started the same way as the previous card but this time using water colour card and zig pens and inktense pencils to water colour the donuts.


I still had to add the wink of stella over each one it just looks so sparkly when you  move it in the light.
The sentiment is simply added on a stripe of white card and then I stamped coloured and cut another donut and added to the card on foam tape.
To finish I added some sequins.


Donut WorryDonut Worry Lawn Cuts

A Birdie Told MeA Birdie Told Me Dies

Thanks for looking.

Tuesday 29 March 2016

Re-doing Chalkboard!

Hi! A few years back, chalkboard was everywhere. I love this look and thought trying a slightly look with it was worth a try.
I've used Prismacolors and this beautiful set 'In Bloom: Anna's Floras'
Firstly, white heat emboss onto black card. Then lay down some white pencil as a base layer to help provide a base to show up the colour.

Next, start to add colour. You may need to add several layers to give some vibrancy to the depth of colour.

Then just trim out all the flowers and stack them at the top of the card
The traditional method of using heat embossing, white ink stamped and some ink blending/smudging around small areas. I've used these but rather more subtly, focussing instead on the black based flowers.

For the sentiment, I used the Winnie & Walter Set 'The Party'
The finishing touches are simply some different sized pearls; enough to give a little focus but not to detract or 'fight' with the flowers. As they're not as bright as usual, I wanted something delicate.

Hope you like the blackboard styled cluster. The flowers are stuck slightly off the card to add some dynamism.
Do give this style a re-visit, you'll be glad you did!

See you next week!

Keren xx

Monday 28 March 2016

Owl Prints


Happy Bank Holiday Monday... hope everyone is enjoying the Easter break despite the wild weather of storm Katie overnight!!

I'm using one of the older mini stamp sets from Lawn Fawn for today's card and making patterns with it. I love the little owl in the You're a Hoot set and he's a solid stamp so perfect for a 'Printed' style of pattern...


I started by choosing a colour scheme by nosing around on Pinterest and then cut quite a few masks using the coordinating owl die and some masking paper.

I simply placed the masks on a piece of card and then inked my background colour over the top. Before removing the masks I used the Linear Woodgrain background to add an extra detail with a slightly darker tone of the background colour. Then it was time to peel off the masks and begin stamping the owls into the white spaces... I love that you don't need to be perfectly accurate for this step, off-centre stamping adds to the overall effect :)
I trimmed a strip from the panel so I could pop it up above the sentiment on a piece of blue card and called it done :)

Whilst I still had the masks and was feeling a little braver I decided to repeat the process straight onto a card front in a different colour combo...


This time I used the MFT Linen background and pigment inks to stamp the owls as the card base is off white and I wanted my colours to stay true :) I haven't added a sentiment to this one yet.... sometimes it's good to keep your options open ;)


This is one of those techniques that makes you go back through your stash and see older stash in a new light, solid stamps are perfect for this and it's another great way to use those metal dies too... hope I've inspired you to give it a try :)

Thanks for stopping by
Jenny x


Sunday 27 March 2016

Meet Edna

Sorry, late again this week, but we're having a relaxing weekend for a change from working through them!

I have a simple card for you today but I think it packs a punch and it features my new favourite character from Stamping Bella - Edna the Fairy Godmother - I love her as she's "me-shaped"!   There are a few Edna stamps to choose from (you will see more from me in coming weeks!) but today I started with "Meet Edna"


I simply stamped her and coloured with copics before cropping off her wings (she works without them so two look from one stamp) and then I stamped the wings again on white glitter paper and did a paper piecing job with her.   I used a scrap of the pink card I used for one of the matted layers to stamp her outfit and did a little shading with copics on top of it.  The matts were cut Avery Elle's Double Pierced Rectangles from pink and purple card stock and layered onto a purple base card with a little strip of white glitter card to tie it all together.

Right time to get the lamb in the oven - Happy Easter Everyone!

Tara
x


NEWS FROM THE STORE:

  • We should get the new releases from Neat and Tangled this week, they were caught in customs on Thursday but should clear on Tuesday so we will finally have them by Wednesday I hope.
  • Our restock and new release order from Concord and 9th should also be here mid-week.
  • We have a massive order in to Altenew for their new release and restocks too which we hope they will ship by the end of next week.
  • We have restock orders in with Lawn Fawn too and many more will follow.


Saturday 26 March 2016

I Dig You

Hi crafters! Popping in today with a quick card featuring the cute gnomes by My Favorite Things. I colored my little gnome with my ZIG clean color real brush markers (that's a mouthful!) and realized that the blending isn't quite as easy as I had thought. At least I didn't wait long enough before adding more color when the first layer was still wet so the colors feathered a bit.


The rest of the card was rather easy to accomplish: some Gansai Tambi watercolors for the background and then the embossed sentiment on the black card stock. I am happy that I though of running that tiny black piece of paper through my die cutting machine with the same die I used to cut the panel so the scalloped edges would match up.


Thank you for stopping by today. Cheers!

Friday 25 March 2016

Bright, Bold, and very, very Black.

Hi everybody,

Jill here, and this week I've got an old technique with a new twist...


Inspired the great, the mighty, the queen herself...Jennifer Mcguire.


Jennifer's latest video shows the good ol' emboss resist technique...but using black ink.  Instantly one of those, 'oh wow how has that never crossed my mind?' moments.  I loved the results, so just had to give it a go...but just make it a little more 'me'.
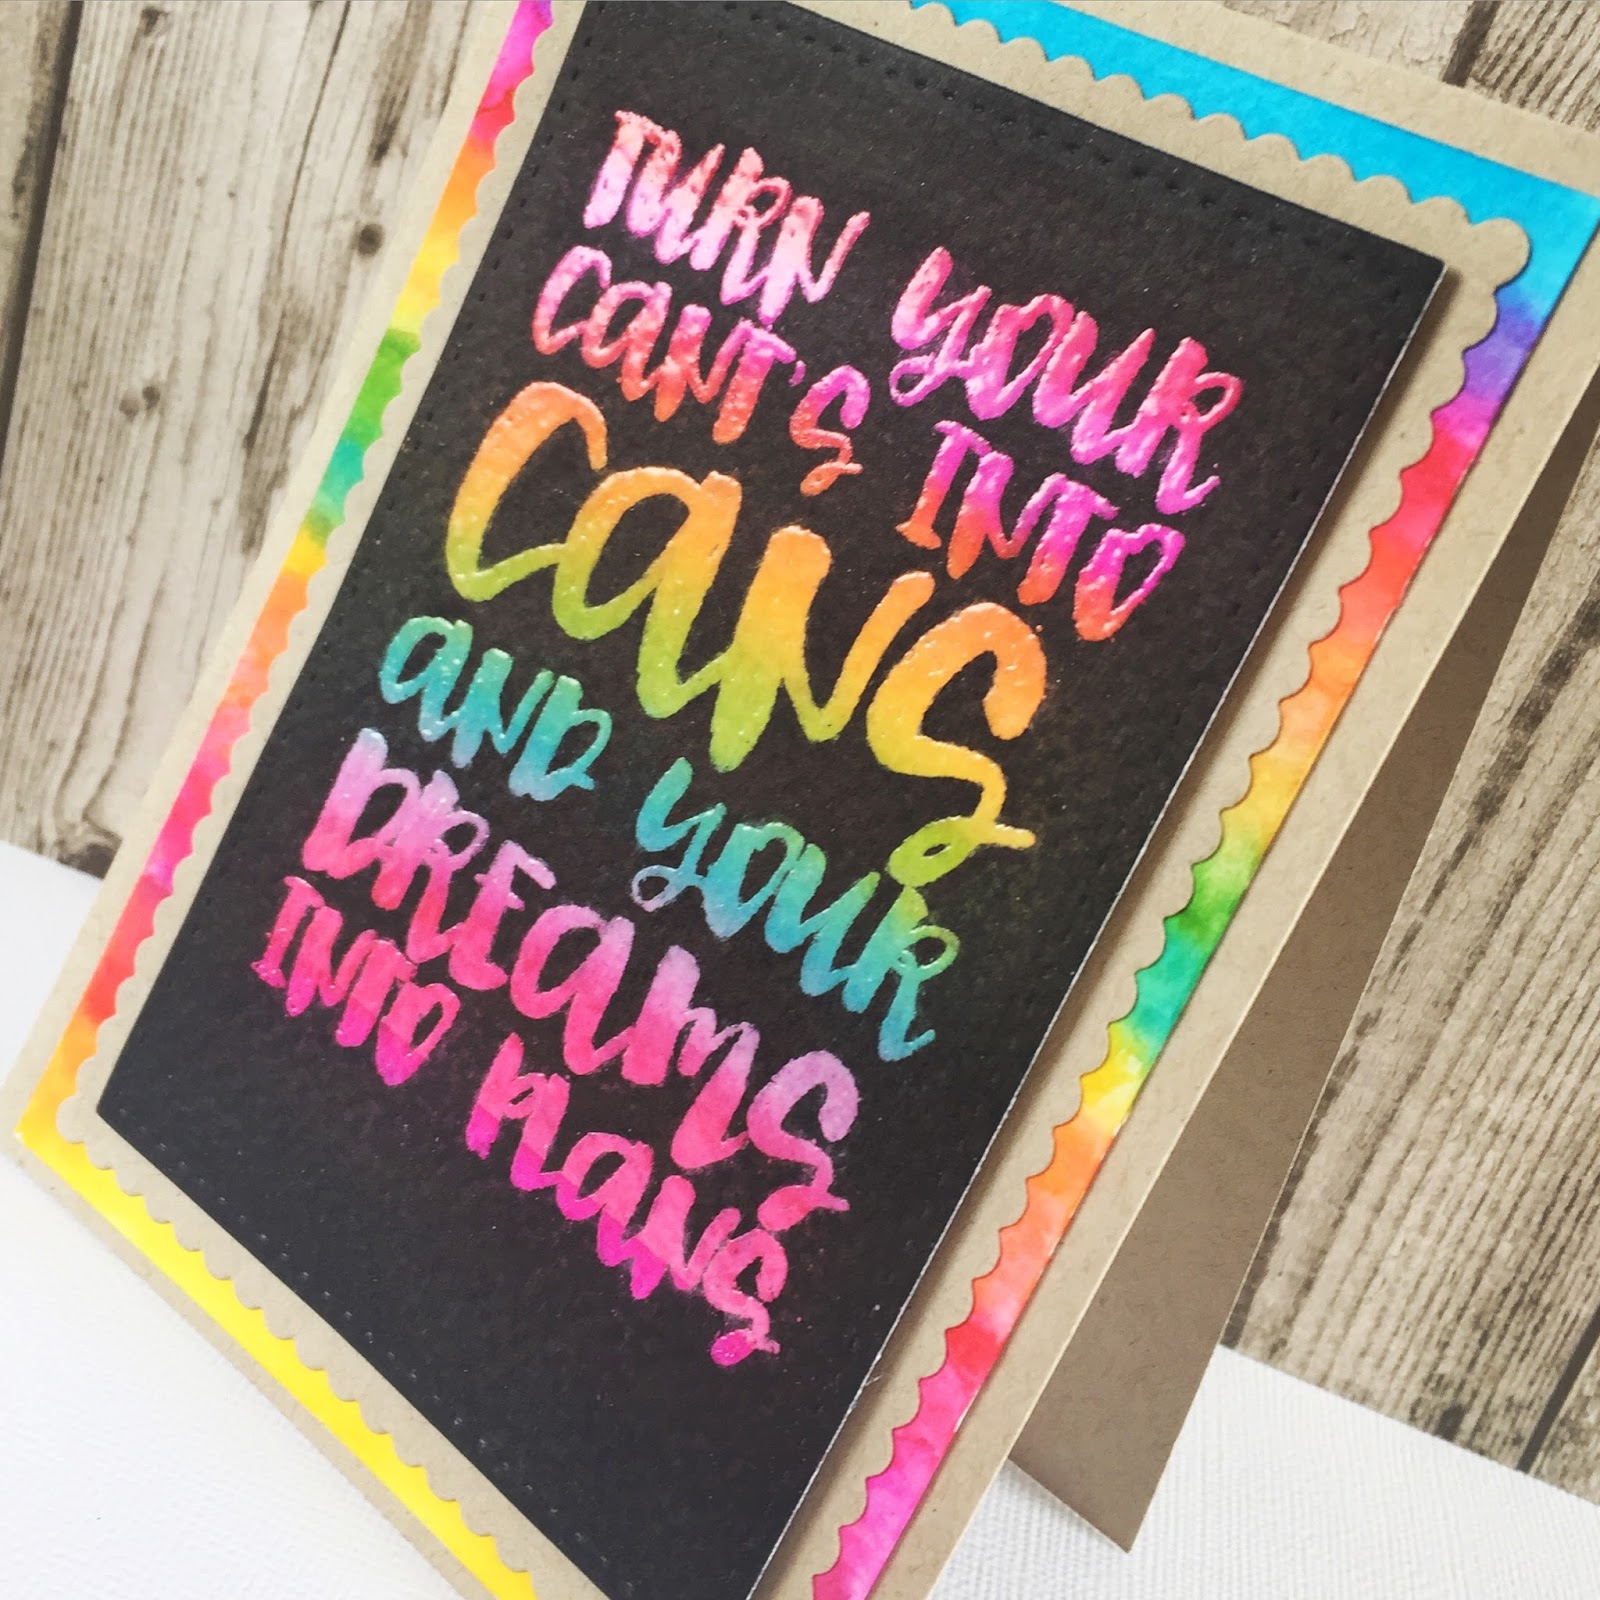
I knew I wanted a statement sentiment to use for my resisted area, so chose Wplus9's 'Dreams Into plans' - love this stamp, it works for so many occasions when you want to say something a little different.  


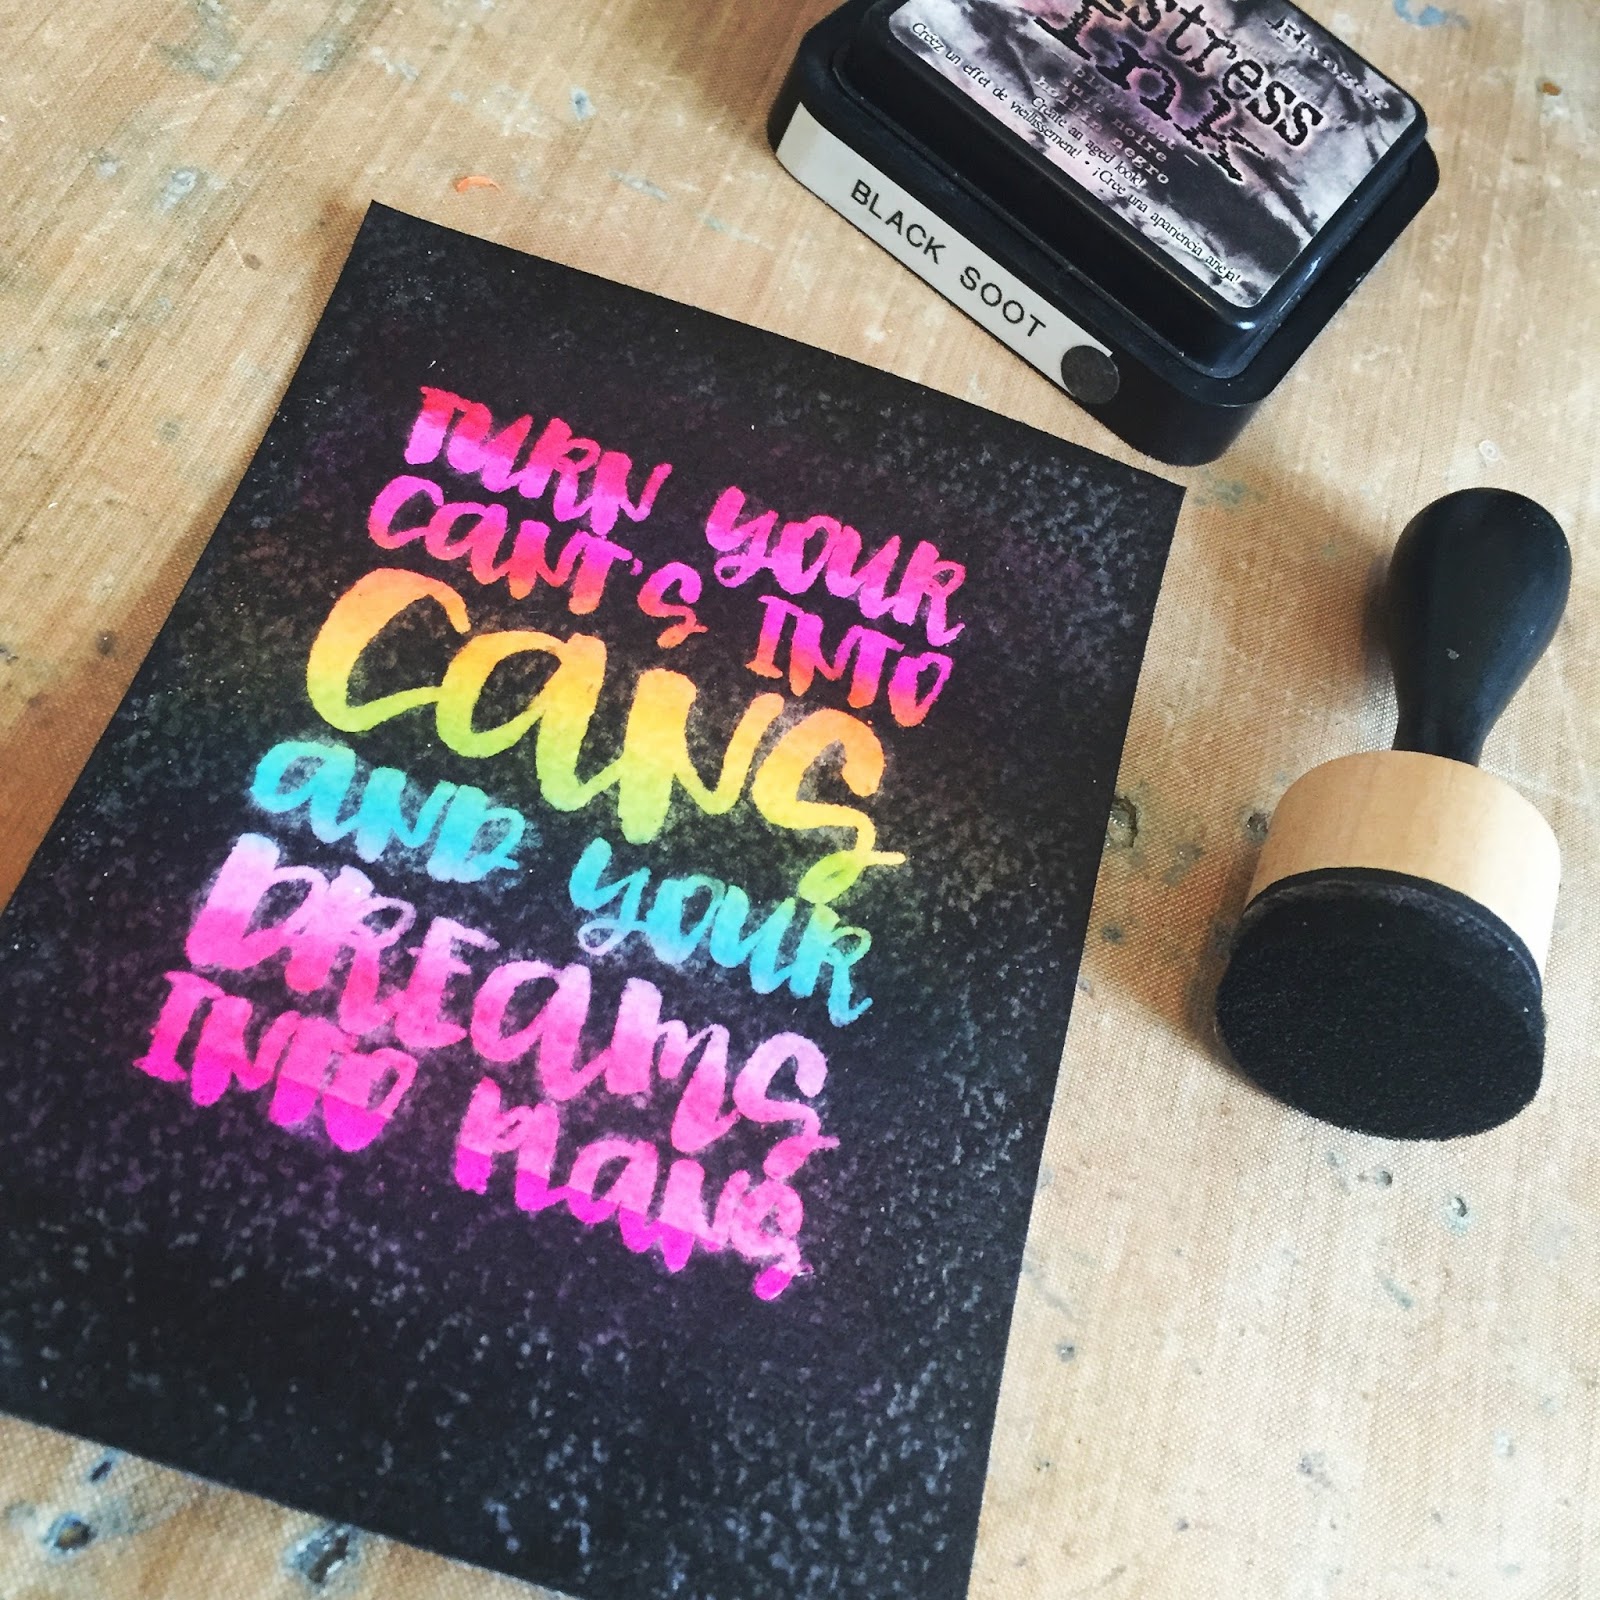
So I started with a piece of white card which I scribbled a rainbow onto using my Zig Clean Colour Markers, but you could use any colour medium you wanted to, and blended together with using water.  Once dry, I stamped and clear heat embossed 'Dreams Into Plans' over the top.  I then took a black ink pad, I used Black Soot Distress Ink but you could use any water based black ink, or even a marker, and rubbed it all over the top.  To get a really intense black I took the actual pad to my card.  The black colours the entire card, but resists where your embossing powder is.  Now I use the emboss technique all of the time, I absolutely love it, but I have never thought to use black before and wow, just look at those colours pop!


I used Mama Elephant's Index Card Creative Cuts to cut my panel and a kraft card mat. For my background I took another piece of white card and coloured using the same rainbow  I did on my main element and, again, blended with water.

I loved the simplicity of the bright colours doing the talking for themselves, so, after building up my card, left it there.

I love when you find a technique that makes you go back through your stash seeing what would work with it, and this for sure made me do that!

I really hope you like it.

See you next week

Jillx


Dreams into PlansIndex Card Creative Cuts Image 1

Thursday 24 March 2016

Back-side Stamping To Stretch Your Stamps


Hi there and happy Thursday! It's Lydia here and I'm so happy you stopped by!

Today I'm sharing with you a card that is great for either guys or gals and is great for just sending as a quick 'I'm Thinking Of You' or even swap the sentiment out for a different sentiment.


As this is a one-layer card I have done all of my stamping onto my card base. To start I took the small plant from Altenew 'Succulents' and placed this onto my block 'the wrong way around' - by this I mean I attached it so the outline image (the image that you usually stamp) was stuck to the block so that I can stamp with the backside of the stamp giving me a solid image. This is not the way the stamp was intended to be used but this gives an awesome look and also stretches your stamps.


Once it was attached I inked up the backside of the stamp and stamped this all over my background using blue, green and yellow ink. I then stamped my sentiment from Altenew 'Label Love' in a bold black ink. As I didn't want to stamp over the sentiment I masked this off by stamping it again onto a sticky-note and cut around it leaving a little border before adding this to the top of the stamped sentiment on my card.


I then flipped the plant stamp over, attaching it in the normal way onto my block. I used black ink to ink up my image but stamped off the image first onto some scrap paper before  using the second generation ink left on the stamp to stamp over the coloured solid images created before.

Thank you so much for stopping by, I hope you try out this technique to stretch out your stamps!

Hugs Lydia x