Showing posts with label Altenew Garden Grow. Show all posts

Thursday, 10 May 2018

Father's Day Card

Hey stampers, Anni here swapping for Taheerah today!

Overhere in Germany last Thursday was Father's Day. My father a pensioner and he is always searching for exciting projects he can work on. At the moment (and through the year) he is gardening, especially a raised bed. So I thought Altenew's Garden Grow was the perfect set for a card for him.


I started by stamping the plant pot with the basil and the snail onto white cardstock in a light shade of brown. I chose this light ink because I wanted to do some no line coloring.

As my colouring medium I chose coloured pencil. These are my prefered medium for no line colouring as I find it makes it easier to the details.
For no line colouring it is important to make the shadows really dark and the lighter areas really light to define the shape.


When I finished up the colouring all there was left to do was to stamp the sentiment (this one is from Lawn Fawn's Happy Happy Happy and to assemble the card.

Thanks for stopping by and have a crafty day.
Anni


Monday, 4 September 2017

Colour Blocked Indoor Garden

Hello there, Jenny here on a 'back to college' Monday morning for us and yes, the early start was a bit of a shock!!! 

As you know I love a good plant related stamp set so it's no surprise I had to have the Indoor Garden set from Altenew, I adore the hand-drawn style and the option to add colour with solid stamps too. 
I had a vague idea that I wanted to use a background of colour blocks and the colours were inspired by a picture on our bedroom wall...


Now there are two different ways to achieve this design and typically, I made life difficult for myself and did it the hard way!!

I stamped each image, trimmed part way around the shape and made the rest into a rectangle with a knife and ruler..... I then added colour with an alcohol marker. It would have been easier to make the background blocks with coloured card and then add the stamped and trimmed images on top (even better as coordinating dies are available!) but that's what happens when a card design evolves!! :)


The panels are adhered at two different heights with foam dimensionals and rather than use a sentiment, I chose a phrase from the Garden Grow set and added a dashed line to balance the layout.


I hope your week gets off to a good start and thanks for stopping by :)

Jenny x

Monday, 10 July 2017

Spreading the Seeds of Summer

Hi, Jenny here and I've gone floral today with a card and gift of the growing kind!!

We have a large area of Californian Poppies in our front garden, they survive so well in the gravel driveway and just love the hot sun and dry conditions... I suppose the clue is in the name Californian eh?!!!

Last weekend I collected quite a few seed pods so I could pass some onto my daughter to plant in her own garden and this sparked a crafty idea.....


I thought I'd make a small vellum seed packet and attach it inside a card... 


I love all those sunny hot shades the poppies come in so for the front of the card I used the Wildflower set by Concord&9th to watercolour my own. I used the largest flower and stamped it in shades of yellow and orange distress inks so the outlines would blend in when I added the colour. You can still just about see the lines which adds texture to the petals I think..


I used a small sprig from the same set to make the leaves, I had to embellish a little with my brush to give them the 'fern like' shape..... I used the same stamp to make a subtle pattern on the green background panel too.


I used vellum to make a very simple envelope for the seeds and adhered it together using strips of Stick It... it's a brilliant glue for vellum and a good use for your left over scraps from the bigger sheets. I stamped a flower and leaves in pigment ink on the vellum and clear embossed them so I didn't have to worry about the ink drying.


Next comes the seeds.... Oh boy did they travel across the worktop!!!
The seed heads had been languishing in a paper bag for a week in our conservatory which 
resulted in them pinging open and propelling the seeds...... luckily the bag contained 
them but they really spring open with force!!


I thought the easiest way to attach the seed packet was a couple of small holes and a piece of twine.


I found the perfect sentiments in Mama Elephants Everyday Greetings and 
Altenew's Garden Grow stamp sets :)

Phew! that was a lot of photos... hope you're still with me ;)
Our daughter was delighted with the seeds and hopefully they'll produce a lovely 
show of colour in her garden too!


Thanks for stopping by :)
Jenny x

Monday, 27 February 2017

A Couple of Keyrings


Hi there, hope you all had a great weekend :)

Do you remember the Coffee coasters I decorated last year? Well I bought a couple of  MDF tag shapes at the same time as the coasters and I thought I'd turn them into key-rings and share them with you today :)

They are quite large tags so probably not really the sort of key-ring you want to carry around with you all the time but I knew we needed a new one for our conservatory door so I naturally got out Altenews Garden Grow stamp set for one of them...


As with the coasters, I have painted the raw MDF with a few coats of chalk paint and 
sanded to a smooth finish before stamping the three plants onto the tag. I then made 
a negative mask for each plant pot with post it note paper so I could sponge ink
 onto them for some colour. 

I find dye ink is the best for this and the colours naturally soften as they sink
 into the chalky surface so you may need a few applications to get a stronger colour.


Yes I did make masks for the large leaves in the blue pot, quite a bit of scissor work but worth it in the end... 
for the smaller leaves and flowers I used a cotton bud to pick up ink and apply it :)


For the second key ring I chose a regal looking cat from MFT's Catitude stamp set and set about making a few negative masks so I could turn her into a tabby.... the very simplistic shapes match the whimsy style of image.
 I drew in a crown and added some extra images around the edge from various other cat 
stamp sets...some are quite subtle and don't show well in the photo 


These were great fun to make and are great gifts too with the possibility to personalise them for the recipient. 
To make them more robust I recommend a couple of coats of Matt Mod Podge to help 
protect them from knocks and scratches!!


Thanks for stopping by :)
Jenny x

Monday, 12 December 2016

Quick & Simple Notepads


Hi there :)

I have a bunch of quick jotter pad gifts to share with you this week, they really 
are simple to make and would be ideal token gifts for friends, family and teachers.


These are slim, shop bought notebooks that have had their front 
covers removed, so I could replace them with my own decorated jacket :)
All you need to do is cut a strip of card the same width as your notebook and then
 measure and score two lines so you can wrap the cover over the top spine. 
You will need to allow an extra inch of card so you can attach the cover onto 
the back of your notebook....
 you could even adhere a magnetic strip for attaching to a fridge!!

I used Altenew's Garden grow for this cover and water coloured the images using
 Distress inks, the lettering is an old Hero stamp set in my stash.


This cover has been stamped using Altenew's water colour wonders 
and the Perfectly Penned alphabet by Concord & 9th (more stocks will be here this week)


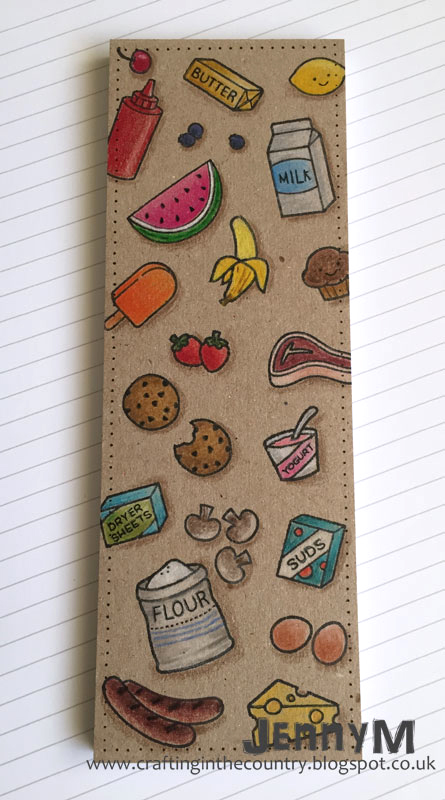
These next two were such fun to create using Lawn Fawn Stamps... I went through my stash and pulled out all of the sets with images you'd find on a shopping list and arranged them on my MISTI so I could stamp one on Kraft and one on white


I used Polychrome pencils on the Kraft and Copics on the white then white heat embossed the Shop, Shop Shop wording with Mama Elephants Hollow letters on black card before I added shading with a white pencil


I used 10 different Lawn Fawn sets so here are the links minus the pictures...


I hope these have inspired you, as you can see the covers can be decorated 
in any style to suit the recipient and would be great makes for children to help with too :)

Thanks for stopping by :)
Jenny x