Hello, crafters! Tallie here today with a cute little bunny birthday celebration! This uses three different sets - Starry Scene, We Herd and Essential Sentiments - from three different companies - Avery Elle, Waffle Flower and My Favorite Things. It's such a great and simple design that you can customise both colour-wise and scene-wise to your tastes.
I started out by stamping the Starry Scene background onto an A6 card panel with some Distress Oxide inks in Broken China, Mermaid Lagoon and Faded Jeans. Here's a tip: to get a smooth transition between the colours, after inking up the portion of the stamp use an ink blending foam to blur the lines. This worked wonderfully on the Distress Oxides! I set these aside to dry to work on the foreground.
I stamped out the group of bunnies and balloons from the We Herd set in some MFT Extreme Black ink. I coloured these with my alcohol markers, sticking to cool greys and contrasting reds and oranges. I cut these out with the coordinating dies.
I white heat embossed the 'HAPPY BIRTHDAY' sentiment from the Essential Sentiments set onto some black card stock and die cut it with a Lawn Fawn Everyday Sentiment Banner die.
Using some foam tape, I popped up the pieces over the background panel. I added some of the balloon strings with a black pen and a little bit of Wink of Stella to to add some sparkle to the balloons.
A cute little birthday card scene!
Thanks for reading, catch you next week.
Tallie
Showing posts with label Avery Elle Starry Scene. Show all posts
Wednesday, 31 July 2019
Wednesday, 17 October 2018
Gingerbread Scenes
Hello, Tallie here! I have another set of Christmas cards for you today. I'm sorry to all those people who hate hearing the word before 1st December, but I have to get an early start on my cards otherwise a panic will ensue!
I have a thing for gingerbread stamps and dies. As soon as I saw the new Lawn Fawn Gingerbread Friends dies, my mind was whirring with the card possibilities! Paired with the Avery Elle Starry Scene stamp, and with a simple heat embossed sentiment, these cards are easy mass produced.
I started with an A6 top-folding heavyweight white card base. A stamp positioning tool makes this design easy to do, so I lined the Starry Scene background from up and stamped a gradient using three different colours of ink per colour combination. For the blue/teal cards, I used Lawn Fawn Fish Tank, Peacock and Merman inks. For the pink/purple cards, I used Lawn Fawn Blue Jay, Sugar Plum and Peachy Keen inks. I then stamped again in Versamark ink and clear heat embossed to get a shiny backdrop.
I heat embossed the sentiment from the Lawn Fawn Merry Messages set in Silver for the blue card and rose gold for the pink/purple card.
Next came the fun part - building the gingerbread! I cut several of the base layers out from both white and kraft cardstock. I used some Vintage Photo and Walnut Stain Distress Inks to add some dimension to the edges of the kraft pieces. I stacked these together to give some dimension to the card. For the faces and decoration I cut these from white cardstock and coloured different pieces in with my alcohol markers. I adhered these onto the gingerbread characters with some liquid glue.
These cards were so much fun to create and I now have 10 more cards to add to my Christmas stash!
Thanks for reading, catch you next week.
Tallie
I have a thing for gingerbread stamps and dies. As soon as I saw the new Lawn Fawn Gingerbread Friends dies, my mind was whirring with the card possibilities! Paired with the Avery Elle Starry Scene stamp, and with a simple heat embossed sentiment, these cards are easy mass produced.
I started with an A6 top-folding heavyweight white card base. A stamp positioning tool makes this design easy to do, so I lined the Starry Scene background from up and stamped a gradient using three different colours of ink per colour combination. For the blue/teal cards, I used Lawn Fawn Fish Tank, Peacock and Merman inks. For the pink/purple cards, I used Lawn Fawn Blue Jay, Sugar Plum and Peachy Keen inks. I then stamped again in Versamark ink and clear heat embossed to get a shiny backdrop.
I heat embossed the sentiment from the Lawn Fawn Merry Messages set in Silver for the blue card and rose gold for the pink/purple card.
Next came the fun part - building the gingerbread! I cut several of the base layers out from both white and kraft cardstock. I used some Vintage Photo and Walnut Stain Distress Inks to add some dimension to the edges of the kraft pieces. I stacked these together to give some dimension to the card. For the faces and decoration I cut these from white cardstock and coloured different pieces in with my alcohol markers. I adhered these onto the gingerbread characters with some liquid glue.
These cards were so much fun to create and I now have 10 more cards to add to my Christmas stash!
Thanks for reading, catch you next week.
Tallie
Sunday, 12 August 2018
Getting Festive
I'm back again with more from the Avery Elle Christmas release. I don't normally feel the urge to create Christmas cards this early but these sets have really inspired me so I have another 4 cards to share today!
Firstly, I couldn't wait to use the corners some more. I did a very similar design to the ones I did on Friday but specifically aimed to send to family in Australia this time...
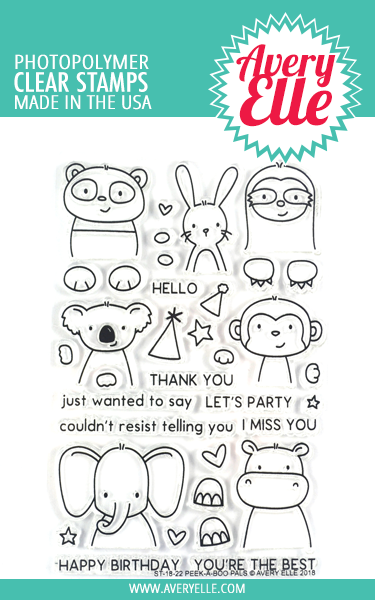
I embossed the sentiment in rose gold then inked over with distress oxide in peeled paint and evergreen from AlteNew and did a little splattering after buffing the embossing clean. I added the koala from the original Peek A Boo Pals and turned him festive by borrowing the hat off the deer in A Merry Little Christmas.
For the second card I stuck with the corner but gave it a complete twist - having a character taller than the corner means you can move the corner out of the corner and it still works. Here I used the bear from A Merry Little Christmas and for the sentiment went with a double coloured embossing to make the Merry pop. I embossed the blue fist avoiding as much as possible getting any powder on the word merry. Then add the red and use the tonic embossing pen to draw over the y where it crosses the blue. Makes the sentiment super modern particularly if you used a bold fresh colour combo.
Next I wanted to play with the stunning Starry Scene set so I stamped the big background using tumbled glass oxide onto a square card and then stamped the trees and mountains onto copic colouring card so I could colour and cut them out. I added a character from A Merry Little Christmas and used the sentiment from that set too.
For the last card I did second generation stamping of the background with the ink that was left on the starry background from the first card and just added a couple of characters from A Merry Little Christmas and more trees from the starry scene. It's a great set to add big impact for quick cards. For the sentiment I went back to my corner set and used masking to selectively ink up only the Merry Christmas part.
Hope that inspires you to get started on Christmas cards - only 135 days to go!
NEWS FROM THE STORE
Our AlteNew delivery with their new watercolours is in transit and due to reach us tomorrow fingers crossed - we will get it opened and processed as quickly as we can but it can be delivered anytime up to 7pm.
The August release from Concord and 9th is due to ship tomorrow so should be here by the end of the week.
We have the whole of the new Hero Arts Winter Catalogue ordered and its due before the end of August.
Catch you later
Tara
Firstly, I couldn't wait to use the corners some more. I did a very similar design to the ones I did on Friday but specifically aimed to send to family in Australia this time...
I embossed the sentiment in rose gold then inked over with distress oxide in peeled paint and evergreen from AlteNew and did a little splattering after buffing the embossing clean. I added the koala from the original Peek A Boo Pals and turned him festive by borrowing the hat off the deer in A Merry Little Christmas.
For the second card I stuck with the corner but gave it a complete twist - having a character taller than the corner means you can move the corner out of the corner and it still works. Here I used the bear from A Merry Little Christmas and for the sentiment went with a double coloured embossing to make the Merry pop. I embossed the blue fist avoiding as much as possible getting any powder on the word merry. Then add the red and use the tonic embossing pen to draw over the y where it crosses the blue. Makes the sentiment super modern particularly if you used a bold fresh colour combo.
Next I wanted to play with the stunning Starry Scene set so I stamped the big background using tumbled glass oxide onto a square card and then stamped the trees and mountains onto copic colouring card so I could colour and cut them out. I added a character from A Merry Little Christmas and used the sentiment from that set too.
For the last card I did second generation stamping of the background with the ink that was left on the starry background from the first card and just added a couple of characters from A Merry Little Christmas and more trees from the starry scene. It's a great set to add big impact for quick cards. For the sentiment I went back to my corner set and used masking to selectively ink up only the Merry Christmas part.
Hope that inspires you to get started on Christmas cards - only 135 days to go!
NEWS FROM THE STORE
Our AlteNew delivery with their new watercolours is in transit and due to reach us tomorrow fingers crossed - we will get it opened and processed as quickly as we can but it can be delivered anytime up to 7pm.
The August release from Concord and 9th is due to ship tomorrow so should be here by the end of the week.
We have the whole of the new Hero Arts Winter Catalogue ordered and its due before the end of August.
Catch you later
Tara
Subscribe to:
Posts (Atom)