Hey stampers, Anni here.
I had this die called Tree Border Die by W Plus 9 in my stash for quite some time and was dying to use it. I think it is so cute with the stitched elements and the possibility to cut extra tree crowns to add them with dimensional adhesive.
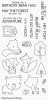
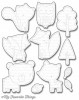
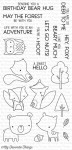
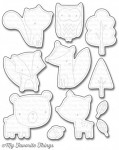
So I went through my stash to find a stamp set that would work with this tree border. My Favorite Things' Forest Friends is just the perfect match, I think. I staretd by stamping, colouring with alcohol markers and fussy cutting (coordinating dies are available, too) the adorable bear.
I die cut the tree border from white paper and dyed it with some ink blending. I used a lighter green for the grass and a darker green for the trees. To add the trunk I used a brown pen.
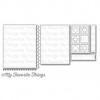
For the frame I used My Favorite Things' Stitched Oval Scallop Frames. I die cut it a few times form white cardstock and stacked them up.
To finish up my card I heat embossed the sentiment in white on a stripe of brown cardstock and cut it into a banner shape.
Thanks for stopping by and have a great weekend.
Anni

Showing posts with label My Favorite Things Forest Friends. Show all posts
Saturday, 29 April 2017
Saturday, 3 September 2016
Deer To Me
Hello there! Today I have a very clean and simple card for you which received some additional specks of color as an afterthought to enhance it and make it more interesting.
First of all, to create the wash of color behind the deer, I used the same technique that Laura Bassen excels at: ink blending. I am tapping off the blending tool before taking it to paper to make sure I don’t end up with ugly blobs of color. In addition, I like to spritz my distressed background with Perfect Pearls mist to make the colors blend even better.
I did color the deer twice. I sometimes seem to go overboard with contrast, and this time I ended up with an image which was way too dark for my taste, so remember: you can always add in more dark colors, you just can’t really make it lighter! Rather go over it another time or a third time than to add too much dark color right away.
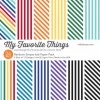
Originally, my card didn’t have any of that rainbow paper. I thought I was done with the card, but I kept returning to it because I felt it was just missing something. In the end, I cut a strip of the rainbow paper and adhered it to the long edge, and the left over was pushed underneath the black banner. It’s just a tiny thing, but believe me when I say it made a huge difference. (I used paper that is different from what's offered in the store, but I added a paper pad into the product list that has rainbow stripes, in case you want to give this a go).
So, don’t be afraid to alter your cards even when you think you are done. Your gut will most likely know what it’s doing :)
Thank you for stopping by today! I hope you got inspired!
First of all, to create the wash of color behind the deer, I used the same technique that Laura Bassen excels at: ink blending. I am tapping off the blending tool before taking it to paper to make sure I don’t end up with ugly blobs of color. In addition, I like to spritz my distressed background with Perfect Pearls mist to make the colors blend even better.
I did color the deer twice. I sometimes seem to go overboard with contrast, and this time I ended up with an image which was way too dark for my taste, so remember: you can always add in more dark colors, you just can’t really make it lighter! Rather go over it another time or a third time than to add too much dark color right away.
Originally, my card didn’t have any of that rainbow paper. I thought I was done with the card, but I kept returning to it because I felt it was just missing something. In the end, I cut a strip of the rainbow paper and adhered it to the long edge, and the left over was pushed underneath the black banner. It’s just a tiny thing, but believe me when I say it made a huge difference. (I used paper that is different from what's offered in the store, but I added a paper pad into the product list that has rainbow stripes, in case you want to give this a go).
So, don’t be afraid to alter your cards even when you think you are done. Your gut will most likely know what it’s doing :)
Thank you for stopping by today! I hope you got inspired!
Saturday, 23 July 2016
Going Nuts with Die-Cut Leftovers
Hi fellow crafters! I created a die-cut window for an entire scene, with overlapping images for a project I've shared in the past. I didn’t throw away the die-cut pieces from that card, but rather used them on today’s project. Check it out!
I know that at first glance, you might think: but those pieces are incomplete! But that’s ok! You can get the same effect as if you’d done some masking and stamping, only here you don’t even need masks ;)
The Copic coloring on Kraft paper is something I am really enjoying because it can lead to stunning effects. The type of effect you get will depend on the type of paper you use, so give it a try. If you are really careful with your markers, you could even heat emboss the stamp outline in white to get more contrast.
For the watercolor background, start out with very little color if you want a soft color wash. I often overdo it in my attempt to get vibrant colors, but opting for a soft background can be beneficial, especially when you are blending between colors. The more intense the colors are, the more difficult it becomes to blend nicely.
And I am really enjoying adding patterned paper to my cards as well, especially bold colors like these black stripes. It’s something I have admired Francine for for a very long time and finally I have worked up the nerve to give this a go myself.
Thank you for stopping by today! I hope you got inspired!
I know that at first glance, you might think: but those pieces are incomplete! But that’s ok! You can get the same effect as if you’d done some masking and stamping, only here you don’t even need masks ;)
The Copic coloring on Kraft paper is something I am really enjoying because it can lead to stunning effects. The type of effect you get will depend on the type of paper you use, so give it a try. If you are really careful with your markers, you could even heat emboss the stamp outline in white to get more contrast.
For the watercolor background, start out with very little color if you want a soft color wash. I often overdo it in my attempt to get vibrant colors, but opting for a soft background can be beneficial, especially when you are blending between colors. The more intense the colors are, the more difficult it becomes to blend nicely.
And I am really enjoying adding patterned paper to my cards as well, especially bold colors like these black stripes. It’s something I have admired Francine for for a very long time and finally I have worked up the nerve to give this a go myself.
Thank you for stopping by today! I hope you got inspired!
Saturday, 21 May 2016
Die-Cut a Window for a Scene
Hey crafty friends! Today I am trying something new, which is to die-cut a window for an entire scene, with some of the images overlapping even! Enjoy!
The first step, which is to die-cut the window, is actually the easiest. You only need to invest some brain power into what kind of scene you want to end up with before starting the die-cutting. For this first step, you don’t need any masks, you just need to remember: whatever you die-cut first will be in the foreground.
As you can see, the only tricky part is stamping the images perfectly into the openings. The MISTI really did help, but you can absolutely do this with just an acrylic block and some patience. I’ve done this before, so it’s not a problem, it just takes a little more time. For the stamping, you will need some masks to make sure you can create the illusion of one image being in front of another.
The coloring with colored pencils followed my usual method of starting with light layers, not a lot of pressure, and then slowly building up my color in layers. After I was done with the video, I even added some more dark color on the bottom of the tail to intensify the shadows.
The added highlights with my gel-pen were not necessary, but I felt that it added something really bright and eye-catching to the design, making it much more interesting.
Thank you for stopping by today! I hope you got inspired!
The first step, which is to die-cut the window, is actually the easiest. You only need to invest some brain power into what kind of scene you want to end up with before starting the die-cutting. For this first step, you don’t need any masks, you just need to remember: whatever you die-cut first will be in the foreground.
As you can see, the only tricky part is stamping the images perfectly into the openings. The MISTI really did help, but you can absolutely do this with just an acrylic block and some patience. I’ve done this before, so it’s not a problem, it just takes a little more time. For the stamping, you will need some masks to make sure you can create the illusion of one image being in front of another.
The coloring with colored pencils followed my usual method of starting with light layers, not a lot of pressure, and then slowly building up my color in layers. After I was done with the video, I even added some more dark color on the bottom of the tail to intensify the shadows.
The added highlights with my gel-pen were not necessary, but I felt that it added something really bright and eye-catching to the design, making it much more interesting.
Thank you for stopping by today! I hope you got inspired!
Tuesday, 17 May 2016
Maypoles in May!
Hey! How are you?
Enjoying May?
As I had a brief thought about about what to create, I got my Forest Friends set out and looked at it blankly. I then remembered it was May.
May led me to thinking about what happens in May...and hey presto... Maypoles!
For any of you unfamiliar with the English tradition (well, to be fair, it's often classed as English but there are different European forms of this tradition), it was to do with celebrating and a May Pageant and this type of maypole that I've depicted was popularised in the 1880s.
I have slightly uncomfortable memories of learning how to do maypole dancing for a primary school celebration and it consisted of many hours, often holding hands with boys with very sweaty hands. I guess we might have looked a little like this
Anyhow- you've come to see a card and not have a history lesson.. so here's my ode to the MaypoleI've used this My Favorite Things set Forest Friends, which is a set with a whole lot of cuteness going on.
I mean, any set that can transform itself into a Star Wars battle and then a historically unprecise sceen has to be worth a punt!
I stamped then coloured them in with alcohol markers. Some of mine are running out and I've got my eye on the new Kuratake Kurecolor markers
Wrapping the thin slithers of cardstock was easier than I imagined oddl therapeutic. Ideally, I should have given them knotted handkerchiefs on their heads and made them into Morris Dancers too- but perhaps the whole Morris thing is for another week ;-)
See you soon...
Keren xx
Tuesday, 12 April 2016
From Owl Ballet to See-through Hello!
Hey! How are you? with the lovely April My Favorite Things release in the store, I thought I'd show you a few cards I created using the fantastic sets.
My first project is using Forest Friends
I wanted to use the owls and imagined them on the barre practising standing En Pointe!
Ms Badger is taking the class with her wooden stick to bash on the floor if they can't get in correct position!
I really really wanted to do ballet when I was little, so this card was for me at some level! I've added some foil to act as the mirror and the little tutus are crafted from pleated washi. Those poor owls are clinging onto the barre for dear life!
Next up is a mini card using the Rounded Rectangles set
with the Tweet On You stamp set & the Hello There die set
Add in the Bold Greenery Dienamics
and you've a fun mini card to send to anyone who just needs a little pick-me-up.

I posted this one yesterday on Instagram, but thought it went well with the selection as it uses the same products listed plus the fab Dainty Scallop Coverup
Do take a look at the rest of the MFT release, there's bound to be something there you really love/want/need! Ha ha!
See you next week, with my ballet shoes on!
Subscribe to:
Posts (Atom)