Showing posts with label Mz Favorite Things English Brick Stencil. Show all posts

Monday, 20 March 2017

Flippin' Super Birthday

Hi there and happy Monday to you :)

Well my card today would have been more suited to sharing nearer Shrove Tuesday a couple 
of weeks ago because this little guy has been making pancakes.....


He's from MFT's Recipe for Happiness stamp set and I just love his expression :)
I couldn't pass up the chance of a pun so I've given him a frying pan and spatula
 to hold behind his back as he's a little embarrassed that he's dropped his 
pancake mid-flip!! I've used a small oval shadow die which I've 
coloured with alcohol markers to make it look like a pancake


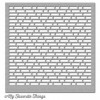
For a background I've inked through the English Brick Wall stencil from MFT 
which is currently out of Stock but I've linked to one below that would work just as well.
 For the sentiment I've used the FLIPPIN' from the stamp set and then used the rest of the wording 
from a Lil Inkers set which is out of stock but you could easily use alpha stamps instead.
 When you're using lots of words from different stamp sets it's easier to chop
 them into separate pieces and mount them on your card at jaunty angles :)



Thanks for stopping by :)
Jenny x

Monday, 15 August 2016

Lucky Me

Hello there and Happy Monday to you :)

I'm back to regular shaped cards this week and, with no particular requirements in my card calendar at the moment, I thought I'd have a play with some unloved stamps and make a card for my collection...


The new Friends for all Seasons line from Wplus9 is adorable and so interchangeable too...having said that I thought I'd just use the cute little bulldogs in the Friends for All Seasons: Summer stamp set to make a scene through one of the Peek A Boo Wonky Windows from MFT. 

I gave one of the dogs a bunch of flowers to present to his friend.......I inked up one of the knuckle ends of the bone in the set to give the little dog a thumb so he could hold the posy.... love the little details :)


Rather than make a countryside backdrop I used the English Brick Wall stencil from MFT to set the scene. I made my background on a scrap of white card and made sure it was large enough to place the frame over... then I adhered it to a coloured card base, added the cute dogs and then placed the frame over :)


Thanks for stopping by, catch you next time :)
Jenny x

Saturday, 13 February 2016

Create A Realistic Brick Wall (On Your Cards)

Hey there, crafters! I have been dying to create a card like the one I am sharing with you today. Not only did I want to give my embossing paste something to do again, I wanted to tint it a bit for an even greater effect.


I started out by applying the paste through my MFT stencil, and then I set the card base aside to dry. It takes about half an hour to an hour before the paste is dry enough to distress without smearing it, so I set out to create my florals in the meantime.


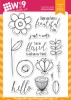
I stamped the  Doodle Buds by Wplus9 on watercolor paper and colored them with a variety of markers: ZIG Art & Graphic, Distress Markers, and Stabilo Markers. Since they are all water based, they work together nicely. After I had dried the flowers with my heat gun, I used the matching dies to cut them out. I added a few highlights with a white gel pen and my Stardust pen after adhering them to the frame.


Before I adhered the flowers and the frame, I placed my stencil back on the now dried surface and grabbed a few Distress Inks. Very carefully, I sponged on some color to create the look of bricks, but without getting ink on the actual card base. It looks fantastic from the side because you can still see that the bricks are white underneath the thin layer of color.


Of course I only thought about the sentiment when it was almost too late and I decided to take a risk and stamp on top of the embossing paste. Could have ruined the entire project, but you know me – if it doesn't get my adrenaline level to rise, it ain't worth it ;)

Hope you enjoyed today's project and got inspired to color dried embossing paste. It's fun!