Showing posts with label lawn fawn stitched rectangles. Show all posts

Wednesday, 14 August 2019

Happy Forevering

Hello crafters! Tallie here and I'm back today with a wedding card featuring the Colorado Craft Company Lovely Legs Happy Forevering stamp set. I haven't used my coloured pencils for a while so this card was a perfect time to bring them out! These stamps have a lot of detail in terms of shading so are perfect to practice your light forms and shading.


I stamped out the married couple scene onto some white cardstock with some MFT Extreme Black ink. I used my Prismacolor coloured pencils to colour in the scene. I personalised the colours based on the couple I was sending the card onto. The trick with these wax-based pencils is to use lots of light layers, finishing with a heavier layer to make sure the the tooth of the cardstock is evenly covered. When finished, I cut this out with a Lawn Fawn Stitched Rectangle die.


Using another slightly larger Lawn Fawn Stitched Rectangle, I die cut two more rectangles, one from Blue Jay cardstock and the other from vellum.


For the card base, I stamped the MFT All Lined Up background stamp in some Versamark ink onto some kraft cardstock. I then layered the stitched rectangles onto the card base and white heat embossed the 'CONGRATULATIONS!' sentiment from the MFT Essential Sentiments set.

Thanks for reading, catch you next week.

Tallie


Friday, 30 June 2017

Simply Sweet Forest Friends

Hi everybody,

Jill here, and this week, I'm keeping things sweet & simple...


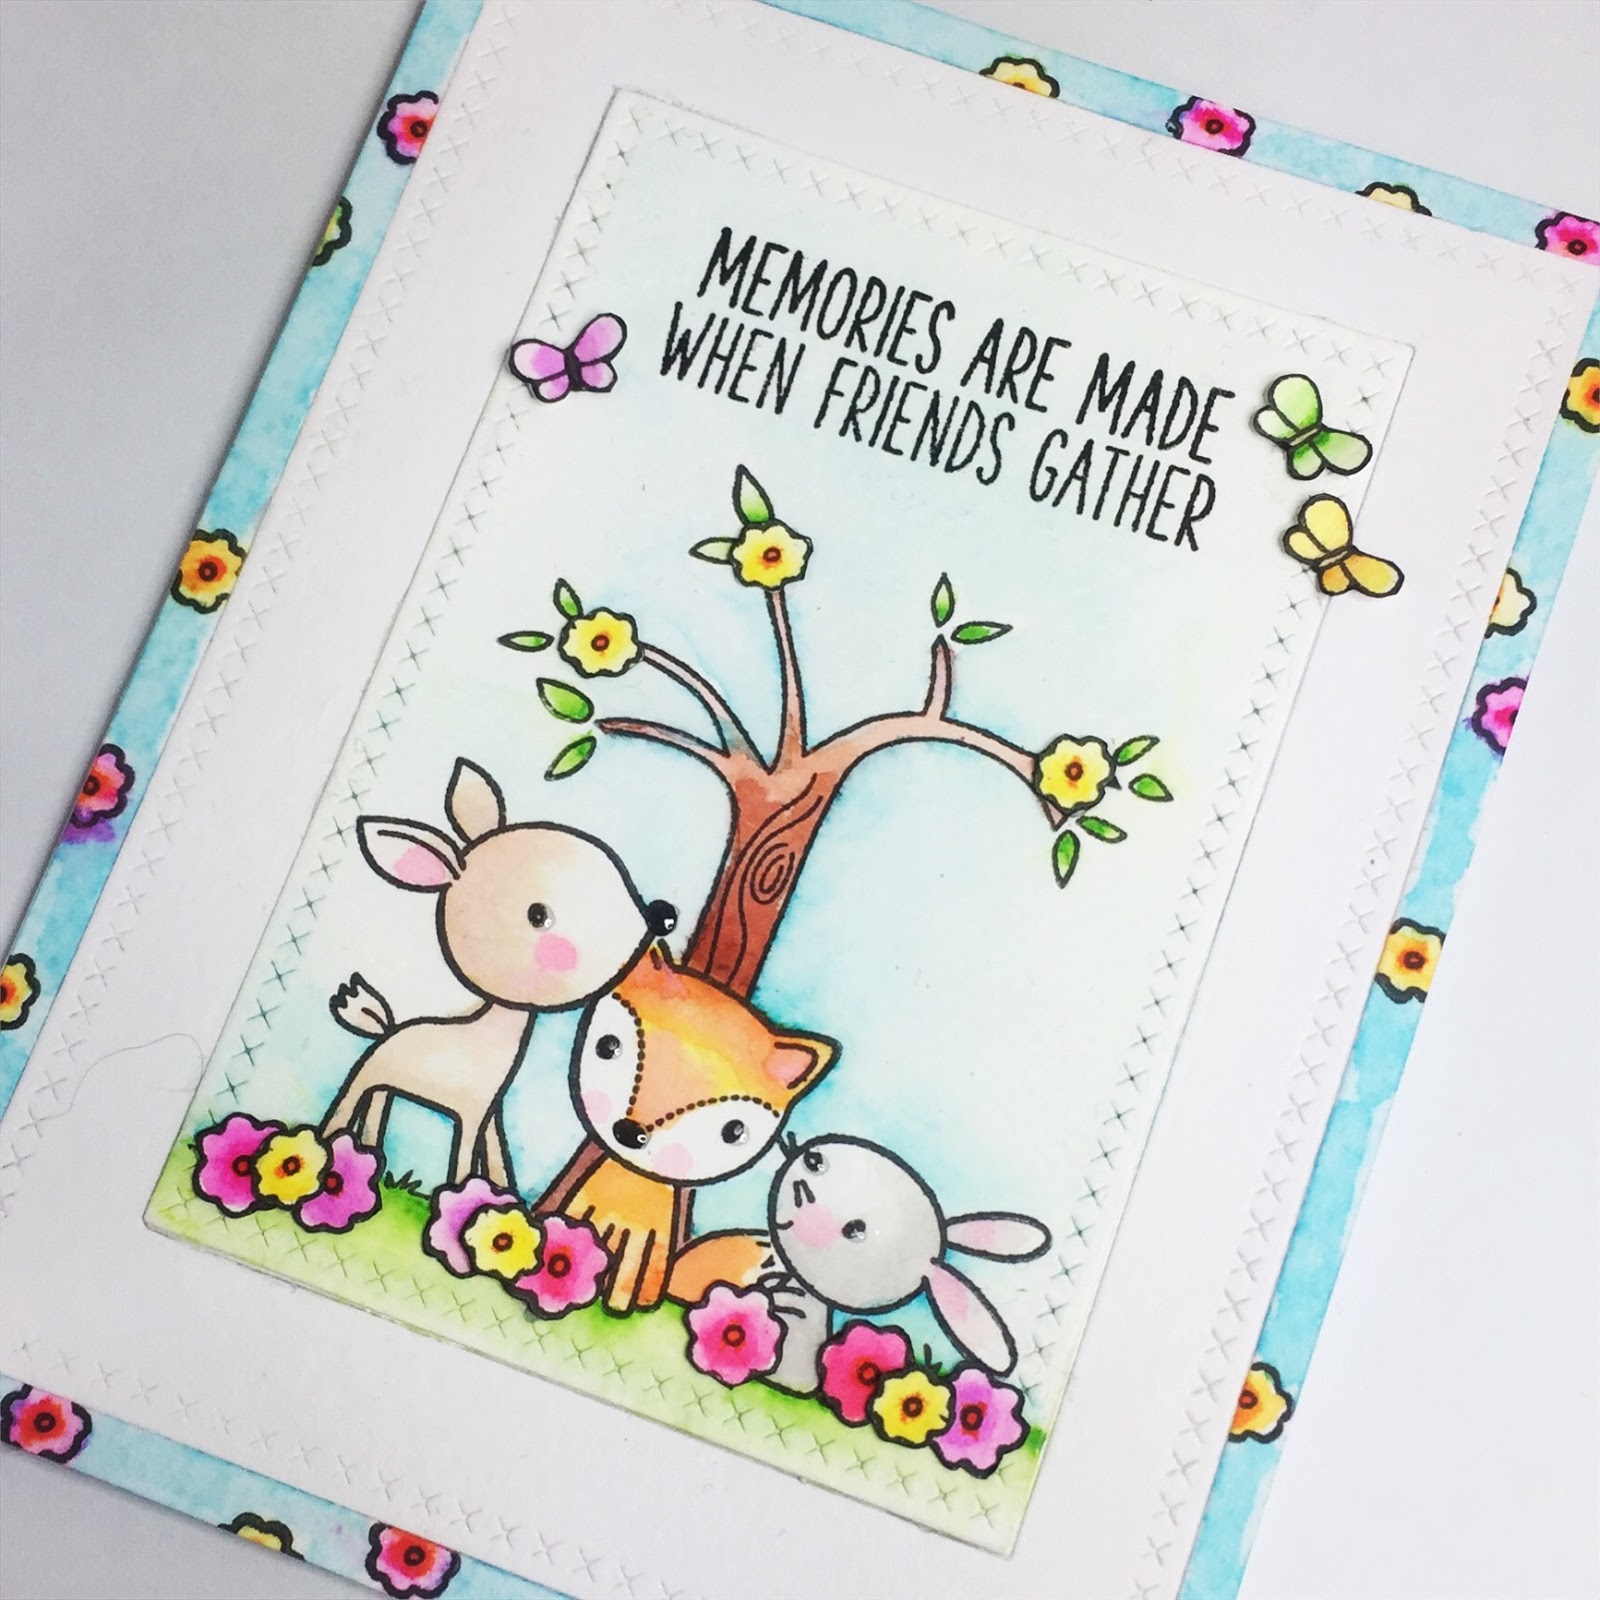
...using the adorable Sweet Forest Friends from My Favourite Things.


Oh my, the little critters in this Sweet Forest Friends are soooo cute...I just can't!  The style of this set is so sweet, and lines so simple I wanted to stick with the same theme with my design and create a very cute and clean card.
I started by cutting my frames using Lawn Fawn's Stitched Rectangles.  I took the centre panel and stamped my design onto it.  I masked off as I went so the little critters could all be gathering in front of the tree.  I stamped my sentiment from the same Sweet Forest Friends set onto my panel and clear heat embossed.  I then coloured my images and my background using Zig Clean Colour Real Brush markers and left to dry.
Whilst that was drying, I took my outer frame and stamped one of the teeny flowers from the set all over it, I also took this time to stamp out a ton of the small flowers from the set onto a spare scrap of card.  I then coloured all of my pieces, again, using my Zigs and fussy-cut the teeny weeny flowers.


Once all my colouring was compete and my pieces were dry, I pieced them back together, adding an extra layer beneath my main panel so it stands slightly forward and added my flowers to my scene.  Once my scene was complete, I felt it was lacking one little touch, so stamped out, coloured and fussy cut a few of the little butterflies from the set and added them to my card.  This finished off my piece a treat and added some lovely dimension.
I finished by adding Glossy Accents to my critters eyes and noses and there you have.


I really hope you like it.
As always, everything I used is linked below.

See you next week.

Jillx

Sweet Forest Friends  Small Stitched Rectangle Lawn Cuts Image 1  Zig Clean Color Real Brush Pen (12 piece set)

Friday, 20 January 2017

Otterly in love.

Hi everybody,

Jill here, and this week I am going 'otterly nuts'...


...for the brand spanking new Otterly Adorable from Mama Elephant.


I love otters, they are one of my particular favourite animals, the way they swim on their backs holding hands...gaaaah!  They are just such beautiful, gorgeous creatures.  So seeing them take centre stage in this new set...oh be still my beating heart!
I started by colouring a few different sheets of vellum using Distress Inks, (I only learnt yesterday this would work.  HOW did I not know?!).  In any case, I coloured my vellum in various blue/greens, and also covered a sheet in white pigment ink.  I then cut them, at varying heights, into waves using the cloud border from Mama Elephant's Landscape Trio Dies, by simply turning the die upside down.


I then cut a frame from a piece of card using Lawn Fawn's Cross Stitched Rectangles and layered up my vellum waves behind.

I stamped out and coloured my favourite image in the set, which is obviously the little guys on their backs, and the little heart also included, then fussy cut everything.
I cut Mama Elephant's Friend word die from a piece of black card adhered to some black foam using Stick it, and began to build my scene. adding the little heart to my sweet swimming otters.

I finished off my sentiment by stamping straight onto the vellum along the bottom of my scene, and clear heat embossing.
I cut the smallest rectangle that makes up my frame, from my card blank to allow the light to shine through, and mounted my panel onto it using foam tape.
I embellished with a scattering of clear sequins and there you have it.


I really hope you like it, and hope you love the new Mama Elephant release as much as I do!

As always, everything I have used is linked below so be sure to check it out.

See you next week.

Jillx

Otterly AdorableLandscape Trio Creative Cuts Image 1Friend Script Creative Cut Image 1

Small Stitched Rectangle Lawn Cuts Image 1Stick It

Friday, 18 November 2016

Soak up the fun in a sea of vellum.

Hi everybody,

Jill here, and this week, I'm making a splash in a sea of vellum...


...using My Favourite Thing's 'Soak Up The Fun'.


I started with an idea to create a circle aperture of coloured vellum waves with these cute sea critters swimming in amongst them, but when I was looking through my circle dies, I came across this absolute beaut, 'Hoop Die', form Neat and Tangled that I hadn't used in a while, and thought it would add a nice little twist on the scene, so opted for that.


I started by cutting a panel using Lawn Fawn's Stitched Rectangles, then cutting the hoop die from it.  I then cut the hoop die again to build the frame up, and in-laid it back in.  I cut strips of vellum using Mama Elephant's Landscape Trio cloud die upside down to create waves and coloured using alcohol markers.  I then adhered these to the back of my hoop aperture, creating pretty layers.  I stamped out my critters, coloured using Copics, fussy-cut, and adhered in place, bobbing about on the ocean!


My sentiment is from the same Soak up the Fun set, and is stamped out onto the banner from Avery Elle's Woodland Wonders set, and fussy-cut.  To add a little more interest to my background, I stamped out a load of the little bubbles that come in the set, and filled them with Glossy Accents.


I then mounted my finished panel onto a cream card blank, and there you have it.

I really hope you like it, as always, everything I used is linked below.

See you next week.

Jillx

Soak Up The FunHoop Die Image 1Woodland Wonders


Landscape Trio Creative Cuts Image 1Small Stitched Rectangle Lawn Cuts Image 1

Friday, 7 October 2016

Frame your phrase with flowers.

Hi everybody,

Jill here, and this week I'm framing some loving words with some lovely flowers...


Using Avery Elle's gorgeous Peonies and Altenew's Painted Inspiration.


I started by cutting a panel using Lawn Fawn's Stitched Rectangles from watercolour card, and masking the edges off with low-tack tape.  I then stamped a selection of the small and large flowers and leaves from Avery Elle's Peonies, around the edges, heat embossing in gold as I went.


I then coloured my flower frame using Zig Clean Colour Real Brush Pens with water, and adding a few flicks and splatters across my background.
My sentiment is from Altenew's Painted Inspiration and heat embossed in gold.
I mounted my whole panel onto a Silver Fox notecard from Avery Elle with foam tape, and there you have it.


I really hope you like it and, as always, everything I used is linked below.

See you next week.

Jillx

Peonies Image 1Painted InspirationZig Clean Color Real Brush Pen (24 piece set)

Silver Fox Notecards (12 pack)Small Stitched Rectangle Lawn Cuts Image 1

Friday, 23 September 2016

Soft and simple, sweet little Pix in the spotlight.

Hi everybody,

Jill here, and this week, I've gone soft and simple with a bit of design spotlighting...


...putting Mama Elephant's Pix's Favourite's in the spotlight!
Such a gorgeous set, it just seems to go hand in hand with a delicate design.


I started with a piece of watercolour card cut down to a panel using Lawn Fawn's Stitched rectangles.  I die-cut an off-centre circle, so that it edged off my card; to that circle, I cut Lawn Fawn's Forest Border and the cloud from Mama Elephant's Landscape Trio.  I then watercolour washed my background and my elements using Distress Inks.  I really wanted my background to be the softest of soft washes, so really watered down my inks and blotted the back as soon as I'd put the colour down to the point it's barely visible in the pictures, but looks really lovely and subtle in real life.


Once everything was dry, I added a sun die-cut from Lawn Fawn's Spring Showers and in-lad all my pieces back in place.  At this point I thought my spotlight circle was getting lost in the pale expanse of the background, and it wasn't really 'popping' like I wanted it to, so I added a border of grey patterned paper behind to help it stand out.
I then stamped out my main focal image, this delightful little bunny (Pix, I assume?), and little tree stump from Pix's Favourite's.  You get a load of different designs in this set, each one as adorable as the next, but with her little butterfly, I felt this one would work perfect with my design.  I coloured her using Zig Clean Colour Real Brush Pens, again, keeping it as light and gentle as I possibly could by adding a lot of water to my ink, and blotting often.  I then fussy-cut my image and mounted on top of my spotlight using foam tape.


I then stamped out my sentiment from the same Pix's Favourite set onto vellum in black ink, heat embossed, and adhered with just the teeniest bit of wet glue along the top, masked by the crosses from the stitched rectangle borders.
I added a few little bits of ribbon to embellish, cut into flags and banners and tucked into a little label, and finished off with a couple of black enamel hearts to tie the whole design together.

I really hope you like it, and as always, everything I used is linked blow.

see you next week.

Jillx

Pix's Favorites Forest Border Lawn Cut Image 1Landscape Trio Creative Cuts Image 1

Spring Showers DiesSmall Stitched Rectangle Lawn Cuts Image 1Zig Clean Color Real Brush Pen (24 piece set)