Showing posts with label Wplus9 Doodle Buds. Show all posts

Tuesday, 14 March 2017

Doodle Flowers

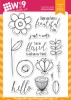
The Doodle Buds stamp set is one of my favourite sets from WPlus9. I love the large flowers, perfect for colouring.

For today's card, I thought it would be fun to have a row of flowers, with one of the flowers in full colour so it really stands out.


I started by stamping a row of flowers and stems in a light ink across the front of a card base. I left a space on the right hand side where I wanted my main flower to go.

For that flower, I stamped the image in black ink on a separate piece of card. I coloured the flower with my Zig Clean Color Real Brush Pens, and then added lots of sparkle with the Wink of Stella clear glitter pen.

I fussy cut this image out and adhered to the card base. If you prefer, you can stamp the image directly on the card base instead and then colour in.

Finally, I stamped a sentiment from the same set. This sentiment is really sweet, I just love the mix of fonts.


After I finished this card, I made another one using a different flower from the set.


Have a beautiful day,
Gemma

WPlus9 Doodle Buds

Zig Clean Color Real Brush Pens


Wink of Stella Clear Glitter


Saturday, 13 February 2016

Create A Realistic Brick Wall (On Your Cards)

Hey there, crafters! I have been dying to create a card like the one I am sharing with you today. Not only did I want to give my embossing paste something to do again, I wanted to tint it a bit for an even greater effect.


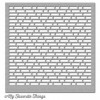
I started out by applying the paste through my MFT stencil, and then I set the card base aside to dry. It takes about half an hour to an hour before the paste is dry enough to distress without smearing it, so I set out to create my florals in the meantime.


I stamped the  Doodle Buds by Wplus9 on watercolor paper and colored them with a variety of markers: ZIG Art & Graphic, Distress Markers, and Stabilo Markers. Since they are all water based, they work together nicely. After I had dried the flowers with my heat gun, I used the matching dies to cut them out. I added a few highlights with a white gel pen and my Stardust pen after adhering them to the frame.


Before I adhered the flowers and the frame, I placed my stencil back on the now dried surface and grabbed a few Distress Inks. Very carefully, I sponged on some color to create the look of bricks, but without getting ink on the actual card base. It looks fantastic from the side because you can still see that the bricks are white underneath the thin layer of color.


Of course I only thought about the sentiment when it was almost too late and I decided to take a risk and stamp on top of the embossing paste. Could have ruined the entire project, but you know me – if it doesn't get my adrenaline level to rise, it ain't worth it ;)

Hope you enjoyed today's project and got inspired to color dried embossing paste. It's fun!