Hello crafters! I have a fun, fun, fun card for you today – something silly that will hopefully make you smile.
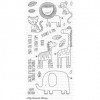
I stumbled across the Sweet Safari set by My Favorite Things by accident and the quirky animals stole my heart and I knew they had to come and live with me. I colored the giraffe for the 30 Day Coloring Challenge a while ago, and finally fussy cut it and put it on a card:
I wanted the warm tones of the giraffe to be the focal point, so I only added a bit of blue Distress Ink to the background and sprayed it with Perfect Pearl to add shimmer. I am still struggling to add super soft color gradients a la Laura Bassen – mine always turn out more intense than I want, but it's ok in this case.
To create some more contrast, I die cut the cloud shape but left it completely white. It contrasts with the blue sky and yellow giraffe, but doesn't add any additional color to the card – I have to remember to use white as a contrast more often.
Thank you for stopping by today, I hope you enjoyed the project. Have a fantastic weekend!
Saturday, 23 April 2016
Friday, 22 April 2016
April Colour Challenge Final Reminder and March Winner
Are you playing along for your chance to win with us this month? If not then this is your final reminder. This month
we're playing with colours and we're feeling a little "blue" so all of
our schemes this month feature blue and we'd like to see you use blue
whichever of the schemes you choose.
So to play along - pick one of the schemes below and use at least 3 colours (including a blue) to make your entry. Remember to use at least one product from the vast range we sell at Seven Hills Crafts to be eligible for the £15 prize.
Link up to our challenges page by the deadline of 10pm on Sunday 24th April for a chance to win.
Talking of winning - here are the very belated announcements of the winners for last month's sketch challenge. As always it is really hard to pick one winner but we did it in the end!
Our two runners up both kept the sketch the original orientation and one went masculine with bold colours and a great nautical theme, the other went with a lovely feminine floral theme and we love them both! Congrats to "I love stamping" and Gemma.
So to play along - pick one of the schemes below and use at least 3 colours (including a blue) to make your entry. Remember to use at least one product from the vast range we sell at Seven Hills Crafts to be eligible for the £15 prize.
I missed the post last week so I am sharing all the DT's inspiration with you today.
Jill
I chose option A and used Neat an Tangled's Hello There die, Mama Elephant's Zenith Border set, Mama Elephant's Index Card Creative Cuts, and a selection of Hero Arts and My Favourite Things inks.
Jenny
I went with the middle colour palette and used Lawn Fawns Hippo Birdie stamp set
and MFT's Watercolour Stripes for a tone on tone pattern on the base card :)
I chose option A and used Neat an Tangled's Hello There die, Mama Elephant's Zenith Border set, Mama Elephant's Index Card Creative Cuts, and a selection of Hero Arts and My Favourite Things inks.
Jenny
I went with the middle colour palette and used Lawn Fawns Hippo Birdie stamp set
and MFT's Watercolour Stripes for a tone on tone pattern on the base card :)
Link up to our challenges page by the deadline of 10pm on Sunday 24th April for a chance to win.
Talking of winning - here are the very belated announcements of the winners for last month's sketch challenge. As always it is really hard to pick one winner but we did it in the end!
Our winner this month flipped the sketch sideways but then created this really cute scene using a mixture of sets from MFT. Congrats Anja - drop an email to the store to collect your winners code for the store.
Our two runners up both kept the sketch the original orientation and one went masculine with bold colours and a great nautical theme, the other went with a lovely feminine floral theme and we love them both! Congrats to "I love stamping" and Gemma.
Here's the badge for your blogs if you would like to show off your win!
Felty Fun!
Hi everybody,
Jill here, and this week, I'm playing with the newest addition to the store, by getting my fun on with some felt!
Tara has brought to us some gorgeous quality felt, in some beautiful shades, and it is just so much fun to play with!
One of my favourite techniques of all time is in-laid die-cutting, and I couldn't wait to see how it would look using felt, so thought I'd give it a blast.
I started by selecting the colours I wanted to work with, there's so many gorgeous shades to choose from, and at such an awesome price. I wanted to test how well the felt cut intricate dies, with wee little fiddly bits, so opted for the Dainty Flowers die from Paper Smooches. I cut the outline from grey, and opted for a bright teal and pink for my pretty flower petals, bright yellow for my flower centre, and a lush green for my leaves. I didn't want to waste the tiniest scrap of my felt, so only cut tiny pieces over the small parts I needed. I'm not gonna lie, it was a little fiddly, and took a little more patience than when using card and the pieces just pop out, but the texture and just the joy of using a different material made it well worth the little bit of extra time it took.
I used Stick-it on my most of my pieces as I thought it would help stabilise the material, but cut it without also and found the results pretty equal. When cutting the felt, I made sure to run it back and forth through my machine a few times to flatten the fibres, and I definitely think that helps.
Once I had 'in-laid' all my gorgeous flowers back into my card panel, I cut Paper Smooches Awesome word die right across the front of my scene, exactly like I would with card, and cut the same die from black felt. And here's where my daft head took over - I had added Stick-it to my piece of black felt, but accidentally cut the die from the wrong side, so the stick-it was on the front. 'Well I'm not wasting it', I thought, so in-laid it back in to my panel using a piece of clear tape across the back, and give it a gentle sprinkling of glitter to take advantage of the sticky front!
I used Mama Elephant's Index Card Creative Cuts to cut a grey mat, and used a piece of patterned paper from Lawn Fawn's Perfectly Plaid 6x6 pad as a back drop. I added a couple of heart enamel dots to embellish, and there you have it!
It's a massive thumbs up from me for the felt, I absolutely love it! So much fun to use, and so lovely to be able to add such fabulous texture to your card!
As always, everything I used is linked below so I hope you have time to pop along and take a look for yourself.
Thanks for stopping by, see you next week.
Jillx
Thursday, 21 April 2016
Penciled Blooms
Hi there and happy Thursday! And a big Happy Birthday Ma'am (if your reading this).
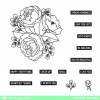
Today I have a floral birthday card using the amazingly gorgeous Mama Elephant 'Organic Blooms'...
I am in love with this stamp set as there are so many different techniques you could use this for, and because its such a big stamp it can be used once to fill up a whole card or it even wouldn't take long to make a background!
I stamped the image using a really light ink and then coloured using some coloured pencils- it does take a little time but I do find this type of colouring very relaxing.
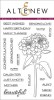
For the sentiment I used Altenew 'Beautiful Lady'.
Thank you so much for stopping by today! I hope you like my card and feel like it's it for a queen ;)
Hugs Lydia x
Wednesday, 20 April 2016
Unbelievable
Hello,
Today I have an unbelievable birthday card.
Well its not lol but that is the fun sentiment from the Lovable legends stamp set from Lawn Fawn.
I stamped and masked the big foot on to kraft card.
Then coloured them using Prisma color pencils.
Its not perfect colouring as I wanted a rougher look so have used little swirls to create different textures to the fur.
I used the icicle die cut for my grass and added a couple of layers.
The sentiment from the set is combined with the a birdie told me stamps and dies.
I added a scalloped frame from some black polka dot paper also from Lawn Fawn.
Thanks for looking.
Tuesday, 19 April 2016
Bountiful Blooms
Hi! How are you this lovely day? With some sunshine peeking through in the window and falling on a vase on flowers in my house, I wanted to create a card full of flowers, but just using one flower. A natural looking bouquet would have lots of different types of flower, but I thought just one might be a challenge.
I've used the ever lovely Winnie and Walter In Bloom: Addie's Garden
First off, I stamped and white embossed the flowers, then coloured them with Zig Clean Color pens. I've blended a couple of colours together on some of them to try and give the realism you might find in the real thing. I created a structure like this at the top of the card to support the design of the flowers.
I extended the length of the stalks, by pulling the colour further at each end of the stalk. Trim out the stalks and create a stack as if it was a hand tied bouquet. You can see a bow in the picture- that's because I added one initially and then decided against it.
You can see here my original design and also to show you how I send cards like this- people have asked how to send them- just find an envelope larger than the card ;-) The sentiment is from The Party (Winnie & Walter)
Hope you enjoyed the blooms. They make a lovely card that's kind of a present at the same time- but without all the hassle of having to find a vase!!
See you next week,
Keren xx
Subscribe to:
Posts (Atom)