Thursday, 24 November 2016
Watercolour and Gold Poinsettias
Hi there everyone and happy Thursday !
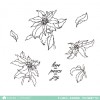
Today I have a card to share using the beautiful Mama Elephant 'Poinsettia'...
I stamped three of the large flowers at the top of a piece of watercolour card and heat ebossed them with gold powder. I then water coloured then using a lot of colour at the base and really watering it down towards the tips. I love the effect this gives.
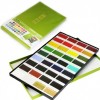
I then took the gold from the Gansai Tambi set and coloured in the land-locked areas at the topand between the leaves and around around the bottom edge of the flowers. To create the gold ombre effect I added clean water to the gold on the bottom edge to draw out the colour.
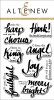
For the sentiment I used Altenew 'Lyrical Script' and gold embossed it on to some vellum before attaching to my card layer with staples.
Thank you so much for stopping by and I hope you enjoyed my card today!
Hugs, Lydia x
Wednesday, 23 November 2016
Quick and fun Christmas cards with matching envelopes
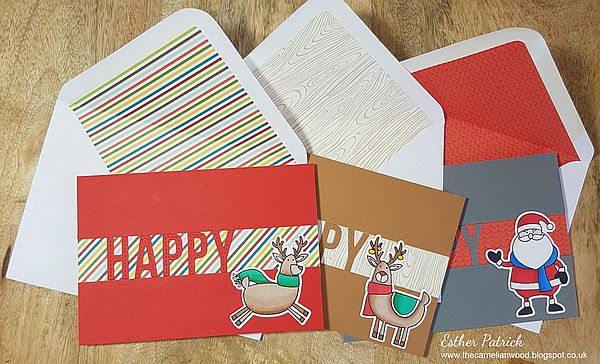
Hi everyone, Esther here with a completely different style of card to last week! This week I want to show you a really quick and easy design for batch making Christmas cards with fun matching envelopes. This is great for producing large quantities of cards that still look like some time has gone into them.
So what do you need? Just a few supplies:
- Coloured card
- A paper pad in a design you like - I used My Favorite Things Trail Mix
- My Favorite Things Stitched Alphabet Dienamic
- A Christmas stamp set of your choice - I used My Favorite Things Merry Everything stamps and matching Dienamics
Cut some card bases to the size you want. I cut my card stock to 8" high by 5.6" wide so that the folded cards were 4" high.
Cut some 1.5" strips of different papers from your paper pad and glue them to the middles of the card bases.
Cut two strips per card of coloured card at 1.5" high by 5.6" wide and glue them to the tops and bottoms of the card bases. You should have a gap of 1" in the middles where your paper shows.
Cut the letters H, A, P, P, Y multiple times from your coloured card using the My Favorite Things Stitched Alphabet Dienamic. Glue them into the gaps, positioning the word slightly to the left of centre. If you're not confident about the fit, just stick your top strip of coloured card, then the letters, then the bottom strip of coloured card. You can always trim a bit off the bottoms if you need to.
Stamp and colour some images from your stamp set, then die cut or fussy cut them out and glue one image per card at the bottom right corner.
Now take matching sheets of paper from your paper pad and one at a time use a corner rounder (or neat cutting) to round off one corner.
Hold that rounded corner at the top inside of your envelope so it lines up along its sides with the glue strips on the envelope flap. Just before the paper overlaps the sides of the envelope, make a small pencil mark, and join the two marks. Make sure your joining line is below the open portion of the envelope body. I've used a thick black pen so you can see the lines.
Cut out the shape, and add two strips of glue tape or other glue of your choice to the back.
Insert the paper into the envelop, aligning its edges with the envelope so it's centred and level.
Finally, re-score the fold line for the envelop flap.
I promise in real life this is so quick to do, and having a matching envelope creates such a fun, personalised effect! It really makes your batch Christmas cards look like they took a lot more time than they did, and will put a smile on the recipients' faces!
That's it for this week - hope you like them! See you next week, and thanks for stopping by.
Tuesday, 22 November 2016
O Christmas Tree Gift Tags
Hello and thanks for joining me.
Today I have a selection of Christmas tags to share, using the Concord & 9th O Christmas tree stamp set.
I die cut different sizes of tags from white card, using the MFT Traditional Tags Die-namics and Lawn Fawn Essential Sentiment Banners dies.
I chose a black and gold colour scheme (my favourite for Christmas this year), and used a mix of the different stamps and sentiments to create various designs. I added in some extra details with the Mama Elephant Basic Borders stamp set.
For the gold stamping, I used Versamark ink and Hero Arts gold embossing powder.
For the black stamping, I used Versafine black ink and heat embossed with Hero Arts Sparkling embossing powder. A black sparkle embossing with Versamark ink would be a great alternative to achieve the same look.
Team these tags with simple brown wrapping paper and twine for a classic Christmas look.
Have a lovely day.
![]() |
| Hero Arts Gold Embossing Powder |
![]() |
| Mama Elephant Basic Borders |
![]() |
| Concord & 9th O Christmas Tree |
![]() |
| MFT Pierced Traditional Tags |
![]() |
| Hero Arts Sparkle Embossing Powder |
![]() |
| Lawn Fawn Everyday Sentiment Banners |
Monday, 21 November 2016
A Wintry View
Hello there :)
I'm back with Christmas inspiration this week and one of those cards that perhaps isn't good for production line crafting but ideal for those special people we make cards for this time of year...
I've made a wintry scene using three different stamp sets and you open up
the layers to reveal the view and greeting...
The first layer you open are the bench and lamp post from Lawn Fawns Winter in the Park which are just stamped in black ink and I used the matching dies for some partial die-cutting too.
This reveals the second layer which are very basic shaped trees from MFT's O' Christmas Tree.
I think the simple shading and bold shapes adds colour but not too much detail to compete
with the final layer which is the town view...
All the images on this base layer are from Mama Elephants City Sidewalks... I love those buildings, so whimsy... so it totally doesn't matter that they seem to be very isolated in the wintry landscape Lol :) The sky is blended with distress inks over the white heat embossed greetings and moon, I then added dots with a white gel pen for some dainty snowflakes :)
The card is made up of three pieces, I thought it would be easiest to start at the front of the scene with the bench and lamp post layer so I could work backwards. I ended up with three panels like this
To attach them to the base panel I scored and folded a flap to make a hinge..
The card could support itself but I felt I should make a card stand to attach to the back which also helped to cover the hinges and marks where the copic marker had bled through.
I took a piece of card slightly larger than the base card so a small white border would show and then cut three sides of a rectangle to make a leg and then valley and mountain folded a strip of card to support that leg. I flipped it over and added tape adhesive like so...
Here's what it looks like all together..
It was a lot easier to make than it looks... making three separate pieces was the key to that.
You could easily make it a winter card rather than Christmas or use foam tape for the layers instead of hinges and frame your scene for a piece of festive decoration.



Apologies for the long, photo heavy blog post but I hoped they help
to see how the card was assembled :)
Thanks for stopping by
Jenny x
Sunday, 20 November 2016
Cakes and Trees
I love blogging - where else can you bundle together something as random as cakes and trees and it still make sense! Today I have two completely different cards to share - one fun interactive birthday cake card and one Christmas card inspired by trees and forest theifs!
It's the first time I've used the Interactive Birthday Cake die set from MFT but it won't be the last - it is such a fun set to make pretty quick and easy birthday cards with lots of impact! It looks really complex but it really isn't. I just used two shades of card and cut the layers and icing and decorated the bottom layer with some fun enamel dots.
To create the inner layer you just use the little channel die that comes in the kit to cut a channel in your base layer and sandwich a slider (or spinner would work too) element between your cake and pull tab which also comes in the kit.
Stick that layer onto your base card (I just used some old dp that matched the colours in the cake to make it more fun) using foam tape (ensuring your tab can still run freely) and then the recipient can pull the tab to reveal the hidden message from the corresponding Twice the Wishes stamp set which has great birthday themed stamps that work with lots of other images too. My top tip for the sentiments is to curve them slightly to match the shape of the cake. The bottom layer of the cake needs to be secured over the inner layer with just a very thin strip of foam tape down either end when the inner layer is in the "bottom" position. I added a few candles (also in the die kit) to cover the channel and make it more festive.
I also really wanted to play with the new tree die from Avery Elle this week. I was really excited by this set but I think it's hard to see what it "does" when you just see the raw die.
Basically with two branch sides and one straight side, you can create a wide variety of trees in whatever width suits your project :-) It also includes some fun elements like knot holes in two sizes for critters to live in, a carved heart for valentines projects, a little bird house and some different shaped leaves. It's a really versatile set for the price.
In my project I had the idea of the animals wanting to trim up the forest for Christmas so I created one chunky tree from kraft card stamped with Whimsical Woodgrain back ground stamp and used one of the knot holes to create a home for the chipmunk to hide his string of lights in. The cardinal is busy tying a bow on the branch to hang his stolen ornament and I just couldn't resist adding the new beaver from Wood You by Avery Elle as I just adore him and I thought he just looked really happy and pleased with the decorations! For the sentiment I went back to an old favourite from Wplus9 - Festive Greetings which is just back in stock. The critters and ornaments are from Joy to the Woods.
NEWS FROM THE STORE
- We will have some Wplus9 restocks in store shortly.
- We have a few new Echo Park paper collection sets expected this week.
- Our Lawn Fawn restock is STILL in transit - it got held up in US customs for two days and is now currently on hold in Leipzig, Germany. We hope it will be here early this week but we are powerless to do anything about it.
- We have the new release from Altenew in transit along with restocks on ALL the inks including the new full sized packs of the new pink/teal and brown sets. We have some restocks too but not everything was available at the time of our order.
- The new release from Newton's Nook is also in transit so should be with us in time for release.
- We will also be placing an order for the new release from Winnie and Walter but as we didn't find out about it until late last week, it won't be here for release day.
- We have more Perfectly Penned from Concord and 9th in transit too but as we just got that set, it isn't coming the fastest way so may take a couple of weeks to reach us.
- We are also ironing out the final issues with our gift vouchers so hope to have those online by the end of the month, it is quite complex as we have to fit in around 2 different development teams time schedules so things keep slipping (we've been working on them for months!) but I have expressed the desperate need to have them in time for Christmas. Unlike our previous vouchers, these are no longer handmade cards, you will get an automated email response including a printable voucher you can either email on to the recipient or print off and put in your own card. As the store has grown I just don't have the time to make them by hand anymore - sorry. The bonus now though, as a digital download, they are postage free and you will get them within 15 minutes of purchase ;-) Watch this space for news of their arrival.
Subscribe to:
Posts (Atom)