
If like me you've been resisting buying another machine for your craft room, then you may think the current trend for hot foiling dies is not for you. Well, I caved and bought a machine last week, and although I did love the result, I wanted to challenge myself to see if the new foiling dies we have can be used WITHOUT a foiling machine - and I have 7 cards below all done without the machine as well as 1 with it, so you can see the original look too. All the cards were made with one die - the Impressive Snowflake Die from MFT and one stamp set - Mistletoe Messages from Concord and 9th.
1) Hot Foiled
So for those of you like me with no will power who bought a foiling machine (I have the spellbinders glimmer which fits in my existing die cutting machine and I found super easy to use - this card was actually my first ever try with it) then this is how the foiled impression looks.

For those of you don't know about hot foil dies (and until last week I didn't!) basically you get a hot plate that replaces the bottom platform of your die cutting machine. You plug it in, once its hot you put the die on, place your foil (coloured surface down) on top of the die and press the timer button. Once the time is up, pop your cardstock on top, place the relevant plate that comes with your foiling machine on top of that and run the whole sandwich through your die cutting machine and it foils and debosses at the same time so you get a foiled letter-press look to your finished image. All the foils we stock are heat activated so will work with your hot foil machines. Here I used copper on some teal card and the sentiment I stamped and embossed with copper embossing powder.
2) Glue Pen Foiling
For those of you who would love to get the foiled look, but don't have or don't want a foiling machine, then I've had a play and there are ways you can do it.

For this look I just ran the impressive die (in this case impressive means to leave and impression rather than being brilliant but it is that too!) through my die cutting machine with my embossing mat in the sandwich and then turned it over to work on the embossed side. I used a fine glue pen and traced over the embossed lines and once the glue was tacky, I placed a sheet of teal foil over top and set it aside for 10 minutes so it could fully dry, a gentle rub and then peel back and hey presto - foiled look with no expensive machine required.
2½) Glue Pad Foiling
I also think you can do it on the debossed side using a glue pad to ink up the die with glue before running it through the machine, then clean up the die place foil over the glue and run it back through to get the foil look more like the hot foil, but when I tried it this morning my flitter glue was dried up so I'll have to get more and give it a go later for you.
3) Embossing/Debossing
The dies work brilliantly for just leaving an embossed/debossed design in your card stock. For this one I just went for the straight forward embossed on white using my embossing mat in the sandwich - its a really crisp embossed texture.

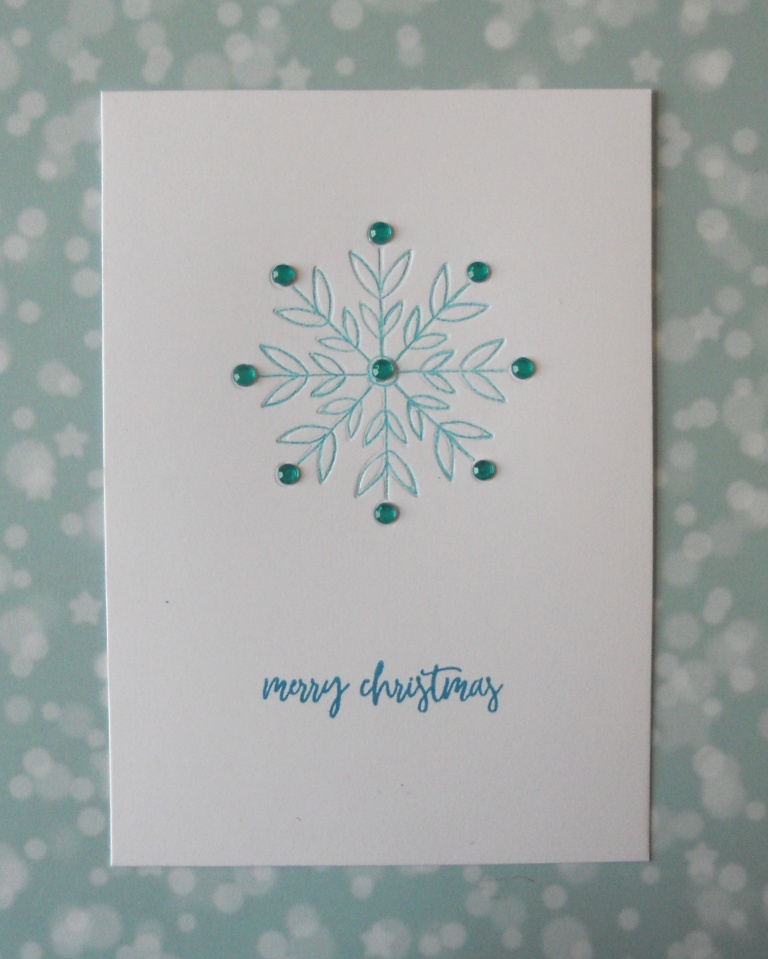
4) Shallow Embossing
This one came out by accident - I got the sandwich wrong and the mat was behind the die (doh!) so the die only debossed the card very slightly as it had nothing soft to press into but it did leave a subtle pattern and I kinda liked it - so I just traced over it with a coloured pencil so it showed up better on photos (irl I would probably have left it as was as I liked the subtlety) I added some gems for sparkle too.

5) Letterpress
By inking up the die (using really light dabs to ensure it only sits on the top) then you can get a letterpress loo to add more drama to the embossed impression. Here I used navy cardstock and inked up the die with Unicorn White ink.

If you swap it round on white cardstock with a darker in you get a really dramatic look!

6) Embossed Letterpress
By taking it a step further - you can ink up your die with versamark and then sprinkle on embossing powder - that's how I got a whiter look to the snowflake here.

7) Glitter Fill
For this last one, I debossed the die as before with my embossed mat in the die cutter and then used sea spray stickles to fill in the debossed lines with lots of festive glitter!

Hopefully that's given you lots of ideas for how to get the most of impression dies - with or without a hot foil machine!


NEWS FROM THE STORE
We are expecting deliveries from the following brands this week:
Catch you later
Tara
1) Hot Foiled
So for those of you like me with no will power who bought a foiling machine (I have the spellbinders glimmer which fits in my existing die cutting machine and I found super easy to use - this card was actually my first ever try with it) then this is how the foiled impression looks.

For those of you don't know about hot foil dies (and until last week I didn't!) basically you get a hot plate that replaces the bottom platform of your die cutting machine. You plug it in, once its hot you put the die on, place your foil (coloured surface down) on top of the die and press the timer button. Once the time is up, pop your cardstock on top, place the relevant plate that comes with your foiling machine on top of that and run the whole sandwich through your die cutting machine and it foils and debosses at the same time so you get a foiled letter-press look to your finished image. All the foils we stock are heat activated so will work with your hot foil machines. Here I used copper on some teal card and the sentiment I stamped and embossed with copper embossing powder.
2) Glue Pen Foiling
For those of you who would love to get the foiled look, but don't have or don't want a foiling machine, then I've had a play and there are ways you can do it.

For this look I just ran the impressive die (in this case impressive means to leave and impression rather than being brilliant but it is that too!) through my die cutting machine with my embossing mat in the sandwich and then turned it over to work on the embossed side. I used a fine glue pen and traced over the embossed lines and once the glue was tacky, I placed a sheet of teal foil over top and set it aside for 10 minutes so it could fully dry, a gentle rub and then peel back and hey presto - foiled look with no expensive machine required.
2½) Glue Pad Foiling
I also think you can do it on the debossed side using a glue pad to ink up the die with glue before running it through the machine, then clean up the die place foil over the glue and run it back through to get the foil look more like the hot foil, but when I tried it this morning my flitter glue was dried up so I'll have to get more and give it a go later for you.
3) Embossing/Debossing
The dies work brilliantly for just leaving an embossed/debossed design in your card stock. For this one I just went for the straight forward embossed on white using my embossing mat in the sandwich - its a really crisp embossed texture.

4) Shallow Embossing
This one came out by accident - I got the sandwich wrong and the mat was behind the die (doh!) so the die only debossed the card very slightly as it had nothing soft to press into but it did leave a subtle pattern and I kinda liked it - so I just traced over it with a coloured pencil so it showed up better on photos (irl I would probably have left it as was as I liked the subtlety) I added some gems for sparkle too.
5) Letterpress
By inking up the die (using really light dabs to ensure it only sits on the top) then you can get a letterpress loo to add more drama to the embossed impression. Here I used navy cardstock and inked up the die with Unicorn White ink.

If you swap it round on white cardstock with a darker in you get a really dramatic look!

6) Embossed Letterpress
By taking it a step further - you can ink up your die with versamark and then sprinkle on embossing powder - that's how I got a whiter look to the snowflake here.

7) Glitter Fill
For this last one, I debossed the die as before with my embossed mat in the die cutter and then used sea spray stickles to fill in the debossed lines with lots of festive glitter!

Hopefully that's given you lots of ideas for how to get the most of impression dies - with or without a hot foil machine!


NEWS FROM THE STORE
We are expecting deliveries from the following brands this week:
- Newton's Nook
- Altenew
- Avery Elle
Catch you later
Tara
What a great comprehensive tutorial - thanks Tara x
ReplyDeletewas the die a hot foil die or a regular die - If you get my drift .Great tutorial - I have the GHF machine too ,very helpful
ReplyDelete