Showing posts with label Altenew Coffee Love. Show all posts

Saturday, 30 June 2018

Darling I Love You More Than Coffee Shaped Card

Hi everyone, Taheerah here wishing you a happy Saturday!

I can't say I'm much of a coffee afficionado. I love the smell of it, but my sweet tooth just doesn't handle the taste. I have recently tasted a couple of cups that I could tolerate, but that's about as far as it goes.

My partner, however, loves the stuff.

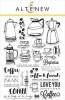
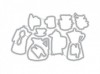
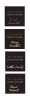
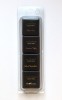
So when it came to creating a little love note for him, I just had to reach for the Lil' Inker Designs To Go Coffee Cup Gift Card Holder die. It's just perfect with its clever design which can house a gift card (or a little love note) and uses the cardboard cup holder design to keep the card closed. Genius!

I couldn't wait to put it to use:


Isn't the finished look awesome?!


I die cut the card, lids and cardboard holder and prepared it for assembly. I adhered the lids on both sides of the 'cup' using dimensional glue gel.


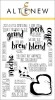
The cardboard cup holder uses a sentiment from the perfectly themed Altenew Coffee Love stamp set. It's even just the right size to fit on it! The additional handwritten sentiment on the cup mimics the cups in coffee shops when you're ordering your coffee to go!

I'd love to hear what you think of this card. Is there someone you know who'd love to receive it? Thanks for stopping by!


Monday, 6 March 2017

Dad's Coffee!!

Hi there :)

I have just the thing for all you coffee lovers on a Monday morning....
 a coffee coloured and coffee themed card!!  


Altenew's Coffee Love set is great for guys cards as well and just to prove it they've
 included a mug in the set with DAD written on it so I had to use it as part of
 the sentiment on a card for my own dad :)

I went with a monochromatic palette and tried a bit of ink smooshing for the
 background, the images are stamped and water-coloured before trimming them out but 
dies are available for this set. I used an oval shadow die-cut to ground the images and
 nestled a sentiment from a Waffleflower set, in the space above the mug.


I've used Avery Elle's Finished Frame to cut the panel and the Card Easel die to cut a stand 
into the base so the card will stay upright .... have to say my dad was most impressed 
with that part of the card, he thought it was a great concept!!


Thanks for stopping by... I'm off to have a coffee now :)
Jenny x

Thursday, 27 October 2016

Coffee & Flowers


Hello there and happy Thursday, Lydia here with you today.

I have gone for a monochromic look, I thought the browns would go with the coffee theme.


For the floral images I have used Vintage Roses and Vintage Flowers. I stamped three of the large leaf stem from Vintage Roses onto the card base with Caramel Toffee, Paper Bag and Dark Chocolate Crisp Ink for the three layers.


I then stamped the coffee pot from Coffee Love onto white card and cut with the coordinating dies. I then stamped the same coffee pot onto some patterned paper. I stamped some leaves onto the bottom of the pot using the same colours before adding a light mica powder over the top- this helps the leaves blend a little more into the 'pattern' on the pot. I then cut this patterned piece out and stuck it on top of the image on the die-cut piece.


I stamped a rose (Vintage Roses) and some leaves (Vintage Flowers) using the same inks and then die cut these with the matching dies. I then assembled the pieces on the card base with foam pads. To finish I added a sentiment from Coffee Talk.

Thanks so much for stopping by and I hope you like the mix of flowers and coffee!

Hugs, Lydia x


Monday, 12 September 2016

Coffee Coasters


Hello crafters :)

I'm always thinking of ways to use my stamps for different types of projects so when I bought the Coffee Love stamp set by Altenew recently I knew just what I wanted to make ;)

I bought a couple of MDF coasters at a local craft show a few weekends ago and painted them with two shades of chalk paint so I could distress the edges with some fine sandpaper then I set about stamping out my coffee design....


I used Versafine Onyx black ink to stamp my images and text, it needed stamping twice to make the black nice and intense but then you have to give it a good few hours to dry before adding the colour.


To add colour to the images I made a negative mask with a post it note and then sponged colour in from the left side to give intense shadow one side and highlights to the right.... I think less is more when it comes to adding the colour. The espresso pot is coloured using a grey Versafine ink, I used the same ink to stamp the coffee beans around the edge too :)


The retro coffee pot is coloured using Hero Arts Pool ink in the same way I described above. To make them durable for your coffee cups and mugs, the coasters will need a coat of varnish.... I left mine a full 48 hours before attempting to do this so the ink had time to dry fully. 

These are intended to fit in nicely with the colour scheme of our lounge..... when we finely get round to decorating it!! Haha.... hopefully before Christmas.... but they would make great gifts too :)

I hope you like them and feel inspired to use your stamps for house decor projects too... here are the fabulous sets I used..


Thanks for stopping by :)
Jenny x