Showing posts with label Avery Elle Waves Ellements. Show all posts

Tuesday, 28 August 2018

Jawsome Day


Today I’m sharing a fun underwater card, featuring the Lawn Fawn Duh-Nuh stamp set. The star of the show is definitely that gorgeous Avery Elle Waves Cover die, though.


I began by blending distress oxides on to a piece of white card. I used peacock feathers, salty ocean and broken china. I flicked it with water to create the water droplets, then put it aside to dry.

Next, I stamped, coloured and cut out the shark and fish from Lawn Fawn Duh-Nuh stamp set.


Going back to my distress ink panel, I added some stick it adhesive to the reverse, then die cut a circle from it. I ran the circle through my die cutting machine again, this time with the Avery Elle Waves Elle-meant cover die. The stick it adhesive kept the pieces together when I removed it from the cover die.

I used two more circle dies to cut a frame from my distress inked panel. I adhered this to a white card base. I then took the pieces from the circle die cut and adhered them within the frame. I used every other piece of the die cut, to allow the white card base to show in between and the pattern to be more obvious.


Below the wave circle, I stamped a sentiment - a combination of the sentiment in Duh-Nuh and a sentiment from the Reveal Wheel sentiments stamp set.

I added the shark and fish to the circle with foam tape, then embellished the card with a few clear droplets to finish.


Thanks for joining me today,
Gemma

Avery Elle Waves
Lawn Fawn Duh-Nuh
Lawn Fawn Reveal Wheel Sentiments


Hero Arts Circle Infinity dies

Tuesday, 6 March 2018

A Wave or Two


The Avery Elle Waves Elle-ments die is the star of the show on my post this week. I've created two very different cards to show how versatile cover dies can be.

For the first card, I blended on blue ink to create an ombré effect, I added stick it to the back of the card before running it through my die machine with the waves cover die. I really recommend stick it adhesive sheets for intricate dies like this.


I added the die cut frame to a grey A2 notecard, then added some of the wave pieces back in to the die cut. 

I die cut a vellum tag, heat embossed a greeting onto it from the Avery Elle Sentimental Too stamp set, then added a glitter die cut from the Sentimental Too die set. Some enamel dots finish this card.


It seemed a shame to waste the other blue wave pieces I didn't use on that card, so I used them to create another waves card with a very different look to the first.

I die cut the waves cover die again, this time from white card. I popped out all the pieces and added just the frame to a white notecard. I then added the blue wave pieces into the gaps they fit.


I added Images from Lawn Fawn Mermaid For You and Duh Nuh to create an underwater scene. I finished the card with a tag sentiment.


Two very different looks from the same cover die. I love both these cards - do you have a favourite?

Thanks for joining me today,
Gemma

Avery Elle Waves
Avery Elle Sentimental Too Dies
Avery Elle Sentimental Too Stamps
Lawn Fawn Duh Nuh

Stick It Adhesive
Lawn Fawn Mermaid For You


Tuesday, 12 September 2017

Big, Bold, and Gold Happy Birthday

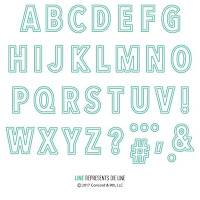
I'm sharing another typographic card today, featuring the Concord & 9th Double Cut Alphabet die set. 


I went for a striking colour combination of black and white with gold for this card, and ended up making several of them. 

I die cut the letters for 'happy birthday' from the MFT Black and White basics paper pack. I love this paper pack which features only black and white graphic prints - no need to ration the black and white papers from other packs now!


I also die cut the letters from gold metallic card stock. I'll use the gold letter outlines for this card and can keep the rest of the letters for another card.

I used a cover die for the background, so I could add detail to the white card base, without adding anymore colour. Any cover dies would work well for this.


I arranged the letters on the card, adhering them with liquid glue. I decided against adding any finishing touches, as I wanted the letters to be the focus.


I think these cards work great for masculine birthdays, with the big bold sentiment taking centre stage.

Below is another example I made, with a slightly different slant on the same technique.


Have a lovely day,
Gemma

C&9th Double Cut Alphabet
Lil' inker Stitched Woodgrain


MFT Black and White Paper Pack
Avery Elle Waves