Showing posts with label MFT Peek-a-boo Windows. Show all posts

Friday, 15 June 2018

Get your rocks off & ROCK ON!

Hi everybody,

Jill here, and this week I’m getting my Rock’s off....


...by getting my Rock’s on using the incredible ‘Rock On’ from Waffle Flower!


This set is so awesome.  You can make the little winged bugs anything you want by colouring however you like.  There’s just something about them that makes me smile.  They have absolute killer rock star attitude and I am LIVING for it!  The little guy with the drum though....
This was such a simple card to make but when sets have as much character as this there’s really not a lot needs doing with them!
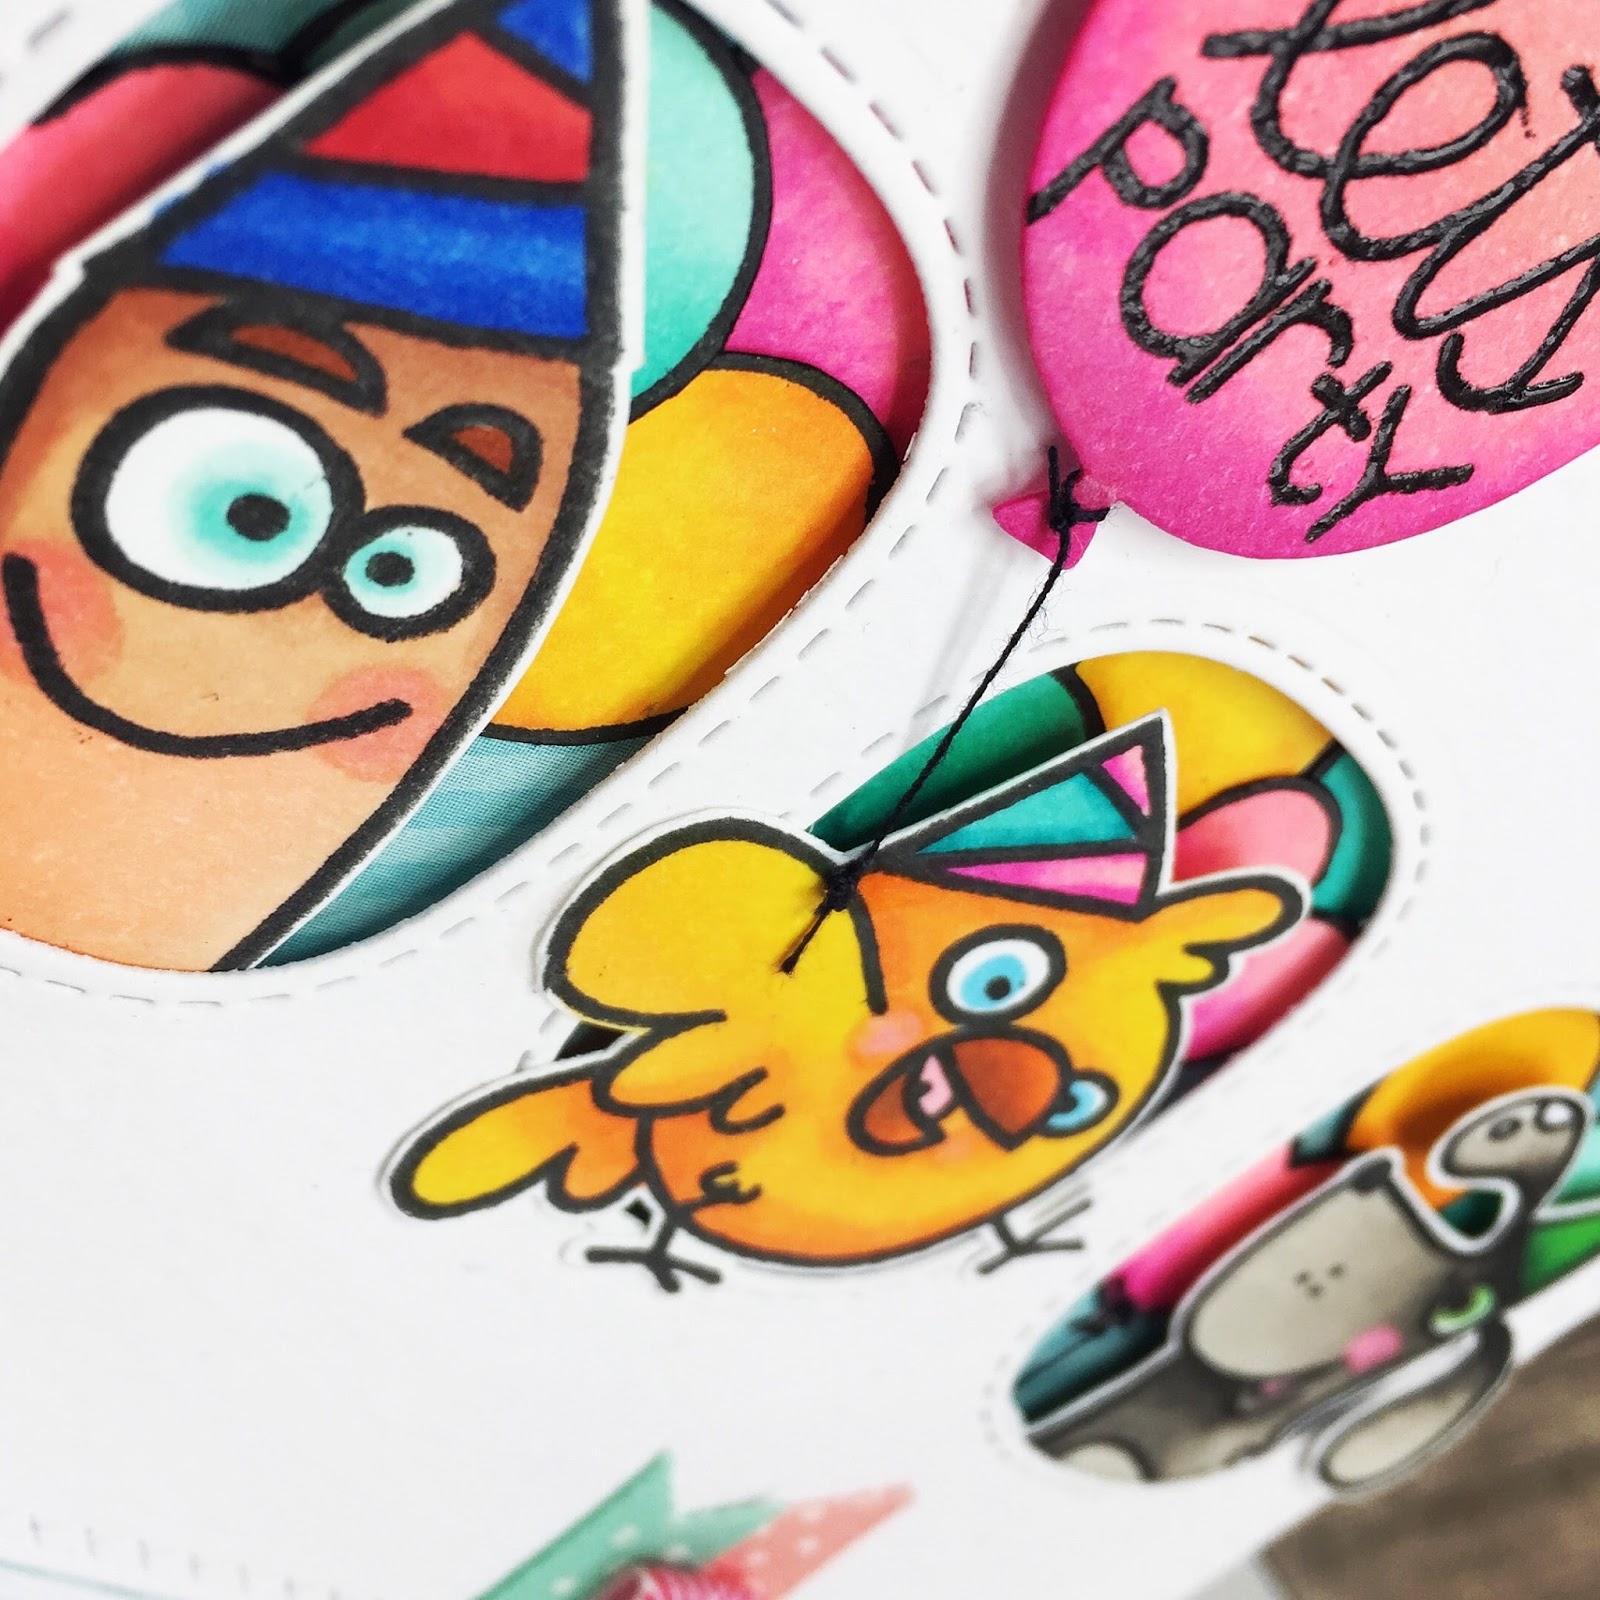
I started by creating a quick watercolour wash across a piece of cardstock as my background, adding a ton of flicks and splashes to add interest.  I then cut MFT’s Peek-a-boo Windows from a separate piece of card and adhered over top using foam tape. 
I then got to the fun part of stamping out and colouring my bugs.  I decided to make mine bee’s because bees are awesome and so are these guys!  Once coloured I fussy-cut, added a coat of Glossy Accents to their wee wings, and placed over each ‘peek-a-boo’ hole.


My sentiment is from the same Rock On set and is stamped into a frame from Lawn Fawn's Flirty Frames set.  Oh, and just for a change (wink wink), I coloured all my card with my trusty Zigs.

I really hope you like it and simple rule for life...ROCK ON!

As always everything I used is linked below.  See you next week.

Jillx

Rock On  Stitched Triple Peek-a-Boo Windows Dienamic


Flirty Frames Image 1  Zig Clean Color Real Brush Pen (24 piece set)

Monday, 7 May 2018

Be a Little Shellfish

Hello, Gemma here on a Monday as I've swapped days with Jenny this week.
This sentiment makes me laugh every time I see it! The Year Six stamp set is another great mini set from Lawn Fawn.


For my card today, I began by cutting square card base, along with a square piece of card the same size. From that, I cut out a MFT peek-a-boo circle window

I blended blue ink onto vellum, then cut it with some MFT ocean wave border dies to get two vellum waves. On another piece of vellum, I used a lighter blue ink to create a sky area.

I layered these onto the card base so they would show through the peek-a-boo window. For a sand bank, I die cut a piece of yellow watercolour paper with a Lawn Fawn stitched hillside border die, then layered this onto the card base too.


I added lots of foam tape behind the card panel, then attached it to the card base. Then I added the shellfish with foam tape too, and a little fish from the Lawn Fawn Duh-Nuh stamp set in amongst the waves. Both are coloured with alcohol markers and Wink of Stella glitter. I also added some white gel details to the shellfish.

At this point, I realised that I'd forgotten to add the sentiment! Luckily, a stamp positioner helped me to stamp it without making a mistake.

Thanks for joining me today,
Gemma


Friday, 8 September 2017

Partying with Birthday Buddies

Hi everybody,

Jill here, and this week I'm partying with some old friends...


...using Paper Smooches Birthday Buddies.


This set is from way back when and is still absolutely amazing.  It is Jam packed with fun-filled characters and cute punny sentiments all in a cool quirky font.  It was an absolute pleasure to be reacquainted with these brilliant Birthday Buddies.
I started my card by stamping out all of the characters I wanted to use from the Birthday Buddies set and coloured them brightly using Copics. I then fussy-cut.  I also stamped out, coloured and fussy-cut a ton of balloons from Paper Smooches Hullabaloo set to use as a fun colourful backdrop.
I then used my Peek-a-boo die from My Favourite Things to cut my panel and built up my scene behind it using wet glue and foam adhesive to give dimension.


I then matted my panel onto a piece of patterned paper and mounted onto a card blank.  My sentiment is from the Hullabaloo set which I stamped onto a balloon and added a string.
I embellished with a cluster of ribbon tabs and flags to tie the whole design together, and there you have it.


I really hope you like it and it inspires you to give some of your older sets a fresh outing.

As always, everything I used is linked below.

See you next week.

Jillx

Birthday Buddies Image 1Hullabaloo Image 1Stitched Triple Peek-a-Boo Windows Dienamic

Friday, 26 May 2017

Otterly obssessed.

Hi everybody,

Jill here, and this week I am going otterly adorable with a peek-a-boo window card...


...featuring the delightful Otterly Adorable from Mama Elephant.


I am otterly obsessed with these amazing creatures, they are soooo cute, sweet, and adorable and best of all...they hold hands with each other when swimming so they don't float away!!!  I mean...gaaaaah *heart bursts into a million pieces*  
So every time I see this sweet set, it just makes me smile and makes me want to ink it right up.

I've spoke before about how obsessed I am with my My Favourite Things Stitched Triple Peek-a-boo die and because there's a ton of different images in the Otterly Adorable set, all doing different things & swimming different ways, I thought it would work perfect to have a little group of them swimming along and 'peeking' through the windows.


It was a very simple card to make.  I started by colouring a piece of card in sea greens and blues to use as my background and, using the cloud border from Mama Elephant's Landscape Trio dies upside down, cut some waves from it.  I then stamped out all the images I wanted to use and clear heat embossed them so I had a raised edge ready to colour with my Zig Clean Colour Real Brush Pens.  I used them with water to create a watercolour finish.  My sentiment is from the same Otterly Adorable set and is stamped out and heat embossed within the banner from Lawn Fawn's Penelope's Blooms.  To add a little 'something something' to my sentiment banner I inked it up from the back in matching colours to background and waves.


I built up my little scene how I wanted it to look from behind the Peek-a-boo windows using wet glue and foam tape and embellished with a scattering of pretty clear sequins.
I adhered my vellum banner in place by placing a teeny bit of wet glue behind the most bold outlines and letters so that it is barely visible.


I really hope you like it and that these adorable otters make you as happy as they make me!

As always, everything I used is linked below so be sure to stop by.

See you next week.

Jillx

Otterly Adorable    Stitched Triple Peek-a-Boo Windows Dienamic
 Zig Clean Color Real Brush Pen (48 piece set)  Penelope's Blossoms Image 1

Thursday, 11 May 2017

Hey Gullfriend!

You've got me again today - sorry!

I made a really quick but really fun and cute card with the ADORABLE new seaside gulls from MFT which I just love (not so much the real things when they try to nick your dinner on Scarborough seafront but in stamp form I can appreciate them in safety!)


I wanted to feature the dude proudly posing on his post so went for a simple shaker using the new rectangle shaker pouches framed with their co-ordinating Peek A Boo die.  I added a scrap of pearly blue card behind the window and stuck my fussy cut gull to it with foam tape to get him to stand out inside the shaker.  I used a hand full of ombre sequins from Hero Arts to make my shaker element which represents the sea.  I like these mini shakers as they are much less fussy to make than the ones that require lots of foam tape - with the shaker pouches you just need normal tape and you're good to go!

Right - lots more stock to process and orders to get out of the door so best get back to it - see you Sunday!

Tara


Friday, 21 April 2017

Spreading a little lunar love.

Hi everybody,

Jill here, and this week I've got some sweet little Lunar Animals...


...spreading a little love from My Favourite Things Peek-a-boo Windows Dienamic.


I have eyed this die up for soooo long, but wasn't sure I 'needed' it, (I've been trying to be a good girl...to avail), but eventually bit the bullet and treat myself...and now I can't put it down!  It is so simple yet so effective, I absolutely love it and can see me getting so much use from it!  Awesome buy :)


I started by cutting the fabulous Peek-a-boo die and doing a little ink blending on the back card in the areas which would 'peek' through.  I then took the adorable, and one of my all time favourites, Mama Elephant's Lunar Animals and stamped out onto some watercolour card.  I coloured all my images using Zig Real Brush Clean Colour Pens and fussy cut, leaving a neat white border.  I then placed my little Lunar Animals behind the Peek-a-boo die and adhered in place.  


My sentiment and little speech bubbles are from Mama Elephant's Everyday Greetings and are stamped in pale grey ink to keep the card light and bright.  I finished by adding a little heart balloon from Lawn Fawn's Hello Sunshine which is stamped using Zig Pens, and to which I added a piece of thread as the balloon string for a little added cuteness.


 I adhered my top panel over my background using foam tape to add some nice dimension and finished by adding a cute enamel heart.

I really hope you like it.  As always, everything I used is linked below.

See you next week.

Jillx

Stitched Triple Peek-a-Boo Windows DienamicLunar Animals Image 1Hello Sunshine Image 1


Everyday Greetings Image 1Zig Clean Color Real Brush Pen (12 piece set)