Tuesday 31 July 2018

Bold Sentiments


Hello, Gemma here today, sharing two cards featuring bold colour and sentiments. 

I took inspiration from a card sketch I found on Pinterest. I often look for sketches when I'm stuck for an idea as they can be a great starting point.


I began by cutting strips of white card - each 2 cm tall x 9.8 cm wide. I then blended on distress oxide inks in blues and pinks (including two of the new colours - spun sugar and tumbled glass!).


Next, I stamped a greeting from the Neat & Tangled Celebrate stamp set onto each card strip. A stamp positioner is really handy for this part.

I stamped the large 'Celebrate' on to two card bases, then added the coloured strips of card above with foam tape.


Thanks for joining me today,
Gemma

Tim Holtz Travel Stamp Platform
Neat & Tangled Celebrate


Distress Oxide Inks

Monday 30 July 2018

Low on Caffeine

Hello hello 😃

I'm back with another coffee themed card..... well, it's never far from my mind 😉
This design was heavily inspired..... okay, a total CASE of this graphic on Pinterest 
because I thought it would work well on the Letter Message Board die from Sugar Pea Designs...


I used the Lil Inkers Coffee Cozy die for the take out cup and cut the base part twice, using a knife and ruler I trimmed one of the shapes on all sides so it was smaller. To make the three gauge sections I removed two narrow strips across the diagonal and then coloured two of the pieces grey and one red. I love the strong contrasting colours of the graphic so kept mine just the same... it also means it makes a great card for both the guys and gals 😉


Thanks for stopping by :)
Jenny x

Sunday 29 July 2018

City Blending

I couldn't wait to open the newest colours in the Distress Oxide range - and my favourite way to use them is for ink blending as they really make is SOOOOOOO easy!   So I decided to create a simple city scene using the AlteNew stencil and inks and pretty much nothing else....


If you've never given ink blending a go, or have tried it with poor results (as I often did in the past!) then trust me, distress oxides are your friend!  There is NO smoother, more blendable ink on the market that I've tried and it works for me every time.

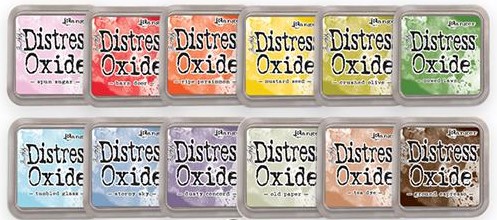
I started by masking off the back edge of my card with post-it tape and then blending tumbled glass from the new colours (set 4) to the top.


Then I added the stencil over the top of the blue and did my first layer of city with hickory smoke (set 3)


For the next layer I used Dusty Concorde (set 4 again), moving the stencil over slightly to get different buildings on show, and as it was a darker shade I didn't even bother to clean the stencil in between colours.


Finally I went in with black soot (set 2) for the final layer as it is the foreground so you want a bolder colour.  This time I flipped the stencil around and used the other city skyline for a different look.


I went with a sentiment from Reverse Confetti's birthday wishes stamp set as the city made me think of New York and the "big" in the sentiment lead me to the "big apple" so I thought it fit.  I stamped and embossed it using Hero Art's Detail White embossing powder.  Again - if you've ever had trouble getting a crisp finish to your embossing then do try Hero Arts detail powders (currently in black or white) as I have found them to give me a brilliant finish even on the finest of details and outlines.  I added a little balloon (Waffle Flower Limo set but you will find a balloon on tonnes of your stamps I'm sure!) wafting over the city for a little bit of detail.


So if you are unsure if blending is for you - I do hope this encourages you to give it a try.  It opens up a whole world of techniques!


NEWS FROM THE STORE

It will be a quieter week for stock this week - the only confirmed delivery is a VERY LARGE restock delivery from AlteNew which should be here on Monday but may not be in store until late Monday or early Tuesday depending on what time the driver arrives - we're finding they are all coming late as they are covering holidays for each other and don't know the routes.

We have the latest Waffle Flower release in transit but not sure when that will arrive as yet.

As we're heading towards the first week of the month however, all our regular monthly brands will start to send us our previews next week so we'll be busy ordering them all for you.

We already have Avery Elle and Lawn Fawn's HUGE Fall releases on order and they will be in store for release day on 9th and 23rd August respectively.   WE DO NOT DO PRE-ORDERS so check the store on those dates to grab your stock as soon as it arrives to avoid sell outs.

Hope the weather isn't too stormy or too hot depending on where you are this weekend.

Happy Crafting!
Tara


Saturday 28 July 2018

Happy Birthday, Woof!

Hey stampers, Anni here!

Yesterday it was the birthday of a crafty friend of mine. Cards for crafty friends are always special and very important because you know the card goes to someone who appreciate it.
That's why I wanted to make a card especially for her and not take one from my stash.


She really loves dogs so I went through my stamps looking for a dog stamp. There were more than one (of course) but I thought Mama Elephant's The Dog's Woof would be a good choice. But I wanted to use it in a different way then using the image as a whole. The idea was to create circle windows forthe dogs to peek through.


So I started by creating the front panel. I cut three circles from the cardstock as windows.
I stamped the image twice and circled the areas I wanted to use using the circle windows as my guide. For the colouring I used alcohol markers. When I fifnished the colouring I fussy cut the parts I needed.

Then I created a background using ink blending. I chose shades of blue and turqoise. I didn't create an ombre effect but added splotches here and there and blended them into eachother.


For the sentiment I decided to go with a simple Happy Birthday I found in Mama Elephant's Woodland Gifts. I die cut a banner from My Favorite Things' Stitched Sentiment Strips and heat embossed the sentiment in white.

Thanks for stopping by and have crafty weekend.
Anni


Friday 27 July 2018

Off the edge Birthday Fishes

Hi, Tara again today with a super cute card featuring one of the new squidgies from Stamping Bella.  I'm a big fan of Stamping Bella as I love to spend time colouring her images as you can go simple or go for lots of detail too as they are nice large focal images and this little dude reminds me of my Dad as fishing was his hobby.


I used my home-made stamp positioner (a few blocks of lego) and got him stamped right up to the edge of my card and then I coloured him in with pencils.  Putting him right to the edge was important for my design as I wanted the fish to be "hanging" off the edge.  So I drew a pencil line down the edge of the card just inside the fish and used scissors and a craft knife to cut along it and carefully around any bits of the image that were hanging over.  I added a mm of white space either side of the fishing line so it wasn't too fragile on the finished piece.  You could get a similar effect with partial die cutting using the co-ordinating die if scissors aren't your thing.


I wanted to make it a birthday card so took a sentiment from MFT's Gill Friends set and after masking off the stamped image just repeat stamped it up the card to get a decorative border of sentiments.

To finish off the card I added a strip of patterned paper from the Fun Time pad from Reverse Confetti to the edge of the "inside" of the card.   Hanging elements over the edge of your card is a neat trick and not something you tend to find on commercial cards so it helps people know it was handmade for them.

OK thats' all from me today - I'll be back on Sunday with some more projects.

Tara


Thursday 26 July 2018

Wedding Card for the Cutest Couple

Hey stampers, Anni here!

A friend of mine married some time ago and I made this wedding card for her and her husband.


There are not a lot of wedding stamp sets in my stash but one I love very much is Mama Elephant's Oh Happy Birds. There are beautiful sentiments and super cute images in this set.

I started by stamping, colouring and fussy cutting the images I wanted to use.

Then I die cut a square from cream cardstock using My Favorite Things' Inside/Out Stitched Square STAX. On this square I stamped the initials of the couple. Unfortunatly this alphabet set is not longer available at Seven Hills Crafts. But there are over 70 other alpabet stamp or die sets to choose from - I bet you'll find one you like.


For the vellum heart I used Lawn Fawn's Heart Stackables. I adhered the bird couple, the flowers and the sentiment stripe to the heart. On the backside of the heart I could now add glue where the images sit. This way you can't see the glue from the front.

Thank you so much for stopping by and have a crafty weekend.
Anni


Wednesday 25 July 2018

Sweetest Birthday

Hello, Tallie here, with some sweet, summery inspiration! I haven't used my Zig Real Brush markers in a while and the bright, vibrant colours perfectly match the ice and lollies from the Avery Elle Sweetest set. I have two different card designs to share with you today, both using similar techniques.


I started off by clear heat embossing a bunch of the sweet treats from the set onto some Bristol Smooth cardstock. I coloured them in with my Zig Clean Colour Real Brush Markers, choosing bright, vibrant colours, and pulling out the pigment with a waterbrush. Once dry, I cut these out with the coordinating dies.

Taking the same markers, I scribbled some onto a clear acrylic block, mixed with some water and flicked multi coloured pigment onto two A2 white top folding card bases. Whilst the bases were drying, I cut a Lawn Fawn Stitched Rectangle frame from some Lawn Fawn Mermaid Cardstock. I used the frame on one card and the centre piece on the other - a great tip to avoid wastage!


On the inner panel I white heat embossed the 'HOPE YOUR BIRTHDAY IS THE SWEETEST' sentiment. On some of the scraps I again white heat embossed the sentiment, trimming into short strips. I adhered the elements to the card bases with a mix of foam tape and liquid glue.

Perfect for someone with a summery birthday!

Thanks for reading.

Tallie


Tuesday 24 July 2018

Ice Cream Birthday


Today I’m sharing a card featuring the Lawn Fawn Village Shops stamp set. This is a great stamp set for scene building but I decided to go for a more clean and simple look instead.


I began by using Itsy Bitsy Polka Dot backdrop die with a sheet of kraft cardstock. From this, I die cut the MFT Peek a Boo Circle Window dienamic.

I used the same circle window to cut a piece of Lawn Fawn Really Rainbow patterned paper. I then adhered the kraft card and rainbow circle onto a white card base.


Next, I stamped and coloured some images from the Lawn Fawn Village Shops stamp set and die cut them with the coordinating dies


I adhered the images onto the card, with some foam tape behind the ice cream van. I finished the card with a sentiment banner with a stamped greeting from the Village Shops set.


Thanks for joining me today,
Gemma

LF Village Shops
LF Village Shops Dies
LF Itsy Bitsy Polka Dot Backdrop


LF Really Rainbow Paper
MFT Peek-a-Book Circle Windows

Monday 23 July 2018

Retro Games

Hello again, it's Jenny and I'm back with my usual Monday spot.
I've been getting crafty this week with the new Life is a Game stamps and dies from Neat & Tangled. This set brings back some great memories of playing this game back in the 80's with family, especially my cousins. We still have the original game which was a Christmas present in 1984! ... I bet the newer version is very different!!!
Anyhow onto my two cards....


For this card I stamped the board spaces in grey and turned them into a road with a white gel pen. The little car is actually a roller coaster carriage from Coaster Critters..... I don't know about the new game but you used to go around in a car in the original board game 😉
When you open the card, the inside reads...


I just had to share this bonus card with you because whilst I was playing around with the board spaces in this stamp set, another game from my childhood came to mind.....


I die cut the corner spaces in red, green, blue and yellow along with a couple of black circles to make SIMON.... yep that iconic game of the 70's/80's. Now I know SIMON didn't speak as such but the play on words works along with the other classic "Simon says" game :)

I used Paper Smooches Fireworks die to make the radiating flashes and blended distress ink behind them... the sentiment is from Mama Elephants Photo Bomb. I love that cute miniature SIMON game


Thanks for stopping by :)
Jenny x