Hey stampers, Anni here!
I know a lot of you think it is too early for Christmas Cards and Christmas Gift Boxes. You might be right but let's be honest: Did you see the last Mama Elephant Release? Who can resist all these super cute Christmas stamps and dies? Even if it is still September? Not me!
And if you know me a little bit you know that I love to make gift boxes and I love all the Christmas stuff (well, definetly the crafty things). So when I saw Mama Elephant's Favor Bag Accessory: Snow Deer I didn't care what time of the year it was (it could have been the beginning of summer break or New Year's Eve) I HAD to make gift boxes using these dies!
I started by die cutting all the parts I needed from coloured cardstock. There are a lot of dies but with the image you see below it is easy to sort out which dies you need. I assembled the reindeer and the snowman and added some details with glitter glue: a red nose for the reindeer and rose cheeks for the snowman (not very realistic but cute, don't you think?).
Than I built the gift boxes using Lawn Fawn's Fancy Box. I used white cardstock for the snowman box and kraft cardstock for the reindeer. To bring in more colour I adhered patterned paper to the lid.
These are really easy to build gift boxes and they are really cute, don't you think?
Thanks for stopping by and have a crafty weekend.
Anni
Saturday 30 September 2017
Friday 29 September 2017
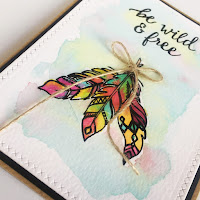
Wild, free, and floaty like a feather.
Hi everybody
Jill here, and this week I'm bringing out my inner hippy...
...using the gorgeous Boho Vibes from Reverse Confetti.
I absolutely adore this set. It is so effortlessly cool and has a real laid back chilled feel to it. I also love a set that has encouraging or positive messages as oppose to just your standard greetings.
I wanted my card to reflect the 'free and easy' feel of the set so kept things very simple and, hopefully, with a natural fluidity to my design.
I started by stamping out my feathers, first with the the centre image then masking off as I stamped each other feather either side, then stamping out my sentiment across the top. I then used masking fluid to cover my feather design so i could get a really nice soft watercolour wash across the background.
I used Distress Inks as my watercolour medium using the same palette to colour my feathers (once the masking fluid had dried and been peeled away) but without nearly as much water so the colours were much more vibrant and intense.
Once my design was dry I added a bow of natural twine to keep the design fresh and organic and there you have.
I really hope you like it and makes you want to reach for the flares and flowers and get on down to the sounds of the sixties :)
As always, everything I used is linked below so be sure to have a peep.
See you next week.
Jillx
Thursday 28 September 2017
It's Just A Phase Moon Encouragement Card
Hi everyone, Taheerah here wishing you a happy Thursday!
I think everyone can do with some encouragement now and then, especially when they're going through a challenging time. It's lovely to be able to feel supported when things are difficult, but sometimes you might want something other than flowers or to have a different sentiment than a standard 'thinking of you' etc.
Being a space lover, I had to snap up the new It's Just A Phase Bold Prints stamp from Hero Arts, but I couldn't quite figure out how to use it - until I came up with an alternative kind of encouragement card:
I was going for a variation of a 'this will pass' message, and thought this worked brilliantly with the background!
I stamped the background onto pale grey cardstock and heat embossed with metallic platinum embossing powder. The imperfect embossing with the platinum tones works great for moons I think!
A custom sentiment was a must for this card. The WPlus9 Whimsy Alpha stamp set was the perfect foil for this quirky card! I stamped the words a letter at a time with black ink, and trimmed out and adhered with dimensional glue gel to finish.
I'd love to hear what you think of this card. Is there someone you know who'd love to receive it? Thanks for stopping by!
I think everyone can do with some encouragement now and then, especially when they're going through a challenging time. It's lovely to be able to feel supported when things are difficult, but sometimes you might want something other than flowers or to have a different sentiment than a standard 'thinking of you' etc.
Being a space lover, I had to snap up the new It's Just A Phase Bold Prints stamp from Hero Arts, but I couldn't quite figure out how to use it - until I came up with an alternative kind of encouragement card:
I was going for a variation of a 'this will pass' message, and thought this worked brilliantly with the background!
I'd love to hear what you think of this card. Is there someone you know who'd love to receive it? Thanks for stopping by!
Wednesday 27 September 2017
Coffee, Donuts and Pretzels
Hello, Tallie here. Autumn always brings the coffee themed cards. I struggle with masculine cards but these stamps and colours came together to create the perfect birthday for my coffee/donut/pretzel-loving friend!
I needed a simple greeting and the Happy Birthday speech bubble from the Lawn Fawn Chit Chat set fit the bill. I stamped it in two tones of brown ink and clear heat embossed it to match the donut icing. I die cut with the coordinating dies and foam mounted it on the background.
I'll have to try this again with some of my other stamp sets!
Thanks for reading, see you next week!
Tallie
I started out with repeatedly stamping the coffee cup, donut and pretzel from the Hero Arts City Adventure set with MFT Black Licorice Hybrid ink on some white card until the background was covered. I then coloured in the images with my alcohol markers, keeping to warmer grey and brown tones. A little Nuvo Crystal Glaze for the icing on the donut and the background was finished. I mounted it on an A6 top folding kraft card base to bring out the brown tones of the stamps.
I'll have to try this again with some of my other stamp sets!
Thanks for reading, see you next week!
Tallie
Tuesday 26 September 2017
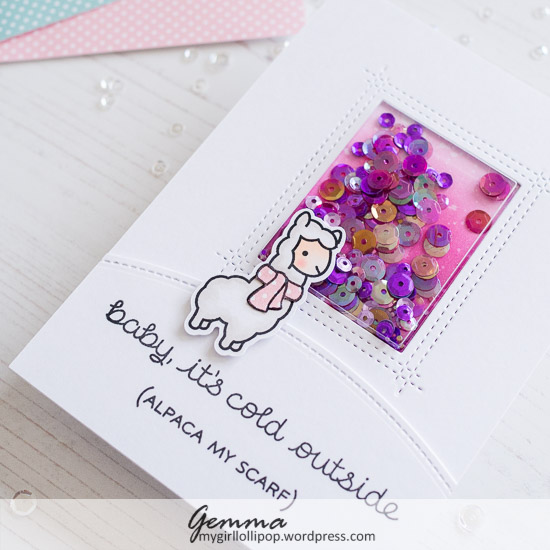
Alpaca My Scarf Shaker Card
I love the Lawn Fawn Winter Alpaca stamp set as the sentiment always makes me smile.
I went to a farm park with my nieces recently, and we saw some alpacas. I told them about the sentiment and it made them laugh too, so I thought I would make cards for them featuring the winter alpaca. Today I'm sharing one of these cards.
This card was quick to make so would work well for Christmas cards, perhaps with more traditional Christmas colours.
I used a rectangle peekaboo window from MFT to cut a window in a piece of card. I also used one of the MFT shaker pouches. I'm a huge fan of the shaker pouches as it makes it so easy to create an interactive card.
On a card base, I blended some ink and flicked with water for droplet details.
I added some Hero Arts Ombré purple sequins to the shaker pouch. This is a large pack with a really beautiful mix of iridescent sequins, that show different colours when they catch the light.
I attached the card panel with shaker to the card base to seal in the sequins.
For the sentiment, I used a stitched hillside die to cut down a piece of card. I added the sentiment, then attached the hill to the card with foam tape.
The alpaca is coloured with alcohol markers, and I added a patterned paper scarf. I used a mix of foam tape and double sided adhesive to add the alpaca to the card.
Thanks for joining me today,
Gemma
 |
| LF Simple Stitched Hillside Borders |
 |
| LF Winter Alpaca |
 |
| Hero Arts Ombre Sequins |
 |
| MFT Rectangle Peek A Boo |
 |
| MFT Rectangle Shaker Pouches |
Monday 25 September 2017
Watercolour Foliage Die-cuts
Hello there, Jenny here to start your week off with a simple card featuring some seasonal foliage.
I've used dies from two different sets by Flora and Fauna and cut them with
watercolour card so I could paint them, I have used the Hero Arts Dot palette by Daniel Smith
which is currently out of stock but any watercolours you have would work
I kept the colours limited to shades of reds and greens after deciding which leaves and berries to use. Before arranging them on my card I used a paintbrush and water to add a background wash of Old Paper Distress ink in a rough rectangular shape..... I wasn't sure whether I'd like it or not but I think it works well :)
I'm really happy with this design and its something you could easily replicate for lots of cards and change up the colours and leaves for different seasons too :) I kept the sentiment small and plain to nestle in with the foliage.... it's from the Sweet Succulents set by MFT.


Thanks for stopping by :)
Jenny x
Sunday 24 September 2017
Seasonal Greetings
Sometimes a stamp set just speaks to you and you have to have it - and for me that happened this week with the Seasonal Border stamp from Concord and 9th - I love all 3 borders but particularly the dotted one as it will be brilliant for creating quick backgrounds. Today however I made 3 cards featuring the other two borders and the Season of Cheer die which co-ordinates brilliantly with them.
First off I reached for that stunning leaf border and I wanted to fill a card with it. I stamped it several times onto kraft using distress oxide inks starting with yellows working through orange, reds and browns. I've found if you layer these inks over each other whilst they are still wet your get a gentle oxide effect which works well for autumn leaves. Once dry I just added a simple bold sentiment over the top - I went with birthday but I think autumn leaves would make good sympathy cards too.
Onto my next "season" and I went full out Christmas - I think I will be making lots of these cards as they would be great to knock out production line style (particularly using a stamping platform)
I just stamped the pine border in 3 shades of MFT green ink at the top and bottom of the card to get a lush green border and then used the complimentary die in red mirri card for a spot of seasonal sparkle on the sentiment.
Finally I moved onto my third "season" and made a New Year card. I always make a few of these so I can send one to those people who weren't on my Christmas Card list but from whom I get an unexpected Christmas card - that way you can include them without them thinking they've been forgotten.
Here I paired the sentiments from the Season of Cheer set die cut from gold glitter card with the fireworks die from Lawn Fawn on a black card. The fireworks die embosses the lines and dotted lines rather than actually "cutting" an image you can add to other cards so I just added a few and then used a metallic silver marker from Kuretake to draw over the lines and some liquid pearls to add colour to the centres and over the dotted lines.
NEWS FROM THE STORE
This week we will have new arrivals from:
Don't forget today is the last day to enter our challenge this month too - you've got until 10pm tonight so get crafting!!!!
Tara
First off I reached for that stunning leaf border and I wanted to fill a card with it. I stamped it several times onto kraft using distress oxide inks starting with yellows working through orange, reds and browns. I've found if you layer these inks over each other whilst they are still wet your get a gentle oxide effect which works well for autumn leaves. Once dry I just added a simple bold sentiment over the top - I went with birthday but I think autumn leaves would make good sympathy cards too.
Onto my next "season" and I went full out Christmas - I think I will be making lots of these cards as they would be great to knock out production line style (particularly using a stamping platform)
I just stamped the pine border in 3 shades of MFT green ink at the top and bottom of the card to get a lush green border and then used the complimentary die in red mirri card for a spot of seasonal sparkle on the sentiment.
Finally I moved onto my third "season" and made a New Year card. I always make a few of these so I can send one to those people who weren't on my Christmas Card list but from whom I get an unexpected Christmas card - that way you can include them without them thinking they've been forgotten.
Here I paired the sentiments from the Season of Cheer set die cut from gold glitter card with the fireworks die from Lawn Fawn on a black card. The fireworks die embosses the lines and dotted lines rather than actually "cutting" an image you can add to other cards so I just added a few and then used a metallic silver marker from Kuretake to draw over the lines and some liquid pearls to add colour to the centres and over the dotted lines.
NEWS FROM THE STORE
This week we will have new arrivals from:
- Lil' Inker Designs
- Echo Park
- Hero Arts (the September kit add-ons)
- Winnie & Walter
- Wplus9
Don't forget today is the last day to enter our challenge this month too - you've got until 10pm tonight so get crafting!!!!
Tara
Saturday 23 September 2017
Happy Hippos
Hey stampers, Anni here!
I instantly fell in love with My Favorite Things' Happy Hippos when they were released - I think a lot of you did, too! Esecially the tiny birds in the set are so cute.
Today I have a quite simple card for you featuring those hippos.
I started by stamping the images in my favorite black ink for alcohol markers: My Favorite Things' Black Licorice Hybrid Ink. For the colours I tried to go with a combination I usually don't use. Most of the time my cards contain some shade of turquoise - my go to colour. But from time to time I'm challenging myself to go out of my comfort zone and try something new.
For the hippos and the birds two colours were set: grey and yellow. Grey counts as a neutral colour so I chose two more colours to go with yellow (following the rule of three) and that was a pale violett and a bright pink.
For the sentiment I searched for a small one in my stash so it wouldn't compete with the cute images. I found one in My FavoriteThings' Birthday Bears set. I stamped it on a stripe of pink cardstock and heat embossed it in white.
What about you? Do you have a favorite colour combo that you use most of the time? Or a go.to colour? And do you try from time to time to stay away from these colours?
Thanks for stopping by and have a crafty weekend!
Anni
Friday 22 September 2017
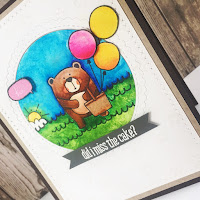
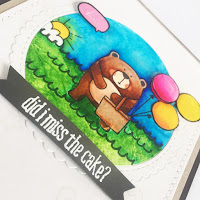
I'm sorry for being late, but more importantly...did I miss the cake?
Hi everybody.
Jill here, and this week, I've got the sweetest way to say sorry...
Jill here, and this week, I've got the sweetest way to say sorry...
Using the adorable 'Friends For All Seasons: Fall' from Wplus9.
As card makers it's the moment we all dread isn't it? Missing a loved one's special day. Well this set from Wplus9 is the perfect way to say sorry and send a belated card...and how can anybody stay miffed with a critter as cute as this delivering your message?
My card was very simple to make. I cut an aperture form a piece of cream card using My Favorite Thing's Scalloped Circles and stamped my scene onto the centre piece. I reached for my favorite colouring medium, my Zig Clean Colour Real Brush Pens but...and this is borderline weird...used them WITHOUT water. Yup, I literally use them pretty much every time I craft but had never coloured with them without the addition of water! And boy oh boy have I been missing out! Now I'm a megafan of watercolour, always have been always will be, but it was such an eye opener to see how they work on their own. So bright and vibrant and blend so beautifully. So now I love them twice as much :)
I stamped out a second set of the balloons so I could have them coming out from the aperture and adhered using foam tape to give them some dimension.
My sentiment is a sweet belated greeting and is from the same Friends For All Season set.
I actually stamped a few of the wee stamps from the set, the hearts and stars, across my background and clear heat embossed for a tone on tone effect but, sadly, my poor photography skills have done the details an injustice.
As always, everything I used is linked below so if you need a 'go to' apology in your stash, be sure to have a peek.
See you next week.
Jillx
Subscribe to:
Posts (Atom)


