Hi crafters, today I have a rather simple card for you – well, it looks simple, but I used a few tricks to get the look that I wanted. I had a few failed attempts with this card, too, so here's what came of it:
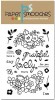
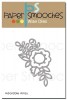
I started out by die-cutting the Adorable Array by Paper Smooches from watercolor card stock and then used my ZIG Markers to color it. You can use regular card stock and color it with pencils or Copics or whatever medium you prefer – do what feels best for you. Then I wanted this floral pieced to "hover" over my card base. Cutting tiny pieces of foam tape was out of the question, since I didn't want anything to attach the shape to the card. I tried adding glue to the edge of the die cut and fitting it back into the panel – let's just say it was a terrible mess and total failure. So in the end I grabbed a piece of acetate and added my floral piece on top of that.
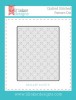
For the bottom layer, I wanted to add something extra, but I didn't want it to distract from the rest of the card. I grabbed an impression plate by Lil' Inker Designs and added the stitched pattern to only a portion of the panel by having the rest hang off – you only die cut or emboss what's between your cutting plates.
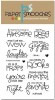
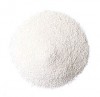
A strip of two-sided adhesive tape provided a surface for my glitter which covers up the transition between the pattern and non-embossed part of the panel. I did have a bit of trouble getting the sentiment stamped because I simply forgot about it until I had adhered the panel to my card, so there were some spaces without foam tape and of course that's where I wanted my sentiment. I salvaged it somehow, but I wonder if I will _ever_ learn to simply stamp the sentiment before I attach my stuff to a card.
I hope you enjoyed today's project! Catch you again soon.