Hey stampers, Anni here!
As you may already know I LOVE to colour with my ZIG Clean Colour Real Brush pens. Most of the time I use them to colour flower images. Oddly enough I never choose them for critters or something else and I don't know why...
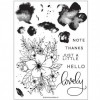
Today's card is another example! For this one I decided to go with no line coloring. I chose a very light ink and stamped the flower from Concord & 9th's Hello Lovely set on watercolour paper.
Then I coloured the images by adding a little bit of colour with the ZIG pens and fading it out with some water and a brush.
After I finished only the big flower was in a red shade and it seemed a little bit off to me. So I added some red dots here and there to balance out the colours.
For a little more interest I added some black details to the flowers to go with the sentiment on a stripe of black cardstock. I even added more dots - this time with a white gel pen to the biggest flower.
I always love how you can take your coloured images one step further by adding just a little bit of white and black gel pen.
So what about you? Do you have a favourite colouring medium for special images just like me? Or do you need every medium on any image? Let me know - I'm curious!
Thanks for stoping by and have a crafty weekend!
Showing posts with label Concord & 9th Hello Lovely. Show all posts
Showing posts with label Concord & 9th Hello Lovely. Show all posts
Saturday, 2 September 2017
Wednesday, 23 August 2017
A quick floral friendship card
Hi everyone, it's Esther here with another quick card, this time a floral friendship one.
Why so many quick cards, you ask? Well, partly because I needed a few recently and partly because my craft stuff is packed away at the moment which is encouraging me to use minimal supplies!
I loved the effect a few weeks ago of using just the background stamp from the Concord & 9th Lace Leaf set, so this week I tried them same thing with Concord & 9th Hello Lovely. I totally love how it came out looking like designer paper!
I cut a panel of card and stamped it with the large flower background stamp and the petal background stamp in three shades of water based dye ink. I then stamped the sentiment in black ink. Finally, I die cut a feature rectangle with plain sides and dotted lines top and bottom using Avery Elle Pierced Banner Layer Ellements, and assembled the whole panel back together on a top folding card base.
Thanks for visiting and I'll see you again next week.
Thursday, 25 May 2017
A Floral Hello
Hi everyone, happy Thursday! I'm Taheerah and those of you who are regulars to the blog might recognise that I'm a new face here! I'm delighted to be joining the Seven Hills Crafts DT as the newest of Tara's awesome team!
So as I'm new, I thought I'd say hello! And what better way for a cardmaker to do that than with a 'Hello' card?
I loved pulling out the Concord & 9th Hello Lovely set for this quick and easy card! That massive floral spray really speaks for itself!
We always seem to want to colour our flowers (who can blame us when nature gives us so much inspiration?!) - but for those who are intimidated by colouring, I wanted to show you how you can create a stunning effect by colouring the background instead! That's precisely what I did, with some watercolouring!
I heat embossed the 'Hello' sentiment with gold embossing powder. A little splattered gold mist to finish things off nicely, don't you think? The end result almost looks like marble!
I hope you have a great day! I would love to get to know you all a bit better - why not say 'hello' back in the comments? :) Thanks for stopping by!
Thursday, 15 December 2016
Hello, You're Amazing
Hello there everyone and happy Thursday!
I have a non-Christmas card to share, and it was so nice to play with some spring-like colours to create this.
I stamped the large flower cluster from Concord & 9th Hello Lovely in black so it filled up most of my card. I then stamped the flowers and leaves using the watercolour elements in the stamp set. I love the loose look that this gives.
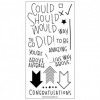
Once I was happy with the image I cut though it on a diagonal twice to cut out a strip of the image. I adhered the strip to my card blank into place. I added a strip of vellum the same width of the strip I cut out and added it into place in between the other two image pieces. I stamped and heat embossed in black a sentiment from Concord & 9th Above Average. Then added this piece to my card blank with foam tape.
Thanks so much for stopping by and I hope you like my card!
Hugs, Lydia xxx
Subscribe to:
Posts (Atom)


