Showing posts with label Mama Elephant Picket Fence. Show all posts

Friday, 18 May 2018

Magical Birthday

Hi everybody,

I'm baaaaaack  How are you all?  I've missed you that's for sure.  I've been a busy bee moving house and changing careers so needed a little time to get sorted and settle in.

I've got a little Mama Elephant magic for you to ease myself in, I do hope you like it...


I used Mama Elephant's Lovely Piggies, Scripty Bday, and Picket Fence to make my card.


As soon as I got my Scripty Bday set, and read this sentiment, I thought of this little piggy in his little top hat and how he looked like a magician, so set up the scene from there.
I started by creating my background, a loose watercolour wash using my wonderful Zigs.  I free handed the grassy verge and added some of the flowers from the Lovely Piggies set.  I stamped and cut out all my other elements and coloured, again, using my Zigs, stamping and cutting a spare little hat to use as my 'magician's hat'.  I would've dearly loved a little bunny popping out of the hat, but I couldn't find one that would fit, so opted for this cute bouquet.


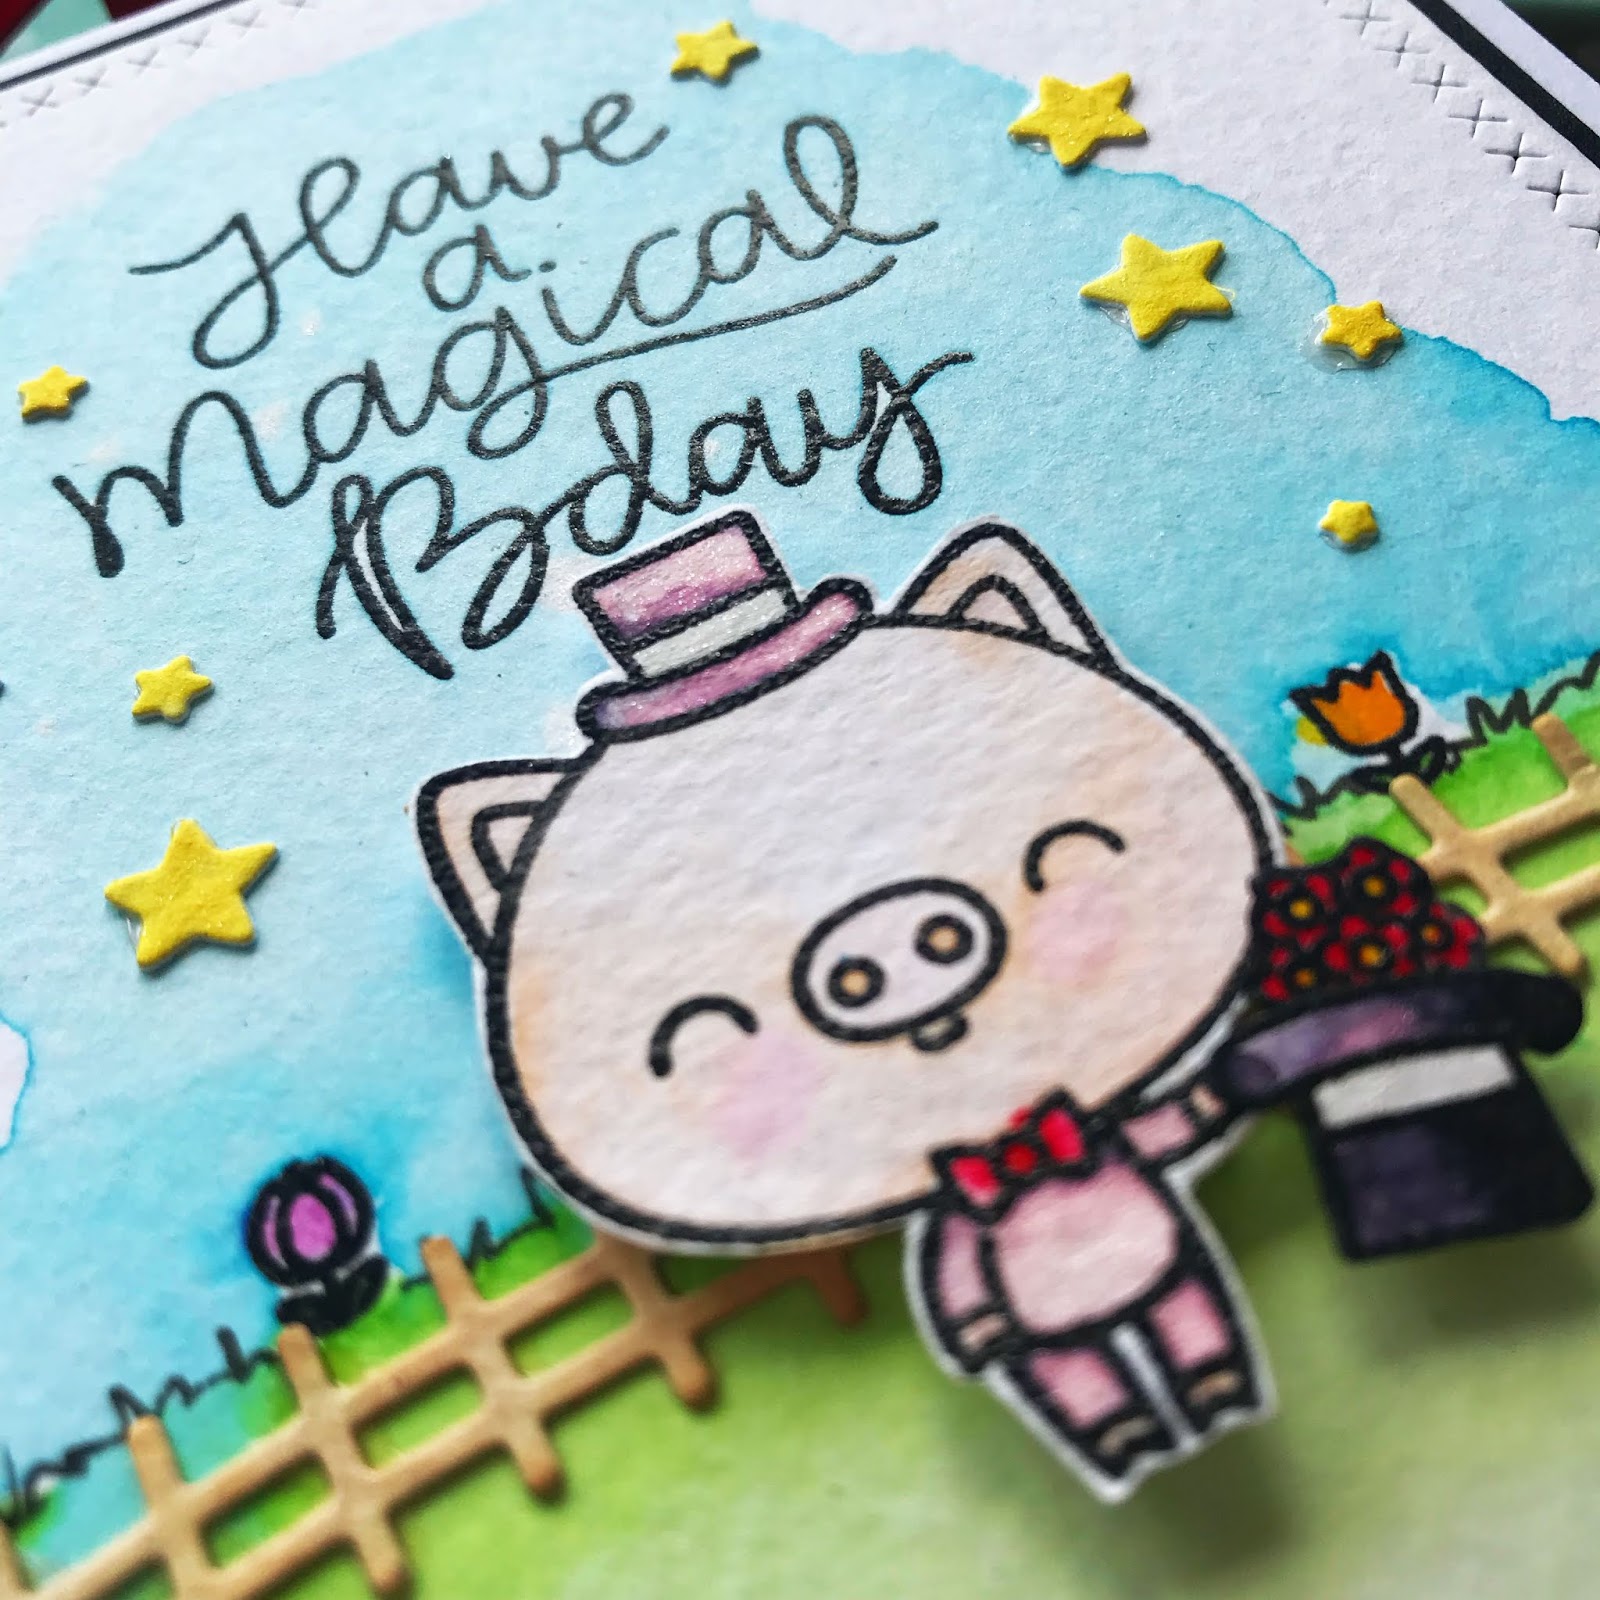
I love the expression on this little piggies face, he looks so very pleased with himself, like he really has just pulled off the greatest magic trick of all time!
I stamped my sentiment from Scripty Bday straight onto my background and heat embossed to give it some extra definition.
I finished my card with a scattering of stars cut from Mama Elephant's Confetti Creative Cuts and there you have it! 
I can't tell you how pleased I am to be getting back to normal...whatever that is!  
As always, everything I used is linked below so be sure to click the links, and I shall very much look forward to cyber seeing you all next week :)

Jillx

Lovely Piggies  Scripty Bday  Mama Elephant Picket Fence Creative Cuts


Confetti Creative Cuts Die Image 1  Zig Clean Color Real Brush Pen (24 piece set)


Friday, 12 August 2016

A Cheery Birthday Chat.

Hi everybody,

Jill here, and this week I've got a little cheerful birthday chat going on...


Using Wplus9's 'Going Places' set as my main feature.


I adore this set, the little characters are just so unbelievably sweet.  The set comes with a hot air balloon, and the sweet critters can sit inside the basket, but I wanted to put them in a different scenario to show how versatile they can be.  I always think, when they're alongside each other, they look like they're having a little natter, so decided to build a little birthday gathering.


I started by stamping out all the images I wanted to use, colouring them using my Copics, and cutting them out using the matching dies.  I don't always get matching dies as I'd rather spend my money on stamps, (more and more yummy stamps haha), but these ones are well worth getting as they cut the little arms out so you can have them peeking over things.  Just so cute.
I then took a piece of white card, cut it into a panel using Lawn Fawn's Stitched Rectangle's, then cut it into several sections using Mama Elephant's Landscape Trio Dies, Lawn Fawn's Speech Bubble die, and Lawn Fawn's Grassy Border die.  I then inked blended onto my pieces to colour them accordingly, and pieced them back together.  I also cut Mama Elephant's Picket Fence, and another slither of Lawn Fawns Grassy Border to add to the front.  I positioned my little gang in place onto my second Grassy Border, then attached to the front of my card using foam tape for dimension.


I cut a second piece of white card into a speech bubble, then die cut Lawn Fawn's 'Cheers' die from it, using the negative space as my sentiment and adding some black card behind to make it 'pop', and adhered this piece using more foam tape.  I added a couple of little balloons, tying them to their hands using black string...coz it ain't a birthday party until a balloon has made an appearance!
I added a few co-ordinating sequins to add some sparkle, mounted the whole panel onto a kraft card base, and there you have it, a little chatty birthday cheer.


I really hope you like it and, as always, everything I used is linked below.

See you next week.

Jillx

Going Places Image 1Going Places Die Image 1Scripty Cheers Lawn Cuts

Landscape Trio Creative Cuts Image 1Mama Elephant Picket Fence Creative CutsSmall Stitched Rectangle Lawn Cuts Image 1

Speech Bubble Border Die Image 1Grassy Border Die Image 1

Friday, 3 June 2016

Simply Colouring Somebunny.

Hi everybody,

Jill here, and this week, I've got some simple pencil colouring...


...using My Favourite Thing's sweet Somebunny set.


I decided it had been too long since I had a good play with my colour pencils, so used them to create and colour my card.  I love the simple naivety you get from using pencils, so decided to colour onto kraft card to add to the organic feel.


I started with a panel of kraft card, cut into sections using Mama elephant's Landscape Trio dies, and Lawn Fawn's Grassy Border die, and coloured each section using my pencils with a little help when needing from some paper stumps and some blending solution.  I then stamped out, coloured and fussy-cut the gorgeous sweet images from My Favourite Things Somebunny.  I also cut and coloured Mama Elephant's Picket Fence to help build up my little scene.


I used Lawn Fawn's Small Cross Stitched Rectangles to give my panel a decorative edge, and stamped out my sentiment, from the same sweet Somebunny set, heat embossing in white powder.  I then matted my piece onto grey card, and mounted onto a card base.
I didn't want to mess with the simplistic look of my card, so skipped on embellishments and left it there.


I really hope you like it, and as always, everything I used is linked below.

See you next week.

Jillx


Somebunny Image 1Landscape Trio Creative Cuts Image 1Grassy Border Die Image 1

Mama Elephant Picket Fence Creative Cuts  Small Cross Stitched Rectangle Lawn Cuts

Friday, 15 April 2016

No line watercolouring with Mama Elephant.

Hi everybody,

Jill here, and this week, I'm attempting some no line water-colouring...


...using the oh-so-sweet 'Spring Garden' set from Mama Elephant.


Now I am well aware I ain't no Kristina Werner over here haha - but I had loads of fun doing it, and am going to have loads more fun practising, so I thought why not share my efforts and learning curve?


I used Distress Inks as my watercolour medium.  I stamped this gorgeous little gal and guy out from Spring Garden, in Antique Linen, so it was a really light line, then proceeded to watercolour.  I love the kind of whimsical look of watercolour, and thought it would work perfect with this set as there's a lot of open space to play around with.  I also love that because watercolour can look so calm and laid-back, it can be really forgiven when colouring, and even when it doesn't turn out 'quite' as you planned...it looks like you meant it that way...or so I hope!  Once my characters were dry, I fussy cut them and set aside while i got on with the rest of my card.
To create my background, I die-cut a mask using Lawn Fawn's Grassy Border, and also Mama Elephant's Landscape Trio Creative Cuts die.  I placed them over a piece of watercolour card and washed more Distress Ink over the top, creating my grass and sky.
I then die-cut Mama Elephant's Picket Fence and again, washed using Distress Ink.


I coloured a few of the cute little blooms from the same Spring Garden set, coloured and fussy-cut them to use to help build up my background.
I stamped out my sentiment, (which I LOVE and can see me using sooooo much.  I call everybody sunshine, and just love the cool fun look to it - an awesome addition to an awesome set!), directly onto my background, clear heat embossed, then coloured the hollows of the 'sunshine' to help make it pop.
I built up my background and adhered my characters in place using foam adhesive.  I mounted my panel, off-centre, onto a piece of slate grey card, then onto my card blank, and that was that.
Like I say, I love the simplicity of watercolour, so didn't want to add any embellishments.

I know I need a lot of practise, but the process is so relaxing, I really enjoyed making this; and I know it can be quite intimidating when you feel the skill-set is not 'quite' there, but so what, we're meant to be having fun, right?
I really hope you like it, and I really hope you give it a go.  Let's learn together :)

See you next time.

Jillx