Showing posts with label concord & 9th flourish. Show all posts

Thursday, 26 January 2017

A Floral Birthday (if your name is January!)

Hello there! I've popped back for a quick visit whilst Lydia is having her brief break.
It's lovely to be back with you all, and today I wanted to combine two Concord & 9th sets to create a bloom filled birthday greeting.
First up, the newer 'All Year Long' set
Don't dismiss this set as one for planner people or just Birthdays; there are some lovely flowers that are incredibly versatile. Granted , this card might only be suitable for people called January ;-) but the sentiments are perfect for lots of occasions and the contrast in fonts is really beautiful.
I decided to pair it with another set; Flourish


To add colour to the flowers and leaves I used some of the Hero Arts Ombre inks

 I've secured most of the fussy cut stems to the reverse of the die cut circle although I did have to use a little extra acetate 'scaffolding' in a curved shape. Granted it may not fit in a standard envelope but with the dreary January days, we all need a riot of colour, right?!
Thanks for joining me today, hope you enjoyed seeing how gloriously these two sets combine!

Keren xx

Wednesday, 28 September 2016

Thanks


Hello.
Today as well as a card to share I have some news. 
I am taking a break from Seven hills crafts. 
Real life has gotten in the way of making but  you still have the most awesome talented design team.
Back to the important stuff ...Today's card features Concord and 9th.


I love clean and simple and today Ive gone for a one layer card.
I have stamped all of the images with distress inks but any water based inks will work and spritzed with water.
This gives a very different look. 
 If done with water colour card it works very well and gives a more water colour effect.
The small dots were stamped in versamark and then dusted with gold powder.
Then not being able to resist the gold water colours i splashed some gold gansai tambi paint over.
The sentiment was then stamped in black archival ink.


Sophisticated Script UppercaseFlourishsophisticated script stamp

Gansai Tambi Set of 36

I love making thank you cards and I'd like to say thanks to Tara and to everyone that leaves comments.
Thanks for looking.

Wednesday, 14 September 2016

Hello friend


Hello.
I have  a simple water colour card for today featuring Concord and 9th and the Gansai Tambi starry water colours.


I had die cut a piece of water colour card and then added some of the blue gold water colour paint.
Once dry I added some splashes of teal ink. 
The same ink was used to colour the die cut flower.
I then stamped the sentiment from the flourish set in black archival ink.
The starry water colours  have an amazing shine to them so I didn't add any extra embellishment.

FlourishFloral & Flutter Die Gansai Tambi Starry Colours Watercolour Pan Set (6)

Thanks for looking.
Tuesday, 12 July 2016

Joseph's Coat!

Hi! How are you?
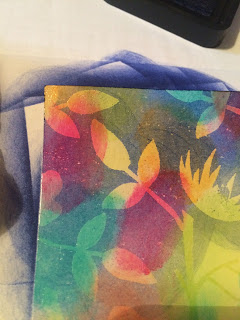
I'm revisiting an old technique today; Joseph's Coat.
You heard of it?
It creates a fabulously vibrant patterned background and is made just with glossy cardstock (or plain), inks, clear embossing powder and some solid stamps.
The choice of colours is entirely up to you. I've gone a little bright, but it gives a whole new look to your stamp sets. This set is perfect for this technique; the more solid the better.
Forgive all the photos- here's how you can re-create the technique.
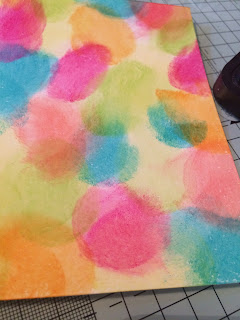
First up, add some splodges of ink, I've used Distress Inks but any ink would do.
 Keep adding colours randomly until all the piece of cardstock is filled. You could do stripes too.
Now stamp randomly using Versamark. You'll find that the more images on the piece of cardstock, the more pattern you'll end up with.
 Now add the clear embossing powder onto the images and heat to set.
Choose a colour to cover over the inks. You need to have one that is darker than every colour you've used previously. I used a dark blue. With the glossy cardstock, you'll need to add layers of ink. With ordinary cardstock, you'll probably use less.
                                                
Once you've reached the desired shade, simply get some kitchen towel and rub over the embossed parts to remove any residual ink and buff up the shine.
To help lift the card as the pattern is quite dark, I've used the 'Friend Like You' die also from Concord and 9th
Do give this technique a go- you'll be able to use your own colours and stamps. Your ordinary line stamps just won't work very well so do pick solid stamps.
See you next week!

Happy stamping,

Tuesday, 14 June 2016

1 Step Stamping!!

I love multi-step stamping. Those sets which give wonderful dimension. Some people find them tricky to line up, and if you're just starting out stamping, you might feel a little nervous about using them.
Thing is, you can treat them as one step stamps too!
I wanted to make a really simple card. The hardest bit is fussy cutting- which you don't need to do necessarily, you could simply stamp a one layer background.

I've used two products from Concord & 9th;
and this amazing die 'Friend Like You'


Do notice that it cuts the black lines- so it is a solid die with the brackets being detachable from the main die. You can't die cut a 'friend' aperture by itself although if you positioned a piece of thin paper across where those letters are, you could die-cut one single word. You obviously have the middle bits of the negative letter shape that you could add in, but I liked the look of it without.

 Simply stamp the background and stamp the outer flower a few times, cut out and add to the card using foam pads. I backed the sentiment which a nice contrasting colour and added it to the front.
I obviously had letters left and thought I'd make a quick tag.
This time I stamped two of the 3-step flowers separately and trimmed them out. The idea with the set is that you start with the largest flower shape with the lighter colour, stamp the next sized down shape in a darker colour and then over those two, stamp the smallest image with the darkest colour.
These outline shapes are perfect for no-line copic/watercolour techniques.Add in detail with pen or pencil and really kickstart your creativity. I die cut one of the brackets from the tag and it gives a lovely aperture to back with another colour (as well as cutting out some bracket shapes to play with too).

I've had great fun with this set- do have a go too!

See you soon,

Keren xx

Wednesday, 25 May 2016

Incredible birthday


Hello.
My card for today uses stamps and dies from Concord & 9th and is inspired by the new Hugs card die.
I don't have that die,but I like the gate fold style and the sentiment across the front.


Here it is closed so you can see the front.
I started by making my background using distress inks.
I flicked water onto the ink then lifted the colour with a paper towel.
I then stamped the flowers from the flourish stamp set in black archival ink.


Once the ink was dry i went over the black with a black wink of stella pen.


For the inside I stamped birthday using both the upper case and lower case sophisticated script stamps.
Then I added some of the flourish stamps is light colours.


To finish i i added some sequins.

Wonderful Words DieFlourishWink of Stella Brush - Black

Sophisticated Script Uppercasesophisticated script stamp

Thanks for looking.

Wednesday, 18 May 2016

Hello lovely


Hello.
I have quite a lot to share today. 
Do you ever start playing with new stamps and just cant stop? lol 
Well that's what happened here with Concord and 9th flourish stamp set and wonderful words dies.


My first card is really simple to make .
To start I stamped some of the flowers from the Flourish stamps set.
They are stamped around the top edge of the card as I wanted some empty space.
I then used distress inks to colour the whole panel and flicked some water onto the ink and allowed to sit then using a paper towel took off the water.
This removes the colour  and adds some extra detail.
The sentiment is made using the wonderful words dies and the hello from the stamp set.


My next card carries on with the distress ink background.
I added the colour to the top and bottom of the panel  before stamping the leafs and stem.
They all come as one stamp so you can have them all in the order shown or you can choose to just ink up the part you want to use.
I inked it up with brown ink and wiped away the ink from the leaf areas and stamped, then did the same but the other way around with green ink. 


I then stamped the berries directly onto the panel to.
Th large flowers are stamped in shades of pink and yellow then fussy cut and added to the panel and one with foam tape.
To finish I stamped the sentiment in black archival ink and added some sequins.


My last card is actually the first one I made as soon as I open the stamps. 
I was just playing but decided to go with it as a card.
I used distress inks but before stamping onto my water colour panel I spritzed with water.
I did  this with all the stamps.


When everything was stamped and dried I used some distress ink to add the blue background.
Before adding the sentiment I used the new starry colours water colour paints to add some flicks of gold.
The sentiment is another of the die cut wonderful words and the friend sentiment from the flourish stamp set.
Again I finished the card with some sequins.


FlourishWonderful Words DieGansai Tambi Starry Colours Watercolour Pan Set (6)

Thanks for looking.