Showing posts with label Avery Elle Peek A Boo Pals. Show all posts

Wednesday, 17 April 2019

Just a Bunny's Hop

Hello, Tallie here.

Easter is just a bunny's hop away (hehe) so my card today is full of bunnies! These Mama Elephant sets feature quite a bit in my card designs as they are perfect for practicing your colouring, and this Bunny's Hop set is perfect for this time of year.


I started out by stamping this mischievous bunch of bunnies in some MFT Extreme Black Ink onto some blending card stock. I chose some bright, springtime coloured markers to go with the cool greys, and coloured the scene in with my alcohol markers. I cut this out with the coordinating dies.


I adhered this to a background panel that I blended some Mermaid Lagoon Distress Oxide Ink in a gradient.


I don't really send Easter cards so I chose a more generic sentiment from the Avery Elle Peek-a-Boo Pals stamp set and added an ellipsis to continue the sentiment inside.

A few clear sequins in the sky brightens up the card!

Thanks for reading and I hope everyone who celebrates Easter has a fantastic one!

Tallie


Wednesday, 30 January 2019

Birthday Pals

Hello, Tallie here. Whilst the weather turns chilly here in the UK I needed a bright and colourful birthday card to cheer up my Nan. The Avery Elle Party Pals stamp set has some purrrrfectly cute little cats!


I started by smooshing some Broken China and Mowed Lawn Distress Inks onto some watercolour paper. I built up the layers until I was happy with the texture and die cut using an MFT Inside & Out Circle STAX Dynamics die. I used a Lawn Fawn Stitched Hillside Border Die on the green circle to layer over the blue sky background.


I stamped out the two kitties, the 'HAPPY' banner, a star and a heart from the Avery Elle Party Pals stamp set and the party hats from the Avery Elle Peek-a-Boo Pals set, in some MFT Extreme Black Ink onto some blending cardstock and coloured them in with my alcohol markers. I stuck to bright, happy colours in rainbow order.


I fussy cut the items out and stamped the two sentiments so I could arrange them on my card base.

Thanks for reading, stay warm and catch you next week!

Tallie


Saturday, 15 December 2018

Hello Emilia!

Hey stampers, Anni here!

A crafty friend of mine got a cute baby girl a few weeks ago. And of course that called for a baby card.


Whenever I make a baby card for a friend I try to put the name on it to make it special. My favorite alphabet die set at the moment is Altenew's Caps Bold Alphabet.
I took a piece of white cardstock and added some ink blending in pastell colours. For the golden shimmering hearts I used some golden paste from my stash through Newton's Nook Tumbling Hearts stencil. Then I die cut all the letters for Emilia from that piece that I created.


As I wanted to create a baby card I was in need of some cute critters. It was the time to put Avery Elle's Peek a Boo Pals to a good use. I stamped three of the animals in the set and coloured them in neutral colours with alcohol markers. I also stamped and heat embossed in white the word hello from Newton's Nook Winged Wishes on a piece of lilac cardstock. I fussy cut the images and the sentiment and then all there was left to do was to assemble the card.

This was my last post on the Seven Hills Blog for this year. I wish you and your family a very merry Christmas and a happy New Year.
Anni


Wednesday, 29 August 2018

Peek-a-Boo!

Hello, Tallie here. This week I'm bringing you some cheeky little animals playing peek-a-boo. That little sloth is definitely my favourite! These cards can be customised for any colour theme and depending upon the sentiment used, can be used for a variety of occasions. I'm looking forward to doing a Christmassy version with the Polar set from the new release!


I started out by stamping out multiple of the critters from the Avery Elle Peek-A-Boo Pals set in some MFT Extreme Black Hybrid Ink on some blending card stock. I coloured these in with my Copic markers using a variety of colours, making sure to use at least three markers to bring the critters alive. I cut these out with my Scan N Cut, though there are coordinating dies available.

I then took three white A6 card panels and cut four circular apertures using the Avery Elle Circle Frames die. You can do this manually with a stitched/pierced circle die, but using this die means only one pass through the machine. Plus, the circles are lined up and this makes me happy!


On some top-folding A6 card bases, I blended on some Distress Oxide Inks in Salty Ocean, Picked Raspberry and Wilted Violet in the areas where the apertures were. I then used some foam tape to pop up the white panels and more to arrange my critters peeking through.

I also used the coordinating colours to create some sentiment strips, which I then white heat embossed the 'just wanted to say' sentiment from the Peek-A-Boo Pals set. I added three white dots with my gel pen so the greeting could continue on inside. I also mounted this on some foam tape and positioned it to the left of the critters.


You could add some sequins (I only added a couple of stars I coloured in from the set) but I think these are beautifully clean and simple as they are. I'm sharing three colour combinations today - blue, purple and pink - though any colour would help highlight these cute little pals!


Sunday, 12 August 2018

Getting Festive

I'm back again with more from the Avery Elle Christmas release.  I don't normally feel the urge to create Christmas cards this early but these sets have really inspired me so I have another 4 cards to share today!

Firstly, I couldn't wait to use the corners some more.   I did a very similar design to the ones I did on Friday but specifically aimed to send to family in Australia this time...


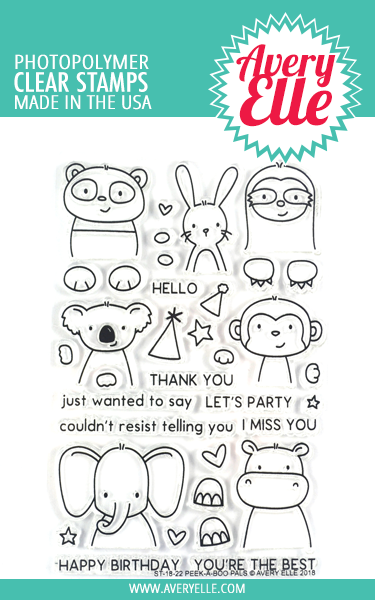
I embossed the sentiment in rose gold then inked over with distress oxide in peeled paint and evergreen from AlteNew and did a little splattering after buffing the embossing clean.  I added the koala from the original Peek A Boo Pals and turned him festive by borrowing the hat off the deer in A Merry Little Christmas.

For the second card I stuck with the corner but gave it a complete twist - having a character taller than the corner means you can move the corner out of the corner and it still works.  Here I used the bear from A Merry Little Christmas and for the sentiment went with a double coloured embossing to make the Merry pop.  I embossed the blue fist avoiding as much as possible getting any powder on the word merry.  Then add the red and use the tonic embossing pen to draw over the y where it crosses the blue.  Makes the sentiment super modern particularly if you used a bold fresh colour combo.


Next I wanted to play with the stunning Starry Scene set so I stamped the big background using tumbled glass oxide onto a square card and then stamped the trees and mountains onto copic colouring card so I could colour and cut them out.  I added a character from A Merry Little Christmas and used the sentiment from that set too.


For the last card I did second generation stamping of the background with the ink that was left on the starry background from the first card and just added a couple of characters from A Merry Little Christmas and more trees from the starry scene.   It's a great set to add big impact for quick cards.  For the sentiment I went back to my corner set and used masking to selectively ink up only the Merry Christmas part.


Hope that inspires you to get started on Christmas cards - only 135 days to go!


NEWS FROM THE STORE


Our AlteNew delivery with their new watercolours is in transit and due to reach us tomorrow fingers crossed - we will get it opened and processed as quickly as we can but it can be delivered anytime up to 7pm.

The August release from Concord and 9th is due to ship tomorrow so should be here by the end of the week.

We have the whole of the new Hero Arts Winter Catalogue ordered and its due before the end of August.

Catch you later

Tara