Showing posts with label Winnie & Walter In Bloom: Anna's Floras. Show all posts

Tuesday, 24 May 2016

Dura-lar Flowers!


Hey! Hope you're doing ok?
I'm here with a new-to-me product called Dura-lar for the very reason that I wanted an acetate that could be sculpted.
Now you can get this look with plain acetate just without so much of the moulding. It's easy...
Stamp your images onto the polyester film.
I've used the Winnie & Walter sets In Bloom:Renee's Leaves & In Bloom:Anna's Flora

It makes these flowers even more interesting, that I can mould them. You simply dip them in hot water, mould under water and then bring out still holding onto the shape which then fixes it.
This is the completed card- I just wish you could see the shine!
The really hard bit was painting. I can't make paints do what I'd normally do with pencils or markers. To be hones, I rushed it. But there's definitely room for improvement!
Hopefully you can see on the next picture both the shine and the shape in the images
 It's so much fun creating shiny flowers by painting underneath acetate. It's a simple technique and you can use any acrylic paint. I do find the more you pay, the better the quality, but you could achieve the same look with paint nicked (borrowed) from your kid's room ;-)
It's a bolder brighter look and makes these flowers really look alive!
Do hope you'll give the technique a go!

See you soon!
xx


Tuesday, 29 March 2016

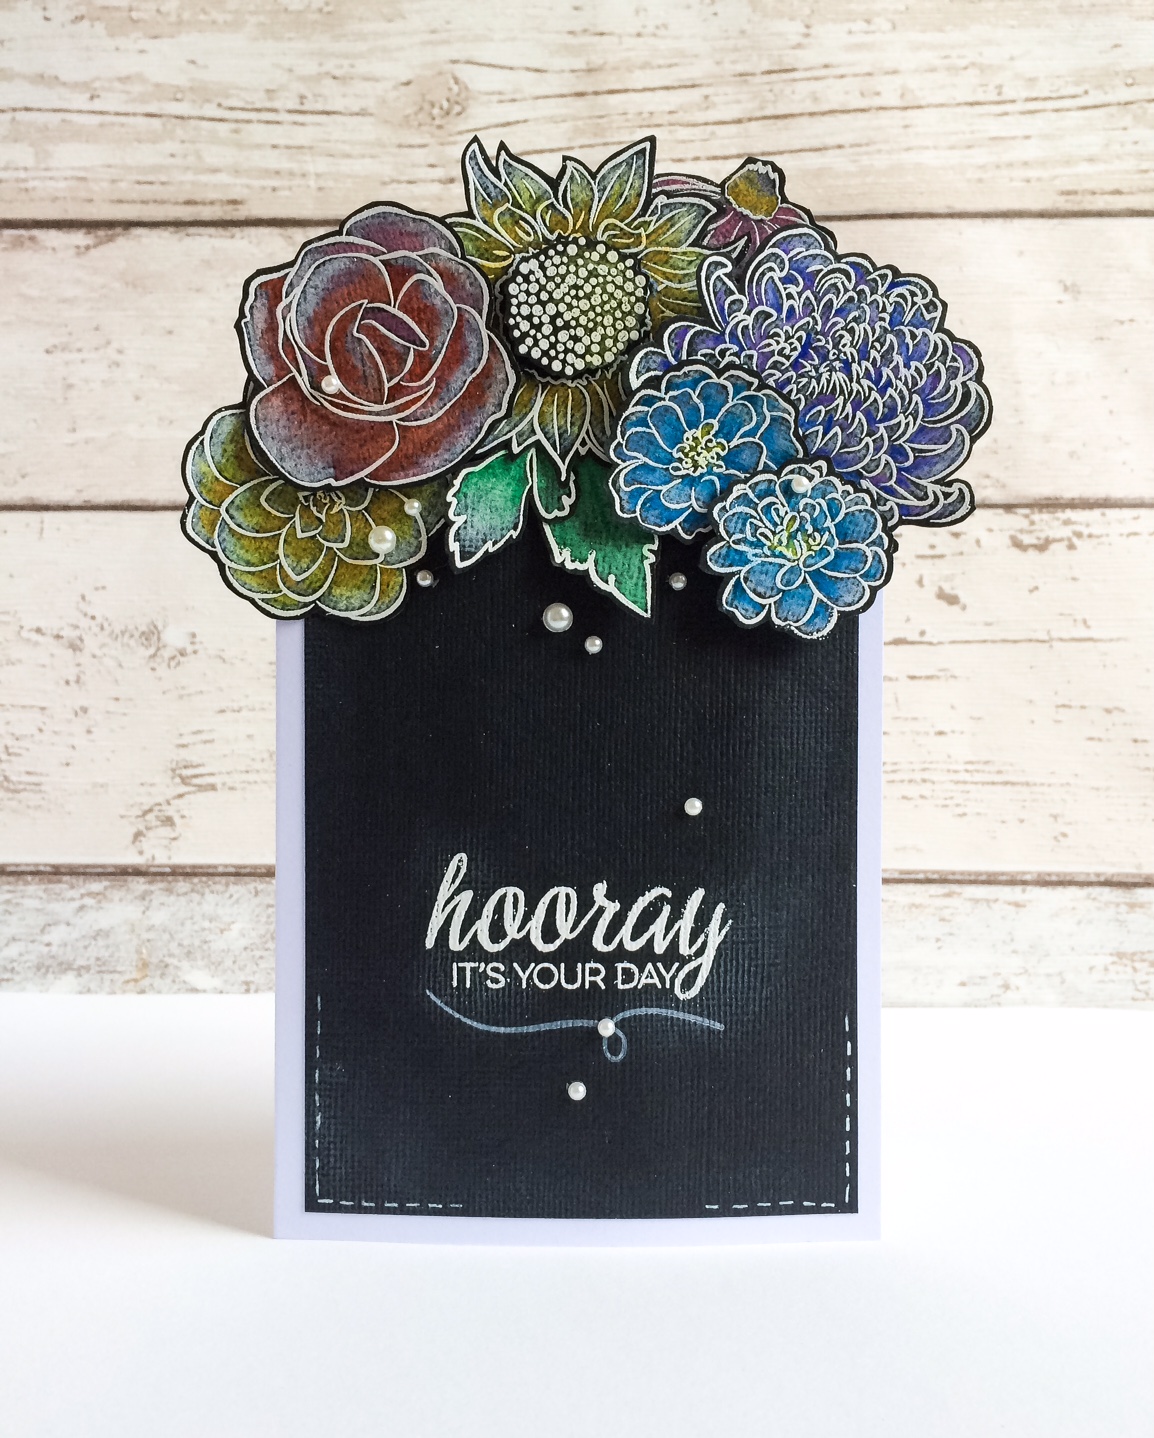
Re-doing Chalkboard!

Hi! A few years back, chalkboard was everywhere. I love this look and thought trying a slightly look with it was worth a try.
I've used Prismacolors and this beautiful set 'In Bloom: Anna's Floras'
Firstly, white heat emboss onto black card. Then lay down some white pencil as a base layer to help provide a base to show up the colour.

Next, start to add colour. You may need to add several layers to give some vibrancy to the depth of colour.

Then just trim out all the flowers and stack them at the top of the card
The traditional method of using heat embossing, white ink stamped and some ink blending/smudging around small areas. I've used these but rather more subtly, focussing instead on the black based flowers.

For the sentiment, I used the Winnie & Walter Set 'The Party'
The finishing touches are simply some different sized pearls; enough to give a little focus but not to detract or 'fight' with the flowers. As they're not as bright as usual, I wanted something delicate.

Hope you like the blackboard styled cluster. The flowers are stuck slightly off the card to add some dynamism.
Do give this style a re-visit, you'll be glad you did!

See you next week!

Keren xx

Wednesday, 23 March 2016

In bloom birthday


Hello.
My garden is in full bloom , well nearly just waiting on the tulips now but that inspired me to make this floral card using Winnie and Walters  In Bloom; Annas florals.


Each image is stamped in black archival ink and water coloured with Inktense pencils. 
I kept the colours quite light and I wanted a loose type of water colour style so I have used more water than I normally would.
I then fussy cut and adhered each one to the top part of my card Panel.
The panel was then added to my card base which has a stripe of patterned paper down one side.
The sentiment is also from Winnie and Walter , The big, the bold and the happy. 
To finish I added some sequins.


In Bloom:  Annas FloralsThe Big, the Bold and the Happy

Thanks for looking.

Tuesday, 1 March 2016

One Colour Wonder!


Hey! How are you?

Now whilst I can't actually claim this card is a wonder- it hopefully shows you that by picking a palette of 'one', you can actually create something quite pretty and with limited supplies.
Great news for those with smaller stashes- or just if you fancy a challenge with a difference.

I've taken my inspiration from one of the challenges at Winnie & Walter's Belated 2nd Birthday celebrations. They are such a wonderful company and well deserving of all the love that's headed their way. This challenge was all about Gold and Watercolour; fun!
Apologies for the slightly weird photos- one of the down sides of photographing this card was the camera was struggling with both the glitter and the pink. Every picture just looked like it had pink hues on the white card!
Anyhow- who'd have thought you could get away with pink leaves?!!

These sets continue to be some of my long term favourites (which with a constantly evolving stash is no mean feat!).
I've simply embossed in gold for all the leaves and white for the flowers. I could have done them all in gold but it helps delineate the flowers as opposed to the leaves which I thought was helpful when they were all pink!! 
I thought I'd show the previous version- just to show that 'more is way too much' sometimes. It took a little more paring back to get a better final result..
Adding the white panel over the glut of glitter definitely was the way to go.

Do give the one-colour a go and check out the gorgeous leaf and flower stamps too!

Enjoy your day!
Hugs...