Showing posts with label Mama Elephant Landscape Trio Creative Cuts. Show all posts

Friday, 28 April 2017

Making a Splash on an inky sea.

Hi everybody,

Jill here, and this week, I'm making a sweet birthday splash...


...using My Favourite Thing's adorable, 'Soak up the fun'.


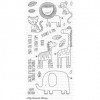
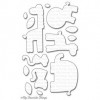
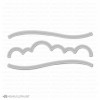
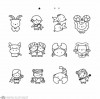
I started by stamping out and colouring these cheeky little monkeys in their cute little banana boat using Zig Clean Colour Pens then fussy-cut, using a scalpel to get to the inner parts.  The 'Soak The Fun' set these fun guys are from is so brilliant, absolutely jam packed with adorable critters and creatures!  I then moved on to creating my background.  I knew I wanted them bobbing about on the sea, but I don't have any wave stamps or dies in my stash, so instead, I cut the cloud border from Mama Elephant's Landscape Trio Creative Cuts from some thick card, turned it upside down to use as a mask, and softly blended a few different blues to create a nice wavey background, adding a few flicks and splashes of ink for extra interest.


I loved how my background turned out but wanted my boat to be behind a wave as oppose to just sitting on top, I also, however, wanted to keep as few layers as possible, so instead of adding extra bulk, I simply cut around one of the waves with a scalpel, and slotted my little monkey filled fun boat behind :)


My sentiment is stamped directly onto my card front in black ink and clear embossed.  I then added a couple of cute balloons to give a little extra oomph and an added pop of colour.  My balloons are from My Favourite Thing's Somebunny set, stamped out, coloured using Zig's, and fussy-cut.  I then added string from the monkeys to the balloons just for a little added cute.


I'm really happy with how this card came out, and think these little monkeys are cute enough to put a smile on anyone's face and fun enough to make a splash on anyone's birthday!

As always, everything I used is linked below so be sure to have a peek.

See you next week.

Jillx

Soak Up The FunLandscape Trio Creative Cuts Image 1Somebunny Image 1

Zig Clean Color Real Brush Pen (12 piece set)


Friday, 6 May 2016

Loving no line colouring!

Hi everybody,

Jill here, and this week I am practising, and loving, my no-line watercolouring.


Using a ton of Mama Elephant goodies...that are in the 'Sale' section!


I posted a card the other week trying out no-line watercolouring, and thoroughly enjoyed letting loose and having a play, so thought I'd give it another go, and share my results.
I used Mama Elephant's Tandem Ride and Tandem Extras, (with matching dies) to create my card, and you can find all of them...in the SALE  section of the store!  Serious.  Mama Elephant at a 'special price'!  Get em' while you can I say!


I used my Gansai Tambi paints (of which the beautiful 'Starry Colours' selection is back in stock...for now!) as my watercolour medium.  I stamped out all my different elements onto watercolour card in a very pale ink, took a deep breath, and just went for it!


All my cute critters are from Mama Elephant's Tandem Ride and fussy-cut, and my balloons and speech bubbles are from Mama Elephant's Tandem Extras and cut using the matching dies.  Like I say...all of these products are in store at a special price so be sure to check them out whilst they're still there!
I created a watercolour wash background as a backdrop to my little scene, and cut a few layers of vellum using Mama Elephant's Landscape Trio dies to build up my clouds for my little pals to float amongst.  I stamped out my sentiment, also from the Tandem Extras set, onto the vellum, and heat embossed in silver powder.  I adhered my balloons to the cuties then adhered them to my background using foam adhesive, and added the speech bubbles as a little fun touch to finish the card off.
I trimmed all my edges, matted onto black car, and mounted onto a card base.
Now I had a whole load already going on the front of this card, so skipped any embellishments and left it there.


I really hope you like it, and I hope it encourages you to step outside of your comfort zone and give something you're not too good at a go...it's where all the fun stuff happens!

As always, everything I used is linked below.  See you next week.

Jillx

Tandem Ride Image 1Tandem Extras Image 1
Tandem Extras Creative Cut Image 1Landscape Trio Creative Cuts Image 1

Saturday, 23 April 2016

Sticking My Neck Out

Hello crafters! I have a fun, fun, fun card for you today – something silly that will hopefully make you smile.

I stumbled across the Sweet Safari set by My Favorite Things by accident and the quirky animals stole my heart and I knew they had to come and live with me. I colored the giraffe for the 30 Day Coloring Challenge a while ago, and finally fussy cut it and put it on a card:


I wanted the warm tones of the giraffe to be the focal point, so I only added a bit of blue Distress Ink to the background and sprayed it with Perfect Pearl to add shimmer. I am still struggling to add super soft color gradients a la Laura Bassen – mine always turn out more intense than I want, but it's ok in this case.


To create some more contrast, I die cut the cloud shape but left it completely white. It contrasts with the blue sky and yellow giraffe, but doesn't add any additional color to the card – I have to remember to use white as a contrast more often.


Thank you for stopping by today, I hope you enjoyed the project. Have a fantastic weekend!

Saturday, 16 January 2016

HelloHowAreYou?

Hello crafty friends! Julia here today, and I am so happy to be back here on the Seven Hills Crafts blog. I am tickled pink by our blog and store website, and I hope you are having fun exploring all the new features and getting your shopping done.

As to my card, I wanted to create something fun and bright for the occasion, and I went a bit crazy with all things Mama Elephant today.


I started out by placing my  front panel on my Letterpress which I love to use as a stamp positioner, and stamping my sentiment with a variety of pigment inks. By using different yet complimentary shades of ink I was able to stamp the letters right next to each other and still keep it legible.


After I was done stamping, I used the Landscape Trio die set to create the stitched border and cut the little extra clouds (from the scraps of the panel, I might add, I hate to waste paper).   I mounted the little clouds with  foam tape to the panel and tucked in some sequins for additional sparkle.


I colored the little critters from the Cosmic Stars set with Polychromos pencils and had my Scan 'n Cut machine fussy cut them because I don't have the matching dies, then tucked them underneath the cloud border and added a few highlights in gold with a gold mister.


Thanks  for stopping by today! I hope you got inspired and check out the new store website!