Wednesday, 21 December 2016

Fun Christmas card with My Favorite Things Strike Up The Band


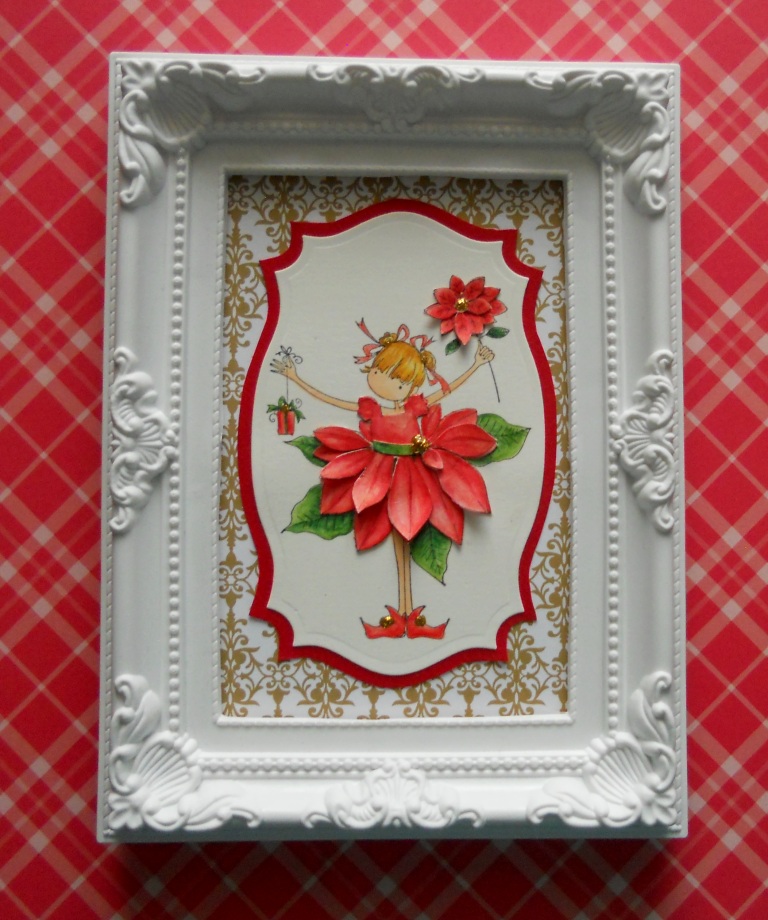
Hi everyone, it's Esther here for our last post before we break up for Christmas. I needed one final card for a friend and their family, and I wanted it to feel really festive and fun. My Favorite Things Strike Up The Band is perfect for this!


I started with a heavyweight card stock base, and layered up a panel of My Favorite Things Trail Mix paper in a festive green chevron pattern. Next was a panel of red card stock with lots of images from My Favorite Things Strike Up The Band heat embossed in white. I also inked the edges of this panel in a darker red to add intensity.


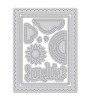
For embellishments, I used a Lawn Fawn Stitched Rectangle Frame die cut from the same red card stock, and went over the stitching with a white pen to make it pop. The 'happy' is the Altenew Happy Die which I cut in white fun foam and then again from the Trail Mix pad before gluing both together. I stamped and white heat embossed 'Christmas' from the end of a longer sentiment in My Favorite Things Merry Everything onto a snippet of green card and gave it a stitched edge. Finally that fun bunny is stamped and die cut from My Favorite Things Strike Up The Band stamp set and matching Dienamics, and coloured with Promarkers.


So that's it for today, but as Tara mentioned we'll have a series of "favourite things" posts starting on Boxing Day until the blog re-opens properly in the New Year. Have a lovely Christmas, and we all hope you have a very happy and fulfilling 2017! Thanks for stopping by :)


Tuesday, 20 December 2016

Party Lights

My card today features a string of white lights, perfect for a New Years party.


On dark blue card stock, I white heat embossed the bunting string and lights from the Avery Elle Bunting stamp set.

To create the illusion that the lights continue in the background, I stamped three sizes of circles from the same set in white pigment ink for a bokeh effect.

To create some more interest on the card, I die cut it with the MFT Inside/Out Stitched Rectangle die-namics. I used foam tape behind the frame to add dimension.

I added a white heat embossed sentiment, also from the bunting set, then adhered the rectangle flat on to the card base. A sprinkling of clear sequins add some sparkle to finish. 

Thanks for joining me today. I'll be back on the blog again in the new year. Have a wonderful Christmas.

Gemma

Avery Elle Bunting
MFT Inside/Out Stitched Rectangles
Hero Arts Unicorn White Pigment Ink
Hero Arts White Embossing Powder


Monday, 19 December 2016

Simple Bobble Hats

Hi there :)

We are on the run down to Christmas now and all the cards we needed to make are done and sent..... so I've turned my thoughts to a winter themed card for a birthday, or any occasion if you change the sentiment...


I've used the Scandinavian Prints stamp set from Neat & Tangled to make these bobble hats in soft wintery colours.... I've added a small amount of detail with black pen around three of the bobbles and along the ribbing band but the rest are stamps from the set.


Most of the ink colours I've used are listed below and the sentiment is from Lawn Fawns Argyle Backdrops... perfect font to match the simple style of the hats. It's quite a CAS design but I love the simple stamping.... there are some interesting shapes to play with in that stamp set :)


Well that's all from me before the big Ho Ho Ho, I hope you all have lovely Christmas and thank you for all your encouraging comments over the year...... see you in 2017 :)

Jenny x

Sunday, 18 December 2016

Ever Lasting Poinsettia

I've got a quick gift to share today.  I buy my Mum a poinsettia plant for Christmas every year, its become a bit of a standing joke, as despite her normally very green fingers, she cannot keep one alive beyond New Year's Eve!  So I thought I'd make her a picture of one that can never die so I've used Pamela the Poinsettia from Stamping Bella and given it a decoupage twist.


I stamped the image several times on cartridge paper and coloured her with inktense pencils and a waterbrush.  I then cut out some "layers" so I could create my own decoupaged image - just pick your way through the leaves and petals and you can easily see the layers to cut.  I glued just the tops down so I could curl the petals.  I die cut the main image (before decoupage) with an old spellbinders die and added a red matt by drawing around the outside of the die and cutting by hand as the next size die was too big for my frame.  The frame is from poundland and I just took out the glass and glued a piece of decorative paper onto the back board before sticking  my piece on top.   Simple cheap stocking filler that can be brought out annually as part of the household decorations.


NEWS FROM THE STORE

If you stopped by the blog or Facebook yesterday then you will have seen the sad news that Julia has decided to step down from the blog as she was finding it too time consuming to keep up with all her many DT commitments - the problems of being such a great crafter is so many people want her!  We wish her the very best and hope she will still pop back from time to time to join us.   Julia actually told me of her plans for the end of the year back when we were looking to replace Keren so I was able to plan ahead and we have therefore already lined up an amazing crafter to join our team from January.   So please go ahead and welcome Anika from Annikarten to the team - we are sure that Anika will provide lots of lovely inspiration for you.

The blog will be taking a break along with the store over Christmas but we will have a little mini series of our favourite things starting on Boxing Day (26th) and the blog will be back with me on 1st January to let you know what to expect when we reopen.

We are hoping to get a last minute restock order from Kuretake this week as we had a sudden rush on paints and pens so if you are wanting them from Santa - keep an eye out on Tuesday/Wednesday before we close.

Finally, if you want to find out a little more about me and the store, then I did my first ever interview  recently for Cardmaking & Papercraft Magazine so I have "The Last Word" on the back page of their January issue which is out this week.


Saturday, 17 December 2016

Fluttery Floral Greetings

Hello crafty friends! This is Julia, and today is my last post as a member of the Seven Hills Crafts Design Team.

Don't worry, I still love Tara and her store dearly, and will remain a loyal customers and pop into the blog from time to time when she invites me back, but I had to take a step back from all of my DT commitments. Those of you who follow me know that I love to make videos and I'm part of several design teams, but this has become a bit too much for me to handle with life and work getting very busy for me. All is good, but sometimes some change is needed, too :)

For my final project, I decided to combine the butterfly shape by Paper Smooches with some gorgeous floral stamps by Waffle Flower. I always wanted to decorate a die cut shape with some stamps -- mostly because I just don't do well with patterned paper and like to create my own patterns.


I started out by outlining the butterfly shapes on card stock by simply drawing around the die with a pencil. Since I wanted to only cover the bottom of the butterfly with patterns, I needed to know the approximate dimensions (I only had limited space since I was working on a small scrap piece of paper). I used various inks to stamp out the floral images, trying to balance them out across the shape, before die cutting the butterfly with my Big Shot.


Next up, I embossed the frame from the Wplus9 Sunshine die set into the card front. It partially cut through, so I adhered a piece of black card stock to the inside of the card front to make sure everything stayed where it was supposed to. Next up, I sprayed the die cut butterflies with a mix of water and perfect pearls so they would sparkle and shine.


The sentiment is from one of my favorite sets by Paper Smooches. I made sure to use my anti-static tool first on the black card stock to ensure that the white embossing powder would stick to the Versamark only. After the heat embossing had set, I used a dry baby wipe to rub off the white "haze" you get from the antistatic tool.


Of course, I could not help myself and I had to add a few dots. On the black card stock, the white gel pen and Stardust pen pop perfectly with lots of contrast, and the black Glaze pen added a few accents to the stamped florals  on the butterflies themselves.

I certainly was inspired by my crafty friend Keren Baker, who always has great card designs and from whom I got the idea to have the butterflies hang off of the card partially. Looks great, doesn't it?

Thank you so much for all the kind comments you've left me on the projects I've shared here, and I hope to see you around in the crafty online world!

Friday, 16 December 2016

Intense watercolour wash with a silver emboss overlay.

Hi everybody,

Jill here, and this week, I've got some pretty, strong watercolour for you...


Using my Gansai Tambi paints with a little help from Mama Elephant and My Favourite Things.


I've seen a few of these beautiful but intense blue watercolour backgrounds with a stunning silver embossed overlay floating around blog land, so thought I'd give my own a blast.
I started with a piece of water colour card & my Gansai Tambi paint set (I have the large set which is currently out of stock , but we still have the smaller set and theses paints are so beautiful you could achieve an awesome look easy, using fewer colours).  I wet my card and, instead of washing & swooshing colour across it to create a gentle blend, I kind of 'dabbed' it on randomly around my card, changing colours and doing the same until my piece was covered.  I then went back in with my darkest colour to make sure I had some areas of real intense concentrated colour.  Once dry, I added a splattering of white & gold flicks and splashes and left to dry again.


I then stamped out one of my all time favourite background stamps, the MFT 'Geometric background', onto my card and covered in Silver Sparkle embossing powder.  I then took a dry cloth and 'buffed' away the powder from the edges so it didn't cover my entire background.  I love doing this as I think it makes more of a spotlight of your background, and gives it a more organic feel.
I then heat embossed a piece of card in matching embossing powder and cut Mama Elephant's 'Birthday Script Creative Cut' from it. I wanted something to anchor my die to my card, and also give me space to finish up my sentiment, so cut a circle from vellum.  My sentiment is then made up and completed of words from other stamp sets.  You could pretty much write a book if you look at all the words and phrases in all your other sets, so don't be afraid to mix and match and even (don't hate me), chop stamps up to say what you want to say! 


I adhered everything in place by adding teeny weeny drops of glue behind the chunkiest parts of my sentiment to avoid any adhesive showing up behind the vellum.
I added a scattering of matching sequins, matted my piece onto light grey card, and mounted the whole thing onto a white card blank.


I really hope you like it.  As always, everything I have used is linked below.

See you next week.

Jillx

Birthday Script Creative Cut Image 1 Geometric Grid BackgroundGansai Tambi Set of 12