
Don't worry, I still love Tara and her store dearly, and will remain a loyal customers and pop into the blog from time to time when she invites me back, but I had to take a step back from all of my DT commitments. Those of you who follow me know that I love to make videos and I'm part of several design teams, but this has become a bit too much for me to handle with life and work getting very busy for me. All is good, but sometimes some change is needed, too :)
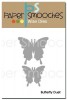
For my final project, I decided to combine the butterfly shape by Paper Smooches with some gorgeous floral stamps by Waffle Flower. I always wanted to decorate a die cut shape with some stamps -- mostly because I just don't do well with patterned paper and like to create my own patterns.

I started out by outlining the butterfly shapes on card stock by simply drawing around the die with a pencil. Since I wanted to only cover the bottom of the butterfly with patterns, I needed to know the approximate dimensions (I only had limited space since I was working on a small scrap piece of paper). I used various inks to stamp out the floral images, trying to balance them out across the shape, before die cutting the butterfly with my Big Shot.

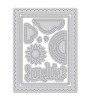
Next up, I embossed the frame from the Wplus9 Sunshine die set into the card front. It partially cut through, so I adhered a piece of black card stock to the inside of the card front to make sure everything stayed where it was supposed to. Next up, I sprayed the die cut butterflies with a mix of water and perfect pearls so they would sparkle and shine.

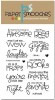
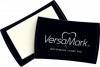
The sentiment is from one of my favorite sets by Paper Smooches. I made sure to use my anti-static tool first on the black card stock to ensure that the white embossing powder would stick to the Versamark only. After the heat embossing had set, I used a dry baby wipe to rub off the white "haze" you get from the antistatic tool.

Of course, I could not help myself and I had to add a few dots. On the black card stock, the white gel pen and Stardust pen pop perfectly with lots of contrast, and the black Glaze pen added a few accents to the stamped florals on the butterflies themselves.
I certainly was inspired by my crafty friend Keren Baker, who always has great card designs and from whom I got the idea to have the butterflies hang off of the card partially. Looks great, doesn't it?
Thank you so much for all the kind comments you've left me on the projects I've shared here, and I hope to see you around in the crafty online world!

You'll be sadly missed :( Love your card - the butterflies are so dramatic against the black background. It's a very impactful and stylish effect!
ReplyDeleteDarned shame when real life gets in the way of our crafting. Great card as always Julia :-)
ReplyDeleteJulia, it has been a pleasure and an honour to work alongside you. You will be missed greatly and I wish you all the love and luck in the world for all future ventures xx
ReplyDeleteWe'll miss you on the SHC team! As an avid follower of your own blog and YouTube, I will be looking forward to seeing what comes next for you :)
ReplyDeleteYou'll be missed here, but I'll still see you on your social media :-) best of luck!
ReplyDeleteThis is such a beautiful card! It really packs a punch with the glorious White patterned butterflies against your lovely embossed background! You will be missed! xxx
ReplyDelete