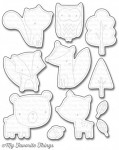
Hey crafty friends! Today I am trying something new, which is to die-cut a window for an entire scene, with some of the images overlapping even! Enjoy!
The first step, which is to die-cut the window, is actually the easiest. You only need to invest some brain power into what kind of scene you want to end up with before starting the die-cutting. For this first step, you don’t need any masks, you just need to remember: whatever you die-cut first will be in the foreground.
As you can see, the only tricky part is stamping the images perfectly into the openings. The MISTI really did help, but you can absolutely do this with just an acrylic block and some patience. I’ve done this before, so it’s not a problem, it just takes a little more time. For the stamping, you will need some masks to make sure you can create the illusion of one image being in front of another.
The coloring with colored pencils followed my usual method of starting with light layers, not a lot of pressure, and then slowly building up my color in layers. After I was done with the video, I even added some more dark color on the bottom of the tail to intensify the shadows.
The added highlights with my gel-pen were not necessary, but I felt that it added something really bright and eye-catching to the design, making it much more interesting.
Thank you for stopping by today! I hope you got inspired!


What an amazing idea-thank you for sharing. I definitely want to try this.
ReplyDeleteWow, I love this idea! And the colouring is perfect!
ReplyDeleteOh it's fabulous!
ReplyDeleteGreat idea - it looks amazing!
ReplyDeleteOh wow this is amazing. I have this stamp set, you have inspired me to dig it out.
ReplyDelete