

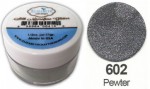
Method 1 - Glitter
Obviously, using glitter is the easiest to create your own embellishment. My preferred glitter is from Elizabeth Craft Designs – it comes in many yummy colors and it _does not_ make a mess! I know, a lot of people think of glitter as messy, and of course it’s messier than not using glitter, but this glitter really is magical! You pour it onto an adhesive surface, shake off the excess, rub the glitter – and it stays in place! It doesn’t come off and does not make a mess in the envelope or your craft desk! You can see here how easily I made a regular die-cut work look great just by adding glitter.
Method 2 - Perfect Pearls Mist
Perfect Pearls are a powder that can be used in many different ways: you can [“paint” with it over sticky ink] like Versamark, or you can dissolve it in water and either [use it directly with your watercolors], or you can mix it with water in a Mini Mister and spray it on your project. The latter will give the sprayed surface a beautiful sparkle!
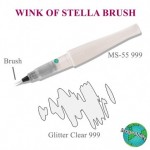
Method 3 - Use a Glitter Pen
If you look closely, you will see that even the black dots on my cards are sparkling. I used a regular black marker and then added my Stardust pen on top of it to make it sparkle. Of course, you can also use a Wink of Stella brush marker in clear, or buy it in colors you’ll use often.
Thank you for stopping by today! I hope you got inspired!

Nice card
ReplyDelete