
First of all, to create the wash of color behind the deer, I used the same technique that Laura Bassen excels at: ink blending. I am tapping off the blending tool before taking it to paper to make sure I don’t end up with ugly blobs of color. In addition, I like to spritz my distressed background with Perfect Pearls mist to make the colors blend even better.

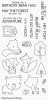
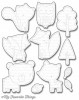
I did color the deer twice. I sometimes seem to go overboard with contrast, and this time I ended up with an image which was way too dark for my taste, so remember: you can always add in more dark colors, you just can’t really make it lighter! Rather go over it another time or a third time than to add too much dark color right away.

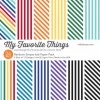
Originally, my card didn’t have any of that rainbow paper. I thought I was done with the card, but I kept returning to it because I felt it was just missing something. In the end, I cut a strip of the rainbow paper and adhered it to the long edge, and the left over was pushed underneath the black banner. It’s just a tiny thing, but believe me when I say it made a huge difference. (I used paper that is different from what's offered in the store, but I added a paper pad into the product list that has rainbow stripes, in case you want to give this a go).

So, don’t be afraid to alter your cards even when you think you are done. Your gut will most likely know what it’s doing :)
Thank you for stopping by today! I hope you got inspired!

Julia, I love this. Using Perfect Pearls over the ink blended background looks beautiful and the deer isn't too dark at all - it looks fab! Those pops of rainbow paper are a perfect finishing touch. Great inspiration, thank you! Esther
ReplyDeleteI love your sweet card and the striped paper does set it off perfectly!
ReplyDelete