
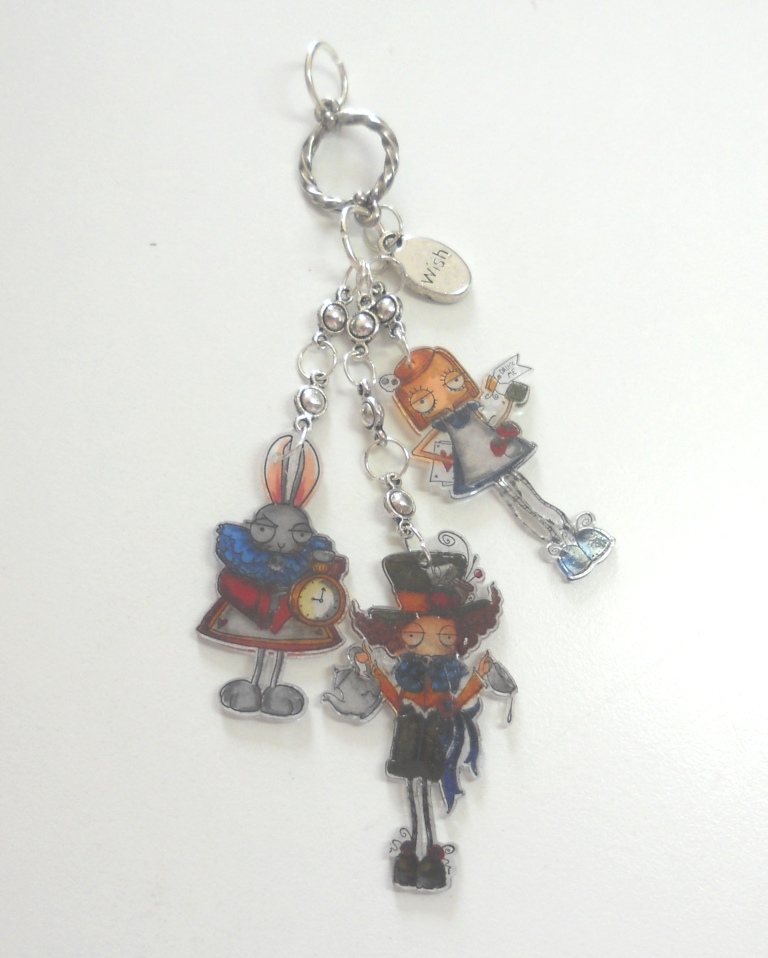
I've got a non-card project to share today as I made a little key chain dangler for my friend who is obsessed with Alice in Wonderland so as soon as we got the new oddball release from Stamping Bella I knew I needed to start playing with them and just as Alice drinks the potion and shrinks in the story, I got out my shrink plastic and shrunk Alice, The Mad Hatter and The White Rabbit.


NEWS FROM THE STORE
This week we will have:
Catch you later
Tara
If you've not used shrink plastic before - its not as scary as it might seem. There is a "shiny" side and a dull side. You simply stamp your image onto the shiny side using stazon ink and flip the plastic over and colour using alcohol markers on the dull side (that way the markers don't lift the stazon off) You do have to remember (which I forgot on the hatter) that the colours get darker when they shrink so start a couple of shades lighter than you want to end up. You can't blend the colours like you do on paper as if you go over the layers of colour too much you will start to lift off the colour underneath as it just "sits" on the plastic. You could also colour using alcohol inks. You can see here how much lighter they were before shrinking.

People also think that shrink plastic doesn't cut in a die cutter - well it does! It may take a couple of passes and I did need to use a craft knife to get the bit between their legs to fully cut as that's a tiny area but it was 95% there so was easy to finish off. Here you can see the size different between the original image and the shrunken version. You do need a pretty decent sized image to begin with or the shrunken version will be too small to do much with - Stamping Bella images are a perfect size to shrink.

Once I'd die cut the characters, I used my crop-a-dile to punch a hole in the top of each - remember the hole will shrink too - so if you don't have a crop-a-dile you can use an awl or pokey tool but you'll need to make the hole at least 3mm wide to have a hole large enough for a jump ring when you've applied heat. An office hole punch will do the trick too but will give you a bigger hole so take care not to be too close to the edge.

When it comes to shrinking you can either pop them in the oven or just use your heat tool which is the method I chose. Alice was a little tricky as her legs wanted to curl up and attach to her potion bottle, but I just keep tweezers on hand so I can pull them apart as I heat and then I use an acrylic block to flatten them out when done (and I actually like the wonky legs on Alice - it adds extra character!)
I then just dug out some old jewellery findings and hung each one at a different length on the main jump ring so each character had a little space. You could make a charm bracelet, earrings, wine glass charms - the possibilities are endless and they make really cute inexpensive gifts.

Hopefully you'll give shrinking a go - we'll actually have shrink plastic coming to store soon so keep an eye on the "Basic Supplies" section where we put all the miscellaneous products we think are useful but don't necessarily come from one of our American brands.


NEWS FROM THE STORE
This week we will have:
- The latest release from MFT
- The camping themed monthly release from Hero Arts
- Some Ranger restocks and some new to us Tim Holtz multi media supplies (art board and alcohol ink papers)
- Some additions to our Basic Supplies section including paper trimmers, craft knifes, rulers and glue pads. If there are basic supplies you wish we had that we don't then do please drop us an email and we'll take a look to see if we can add them to our wish lists.
- The current stencil release from Altenew plus restocks
Catch you later
Tara
Cool!
ReplyDeleteThey look fab i'm inspired thank you!
ReplyDeleteI have read a few of the articles on your website now, and I really like your style of blogging. I added it to my favorites blog site list and will be checking back soon. Please check out my site as well and let me know what you think. https://foodkeychains.com/
ReplyDelete