
Hello - its me again - I am sure you are fed up of me by now, but I am happy to report that this is the last week I will be doing multiple posts for a while as from June we will be back to a full compliment of Design Team members so you won't have to put up with me 3 days a week anymore! Taheerah will be back, but is switching to Fridays every other week as we will be keeping our fan feature of Found on Friday too. On Tuesdays and Thursdays we will have some new blood on the team, but I'm keeping their details under wraps for now - you'll have to tune in next week to find out who is joining us!
For today though you have got me and I've been playing with (some) of my favourites from the new Avery Elle release so I am bringing you some sea scenes and a big fat rainbow too!

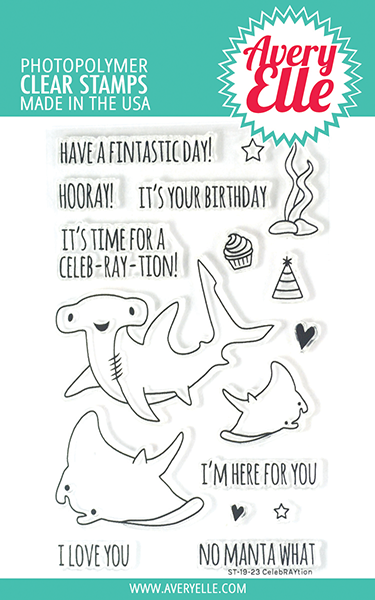
Let's start with the sea - I do think Caryn from Avery Elle designs the best sea creature sets ever so her Celeb-RAY-tion set was slap bang at the top of my shopping list for this release. Rays are my absolute favourite sea creature, watching them swim is mesmerising.

I decided to do two cards using the same supplies but flipping them. So I started with the Sea Scene die and die cut it twice - once from white glitter card and once from blue (currently on sale) and put the waves that it die cuts from one into the other.

To add more design behind the die cut I used the fabulous bubbles embossing folder from Echo Park once from white and once from blue card so they could sit behind their opposite coloured die cuts. To keep the opposite theme going too I used the white with the embossing facing down (so the bubbles are debossed into the card) and facing up on the blue - you do get a really different look from the same embossing folder doing it that way so more bang for your buck!
I then stamped the rays and the hammerhead shark onto grey cardstock and added shading around the edges and some dotted details using pencils before cutting them out with the co-ordinating dies. The hat was stamped onto glitter card too and coloured with copic markers. I stamped the sentiments from the same stamp set onto glitter card using versafine inks.
For the rainbow, I wanted to create a fun shaker card so just used the Rainbows Die to create my card without the co-ordinating stamp as the die is a perfect stand-alone piece too which works well with lots of the rainbow sentiments you may already have in your stash.

I cut the die 3 times - twice from white card and once from white kids craft foam sheet. I used copic markers to colour the first white card die cut in rainbow colours and glued that to my blue base card.
I stamped the sentiment from Waffle Flowers' Rainbows stamp set in blue onto the white cloud at the base of the rainbow.
Then I added the foam using strong wet glue and then let it dry before adding coloured seed beads in co-ordinating rainbow colours to each rainbow stripe and some clear and silver ones into the cloud.
I trimmed a piece of acetate to be the shape of the die cut by drawing around the outside of the die so I got a solid sheet of acetate and used the wet glue to glue that in place over the foam and topped that with the remaining white die cut to cover it all up. You need to leave that to dry again before moving it (don't get impatient to try it like I did or you too will end up with seed beads stuck in the glue!) Once dry you've then got a fun rainbow coloured shaker card.

Hope that's inspired you to go under water or to reach for the sky!
See you on Sunday with my regular weekly post.
Tara


For today though you have got me and I've been playing with (some) of my favourites from the new Avery Elle release so I am bringing you some sea scenes and a big fat rainbow too!

Let's start with the sea - I do think Caryn from Avery Elle designs the best sea creature sets ever so her Celeb-RAY-tion set was slap bang at the top of my shopping list for this release. Rays are my absolute favourite sea creature, watching them swim is mesmerising.

I decided to do two cards using the same supplies but flipping them. So I started with the Sea Scene die and die cut it twice - once from white glitter card and once from blue (currently on sale) and put the waves that it die cuts from one into the other.

To add more design behind the die cut I used the fabulous bubbles embossing folder from Echo Park once from white and once from blue card so they could sit behind their opposite coloured die cuts. To keep the opposite theme going too I used the white with the embossing facing down (so the bubbles are debossed into the card) and facing up on the blue - you do get a really different look from the same embossing folder doing it that way so more bang for your buck!
I then stamped the rays and the hammerhead shark onto grey cardstock and added shading around the edges and some dotted details using pencils before cutting them out with the co-ordinating dies. The hat was stamped onto glitter card too and coloured with copic markers. I stamped the sentiments from the same stamp set onto glitter card using versafine inks.
For the rainbow, I wanted to create a fun shaker card so just used the Rainbows Die to create my card without the co-ordinating stamp as the die is a perfect stand-alone piece too which works well with lots of the rainbow sentiments you may already have in your stash.

I cut the die 3 times - twice from white card and once from white kids craft foam sheet. I used copic markers to colour the first white card die cut in rainbow colours and glued that to my blue base card.
I stamped the sentiment from Waffle Flowers' Rainbows stamp set in blue onto the white cloud at the base of the rainbow.
Then I added the foam using strong wet glue and then let it dry before adding coloured seed beads in co-ordinating rainbow colours to each rainbow stripe and some clear and silver ones into the cloud.
I trimmed a piece of acetate to be the shape of the die cut by drawing around the outside of the die so I got a solid sheet of acetate and used the wet glue to glue that in place over the foam and topped that with the remaining white die cut to cover it all up. You need to leave that to dry again before moving it (don't get impatient to try it like I did or you too will end up with seed beads stuck in the glue!) Once dry you've then got a fun rainbow coloured shaker card.

Hope that's inspired you to go under water or to reach for the sky!
See you on Sunday with my regular weekly post.
Tara


No comments:
Post a Comment
Thanks for taking the time to leave a comment - we hope the blog inspires your creativity.
The Seven Hills Crafts Design Team