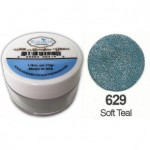
Today, I’m going to show you how to add glitter to outline images. I know! Usually, you wouldn’t, but there’s a super duper easy technique (so I easy I’m hesitant to call it a technique, but the effect is too cool not to share).
Told ya. The effect you can get when you coat Glossy Accents with glitter is amazing. If you are generous with the glue, it even dries slightly raised, so it will look even better when it is sparkly all way around. Also, be generous with your glitter as you are dumping it on the project. You need to make sure it’s covered all around, and you can easily funnel the excess glitter back into the jar so there’s no waste.
- Set up your workspace so that everything that you don’t need is out of reach.
- Grab a sheet of scrap paper to dump glitter on. After you funneled the glitter back, fold the paper and throw it away.
- Use static cleaning/dryer sheets to wipe off excess glitter from your work surface. Works like a charm and no mess!
You might still look a little sparkly after using glitter, but believe me: it’s by FAR not as messy as you might think if you just prepare a bit.

I am so pleased about how these My Favorite Things flowers turned out and how clean and simple the entire design it. Since I wanted the glitter to take center stage, I made sure to keep the rest of the card basically completely white as to not to distract. That’s not to say you can’t have other elements on your cards together with glitter, and I’ll show you different examples of that throughout the next weeks.
If you have sticky embossing powder (that turns sticky when heated) you can use that to stamp sentiments or more intricate shapes, and then pour glitter on that sticky powder (Versamark itself is not sticky enough).
Just don’t forget that you need to wait a while until the glitter has dried before you can finish the card. I usually err on the side of caution and give my project at least 30 minutes, if not an hour. After that time, I use a pen or brush to knock against the backside of the panel to shake off excess glitter (remember that scrap sheet of paper and those dryer sheets!), then use a brush to wipe off whatever still sticks where it ain’t supposed to go. Once the glue is dry, you can rub (gently) over the glittered areas without trouble.
Oh, and if you want to see how I created this card, as usual hop on over to my blog (link in sidebar) for a video tutorial. Cheers!


What a simple but beautiful effect. I can't believe I haven't already thought of it. Thanks for sharing.
ReplyDeletenice crafting thanks for sharing.
ReplyDeleteDark Gold Metallic Glitter
Green Bronze Metallic Glitter