
Hey! How are you?
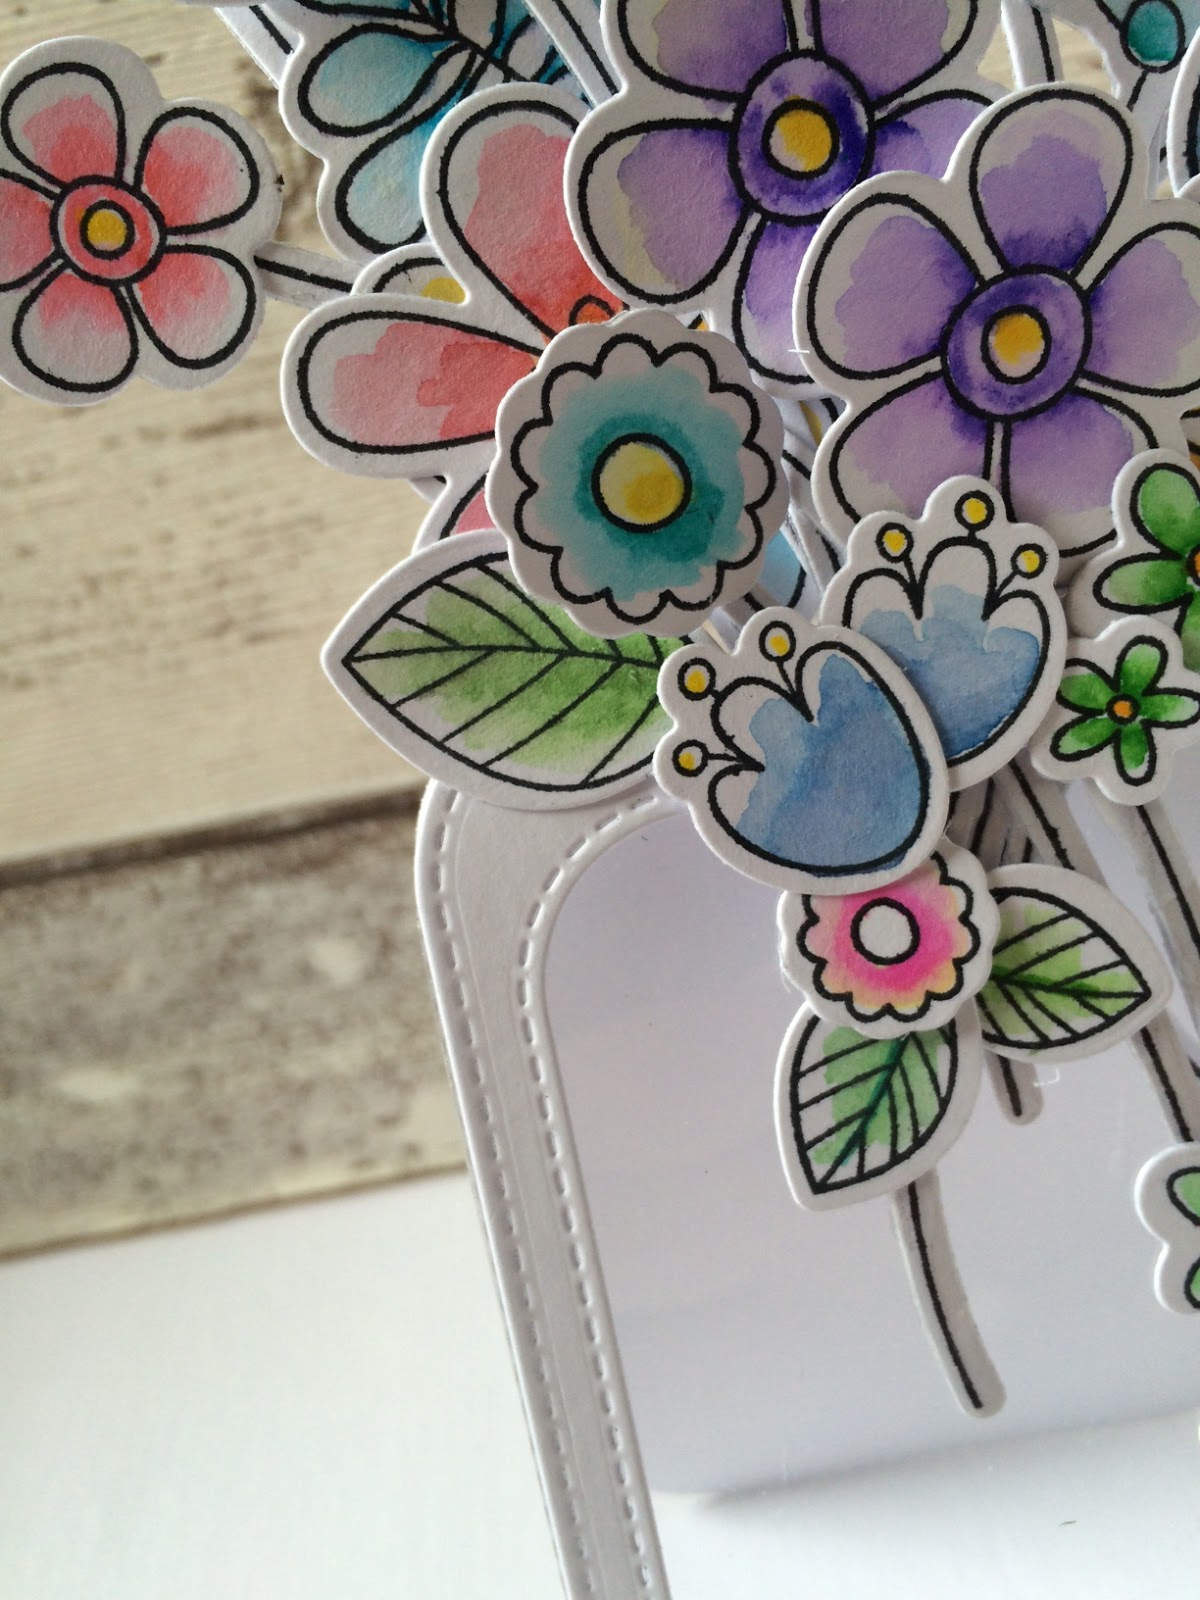
I've had this set for a little while and never really felt I've done it justice. It's called Build-able Bouquet but I've never made a bouquet with it- just some random flower stem arrangements. I was trying to decide what to create and thought I'd try and fashion a see through 'vase' kinda thing using the set plus some nested dies.


The see-through element gives the impression of a vase. I guess if I'd had more time I could have added some blue coloured vellum to show the 'water'.
You might be wondering how it's constructed.
First up, make a folded card blank and then die-cut one of these Inside & Out Stitched Rounded Rectangle dies onto it, allowing the fold of the card blank to stick up slightly above the shape, so you still have a folded card

Next I die cut a smaller stitched rectangle into the centre of the folded blank and then backed it with acetate. Next up create a slit into the centre fold

This is how you're going to slot the flower stems into the card which then gives the stability without having to put an acetate structure behind the back of the blank.
Simply slot the taller stems in, and pretend you're actually flower arranging! Ha!
Once I was happy with the largest 6 stems, I added some PVA type glue onto the front of the stems (only a tiny amount) and then pressed the acetate front onto them. Granted, you'll get a tiny bit of glue spreading, but if you've been sparing with the glue, you should be fine, and you can hide any splodges with the extra flowers.
I did use the matching dies for the stamp set, which when using so many flowers and stems saved me a heap of time with fussy cutting!


You can see the 'vase' effect and the places I've 'hidden' the glue! Always leave room to cover your mistakes ;-)
It's slim enough to fit into a DL envelope, which is something I get asked about a lot with these non-standard projects!
See you next week xx
Oh my ... Another amazing creative project that I can't help but love! Fantastic keren!
ReplyDeleteSuch a fun idea. So very creative and so beautiful x Stunning and clever x
ReplyDeleteWOW!!!!!! STUNNING..and Super great idea!
ReplyDeleteMorning this is just so fun - thank you for your step by step so useful. I have these stamps and think the dies will be a must now. Beautiful different card.
ReplyDeletex
Fabulous! Such creativity! I love it. :)
ReplyDelete